

On today's menu, to get rid of the cold and warm up, we have a light but nourishing pair of SWR class-D heads (an amp/preamp combo and a power amplifier).
This would be a dream come true on any restaurant’s menu. And since French gastronomy (Yes, I is Vrench!) is now part of the UNESCO world cultural heritage, I would like to talk about food. But what do 7 lbs of potatoes and a 800-watt amplifier system have in common? First of all, the weight! And also the fact that both fit inside the vegetable compartment of a small fridge. Class-D amplifiers are more common nowadays. Most manufacturers have developed their own models, and now SWR serves us a new interpretation.
Small is Sweet…

And it even fits in my gig bag’s pocket. The main advantages of a switching amplifier are its extremely compact size and very light weight, despite a high output power. Just imagine riding to the recording studio with 400 watts on your bike. And if that’s not enough, imagine the same with 800 watts! Plus a tube preamp, semi-parametric EQ, compressor and enhancer. The whole universe of SWR has been miniaturized an fitted into a very convenient and compact housing.
Headlite: 1.8" × 8.5" × 9.8" for 3.7 lb. / Amplite: 1.8" × 8.5" × 9.8" for 3 lb. Incredible! But before testing these products, let me make a brief summary of the brand as well as of class-D technology.
Garage Brand
In the beginning of the 80's, clean sound was trendy. It had to be less raw and more sophisticated than the past decade. All radio stations played New Wave synth music, Michael Jackson was the King of pop and soul music changed disco for funk. An engineer at Accoustic Control Corporation, the brand of choice of Larry Graham, Jaco Pastorius and John Paul Jones (to name just a few!), decided to radically change the bass amplification market based on the fact that many famous studio musicians wanted more sound clarity and neutrality.

Steeve W. Rabe started his small revolution in a garage where he, together with some associates, tried out many preamp/EQ/amp combinations until he satisfied the pro bass players in Los Angeles. A handful of them tested the prototypes during different recording sessions.
This long and arduous work would lead to the brand’s first amplifier head in 1984. Called PB-200 (which became later the famous SM-400), this amp head already offered all the features that made the young company a success: a tube preamp, a stereo amp, a semi-parametric EQ, a DI out (a groundbreaking feature for a bass amplifier), an aural exciter, and a compressor.
Following the success of their amp heads in recording studios, SWR started to manufacture speaker cabinets to set a foot in the live amplification market. The first Golliath speaker cabinet was introduced in 1986 and combined four 10" speakers (a new concept introduced by Trace Elliot) with a tweeter. The success was immediate in the professional amplification market.
In 1997, Steeve W Rabe sold his company to form Raven Labs. The new owners would sell the brand again to FMIC (Fender Musical Instrument Corporation) in 2003. Today, the products of the brand are manufactured mainly in Corona and Ensenada, California, together with other Fender products.
Now, What the Heck is Class D?
Let’s start with some theory. I’m a nice guy, so I will write the following lines in a small, separate paragraphs. If you are already a master of the subject or find it boring you can just skip to reading the rest of the review.
What is a class-D amp? What are its properties? And more generally, how does a power amplifier work?
The main function of an amplifier is to increase the level of a low-level input signal. It can be a direct sound source like a microphone, a music instrument or a signal coming from a preamp (to processes the source signal with an EQ, filters, etc.).
You probably have already noticed that amplifiers are sorted in classes (A, B, AB, D). These different classes don’t correspond to the active components in the amplifier (tubes, bipolar or MOS transistors), they describe the input signal ratio processed by the components:
Class A: uses the full input signal (100%). The conduction angle (or glow angle) is 360°.
Class B: uses half the signal (50%). Conduction angle: 180°.
Class AB: uses more than half the signal (from 50% to 100%). Conduction angle between 180° and 360°.
 (Author: Yves Laurent)
These amps are called linear amps because they process all or part of the signal. They are all based on active components, like transistors or tubes, whose assembly and polarity is different depending on the class.
Class A: the output stage (just before the speaker out) uses only one active component (a transistor or a tube) which is always conductive. It amplifies the full input signal, thus it’s more faithful (linear) by limiting the distortion in the output signal. However, the output power is limited due to the fact that this technology has a low efficiency (the ratio between the power consumption and the energy delivered). The power consumption is high because it is constant. Generally, such amps cannot provide more than 20 watts of output power and are more often used by guitar players than by bass players. They also require high amplitude in order to perform at their optimum.
Class B: the active components of such amps work half as much. A class-B system amplifies only half the signal, increasing harmonic distortion. That’s why they use a push-pull design in which two active components are used at the output stage (for example two transistors). They split the tasks: the first one amplifies the negative part of the signal while the second one amplifies the positive part. That way, the full signal is amplified and the efficiency value is good enough without having too much distortion. Such amps provide high output power but have a disadvantage: between the amplification of the positive and negative parts of the signal (remember that a sound is a sine curve), a non-linear area called “crossover distortion” appears and becomes audible with low-amplitude signals. So a new amplifier class was created. Enter class AB.
Class AB: this amplification technology is a synthesis of the first two classes. As long as the output power is limited (up to 20 watts), the polarity is class A. As soon as the level exceeds this value, the amplifier uses class-B technology and the output stage uses both poles. Class AB is the most common technology used for stacks and combos. The main advantage: it avoids crossover distortion and stays linear under 25 watts. The other great advantage is that it provides the output power of class B technology.
These last years we have seen the emergence of several new amplifier classes: the switching amplifiers (class D, class E, class F, and class H). Their operation is totally different because their conduction angle is zero (they don’t amplify the source signal directly). So they are sorted depending on the technology they use. For instrument amplifiers, the most common is class D.
Class D doesn’t stand for “Digital” in this case. This technology is called D because it follows class C (which I won’t talk about here considering that it’s main application is in radio transmitters).
The principle of such an amp is to slice the input signal completely: first, the signal is modulated (pulse width modulation). From a curve, you get a two-state square signal with constant amplitude and frequency but variable pulse width (whose average varies according to the input signal’s amplitude).

(click the picture to see the animation – Author: Yves Laurent)
Since the amplitude stays constant, the components in the amplifier can act as a switcher. They are either blocked or saturated to deliver the amplified signal with an unbeatable efficiency. Afterward, the output signal passes through a low-pass filter to cut out unwanted harmonics generated by the modulation. Thus, the output signal is very close to the input signal but amplified. The quality of the filter ensures the linearity of the output signal.
But why should the input signal be converted? As I already mentioned: due to efficiency. But class-D systems have more advantages: there is less energy loss, which means less heat generation during operation and less power consumption. As a consequence, the power supply and heat dissipation components can be smaller.
The result is a much more compact design and, in case the power supply also uses switching technology, a much lighter weight. In case you don’t remember, the transformer of the power supply accounts for most of the weight of a heavy system. OK, let’s stop here with technical aspects!
And let’s go back to the product review.
VIP Area!
If you are into tweaking sounds, this baby offers you everything you need (never mind its compact dimensions).
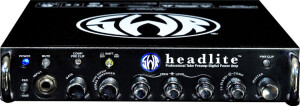
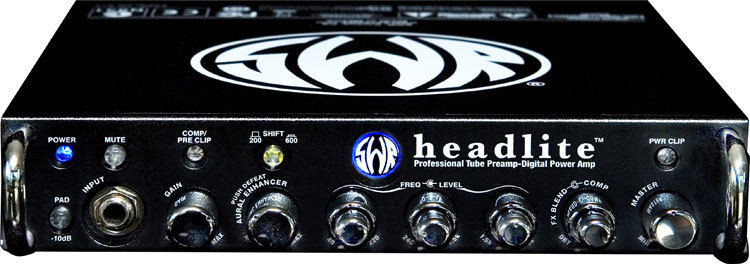
Let’s begin with the front panel of the Headlite:
- 1/4" input jack
- Input gain
- Active/passive and mute switches
- Aural Enhancer
- Semi-parametric EQ (four bands and four multistage frequency selectors)
- Compressor and FX loop level (dual control)
- Master volume
- LED indicators: active/passive, power on/off, compression and clipping for the preamp stage (two-colored LED), Aural Enhancer, overload and risk of failure for the power stage.
Amplite:
- 1/4" input jack
- Master control
- Four gain indicators (-20dB, –10dB, 0dB, +3dB)

The front panel design is well thought-out and provides comprehensive control elements. In spite of its extremely small size, the Headlite provides all control elements of bigger SWR systems, except for the useless ones: saturation, limiter and octaver are not available on this amp. I love simplicity and I ought to be bedazzled, but something has been worrying me since the beginning: there are no unity scales on the front plate. No scale around the controls, no signs of any kind. Nothing!
As soon as I noticed this, I thought it wouldn’t be easy to adjust the EQ. As it turned out, when I was using the amp in the studio, I had a really tough time and it wasn’t easy to adjust the settings like I wanted.
Moreover, the model I received bears the cruel marks of its former owner (a certain Michel Alibo…) who had already carved his own settings on it. And you won’t have any other possibility if you want to use the Headlite in dark stage environments.
This was the first drawback: it’s essential to add visual marks around the controls, especially when you have so many settings on such a small front panel. Otherwise, I like the feel the LEDs provide. Most of them are blue. This change from the usual green and red indicators is an invitation to go swim with dolphins.
Rear panel:
Headlite:
- Speaker out on Speakon connector (not enough place for a second one…)
- Footswitch connector
- Pre Out
- DI out on 1/4" jack and XLR connectors
- FX loop
- Additional direct out (1/4" jack)
- Controls: on/off switch and DI parameters (output level, pre/post, ground/lift)
Amplite:
- Two speaker outs on Speakon connectors
- Pass-through connector
- Neutrik combo input (1/4" jack and XLR connector)
With their numerous connections, the rear panels are as well equipped as the front panels. We just miss a second speaker out on the Headlite; but since I only have one speaker cabinet, I can’t complain!
The Amplite has two inputs (one on the front panel and one on the rear). The pass-through connector is very convenient and allows you to link several amps in parallel (to double, triple or even quadruple the power!) by sending the input signal to the other amps. Since I have four walls and a ceiling with neighbors all around, I will limit the power to 200 watts…
In Use!
For this review, I connected the Amplite to the DI out of the amp/preamp combo (Headlite). The system feeds my Epifani speaker cabinet (2 × 10" neodymium drivers at 8 ohms). The bass is a four-string MusicMan Stingray. I recorded with a Zoom H2 (except for direct recordings). Don’t forget that only one Headlite can provide 400 watts at 4 ohms. You can also connect the Headlite to a 4-ohm speaker and send the signal to an Amplite, which can feed two 8-ohm speakers or one 4-ohm speaker. That way you can get a 800-watt RMS stack.
The EQ is extremely precise and it requires some time to get satisfying results. I never use parametric filters for low or high frequencies. As a consequence, on the following sound samples only the mid range is processed with semi-parametric filters.
As I mentioned before, it took me some time to master all parameters and the musicians I play with had to bear with me. Once again: the lack of scales around the controls makes you loose precious time.
The optional footswitch won’t help you much since it only allows you to mute the amp and disable the FX loop. However, once you spend enough time with the settings, you begin to understand the huge possibilities it offers. The sound is extremely versatile, in spite of its very clean character. No, the Headlite was not conceived for punk rock nor for dirty sounds. For ALL other music styles, the system performs brilliantly.

- 1 EQ a plat00:20
- 2 Grave 15h, Med 0, Aigus 9h00:20
- 3 Grave 14h, Medium 15h, Aigus 0, Freq medium 9h00:20
- 4 Grave 15h, Med 15h, Aigus 9h00:20
- 5 Grave 14h, Medium 14h, Aigus 0, Freq medium 9h00:20
- 9 Slap A Grave 14h, Med 9h, Aigus 14h01:02
The Aural Enhancer allows you to emphasize different frequency bands using only one incremental knob. A shift switch allows you to choose between classic EQ (the standard circuitry used on most products of the manufacturer) and a modern EQ developed together with Marcus Miller.
The more you turn the control, the more the sound becomes transparent. The low mids and the upper high end are emphasized while some frequencies are progressively attenuated.
It is a subtle tool you should use carefully, considering it is independent from the semi-parametric EQ. My favorite setting: control turned 2/3 up in modern mode.
Two sound samples at 200 and 600. The first bass line in each sound sample was recorded in bypass mode.


To be compared with the slap part above, here is another one using the Aural Exciter and the same EQ settings.

The output power is high even at 8 ohms with only half the resources of the small amp. The Headlite is also perfect in the studio (as a preamp directly connected to the mixer) thanks to its small size and the subtle sound shaping possibilities.

On the other side, the Amplite will allow you to power the output signal of a preamp without having to worry for size or weight.
Marcus’ Favorite Tool
I had to return the products just before the trade show in Paris (France) so that Marcus Miller could use them for demos. I’m moved by the fact that I could use the same gear as Michel and Marcus (yes, since we all use the same amp, we call ourselves by our first names): it is almost as if I had intruded into the privacy of these two bass guitar gods…
It’s true, I’m boasting a bit but this conclusion is mine and I want it to be brilliant and positive. SWR offers an affordable class-D system considering its quality. It requires a bit of adaptation to manage all possibilities and to get on with the lack of visual scales around the controls, but I’ll bet you anything that they will add them to future versions. To be seriously considered — for fun or business.