

Do you know what ice cream and compressors have in common? Both are better when you have a choice of flavors. FabFilter’s new Pro C-2 is a veritable ice cream store of compression, offering eight different types, and just about every kind of parameter control you’ve ever seen in a compressor, and some you probably haven’t.
Hey look at me!
 |
If you’ve ever used Pro C, you’ll immediately notice that Pro-C 2 sports a redesigned GUI. The new user interface adds more metering and display options to make it easier to see what’s going on with your signal.
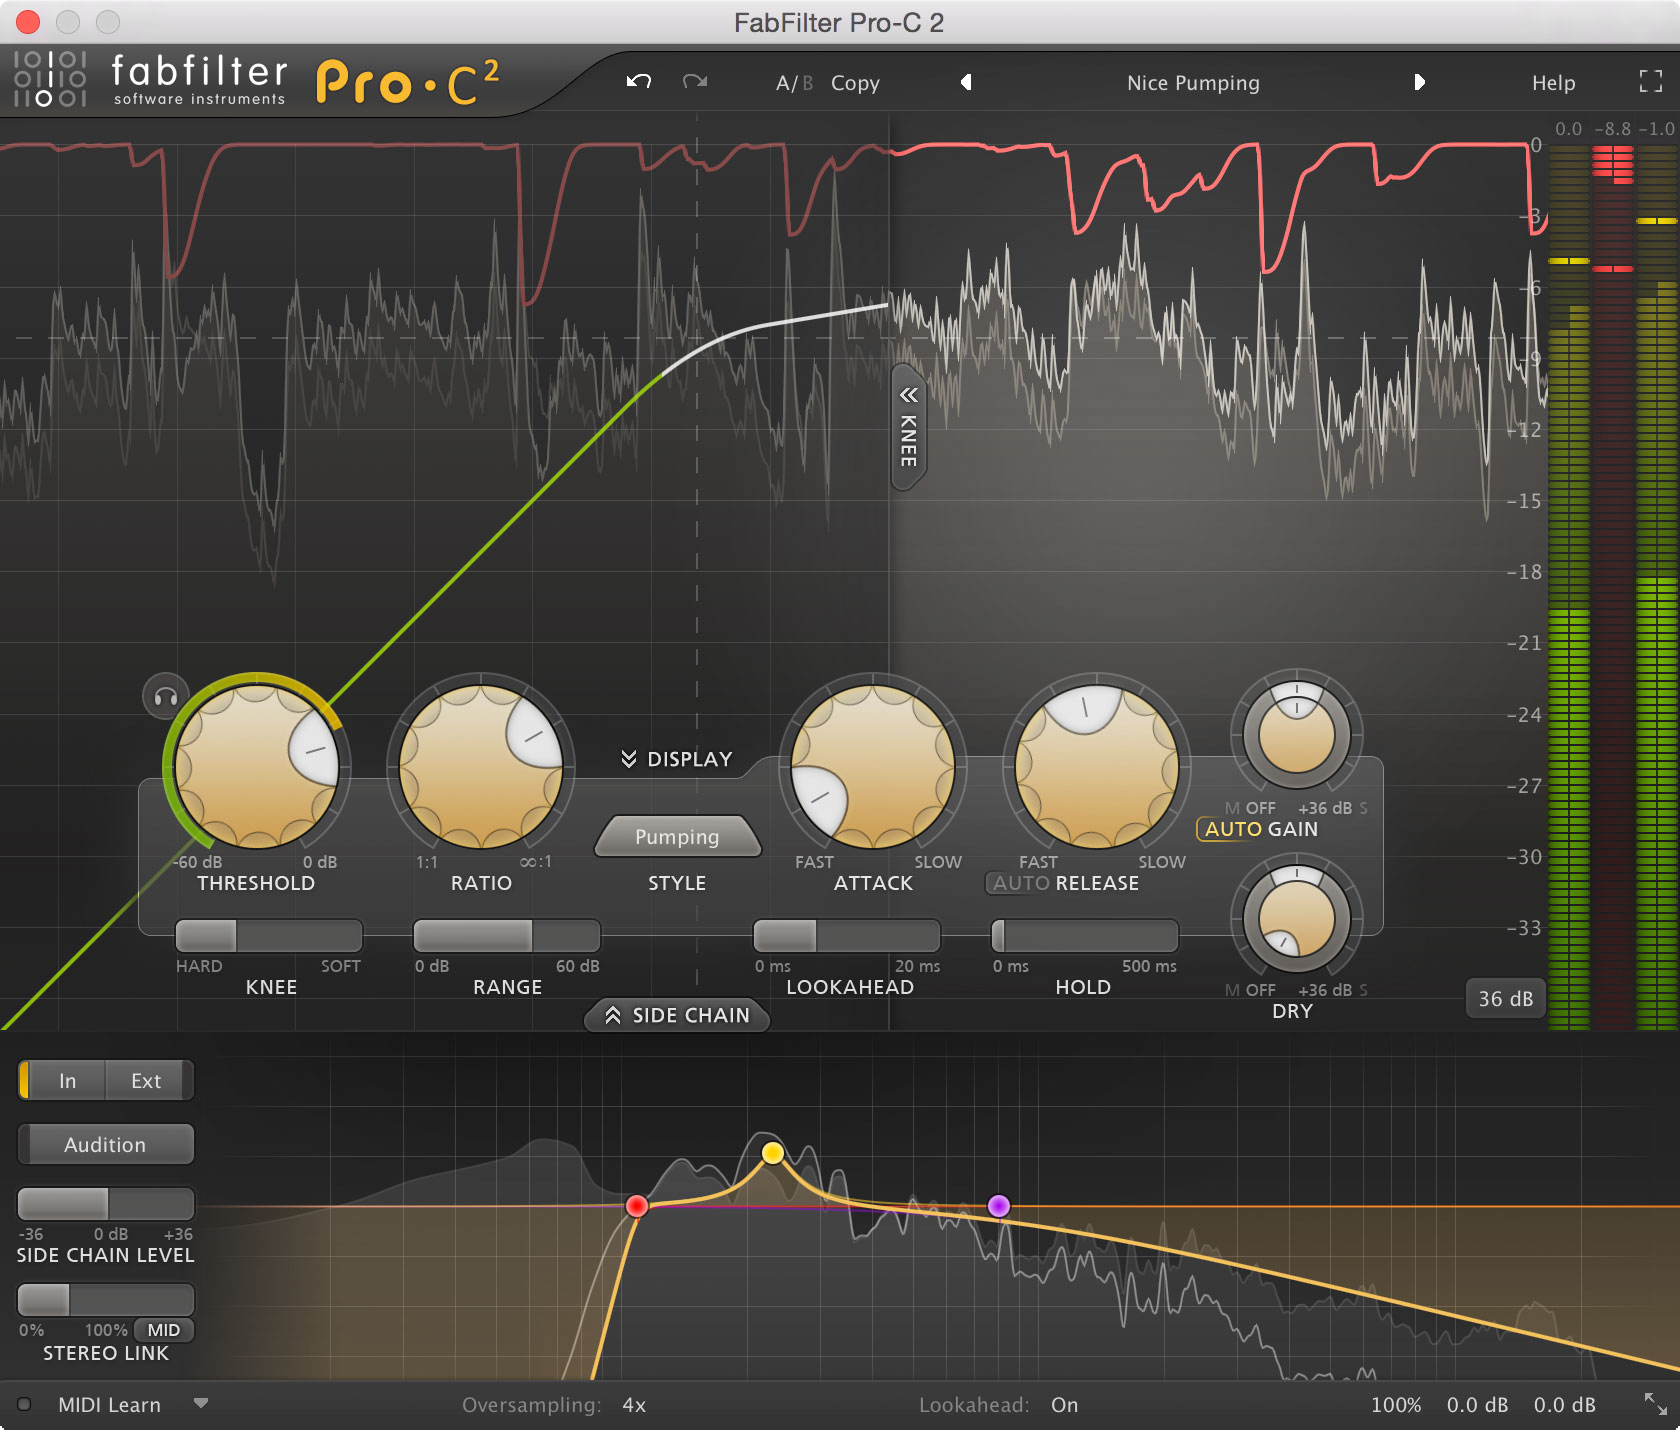
In its default state, Pro-C 2 provides a couple of different ways to visually interpret what the compressor is or isn’t doing. On the far right of the window are bar-graph style meters for input, gain reduction, and output. As soon as you send signal through the compressor, you’ll see a moving waveform display, which shows you that same information graphically. The waves with the straight lines are input, with ones with the squiggly lines are output, and the red line on top shows gain reduction. This display is larger than the similar one in the original Pro C, and the red line is really helpful to see where the gain reduction happens.
In addition, a diagonal line representing the Knee setting goes across the screen, and it changes based on how you set the Knee slider and various parameters. You can hide it if you want.
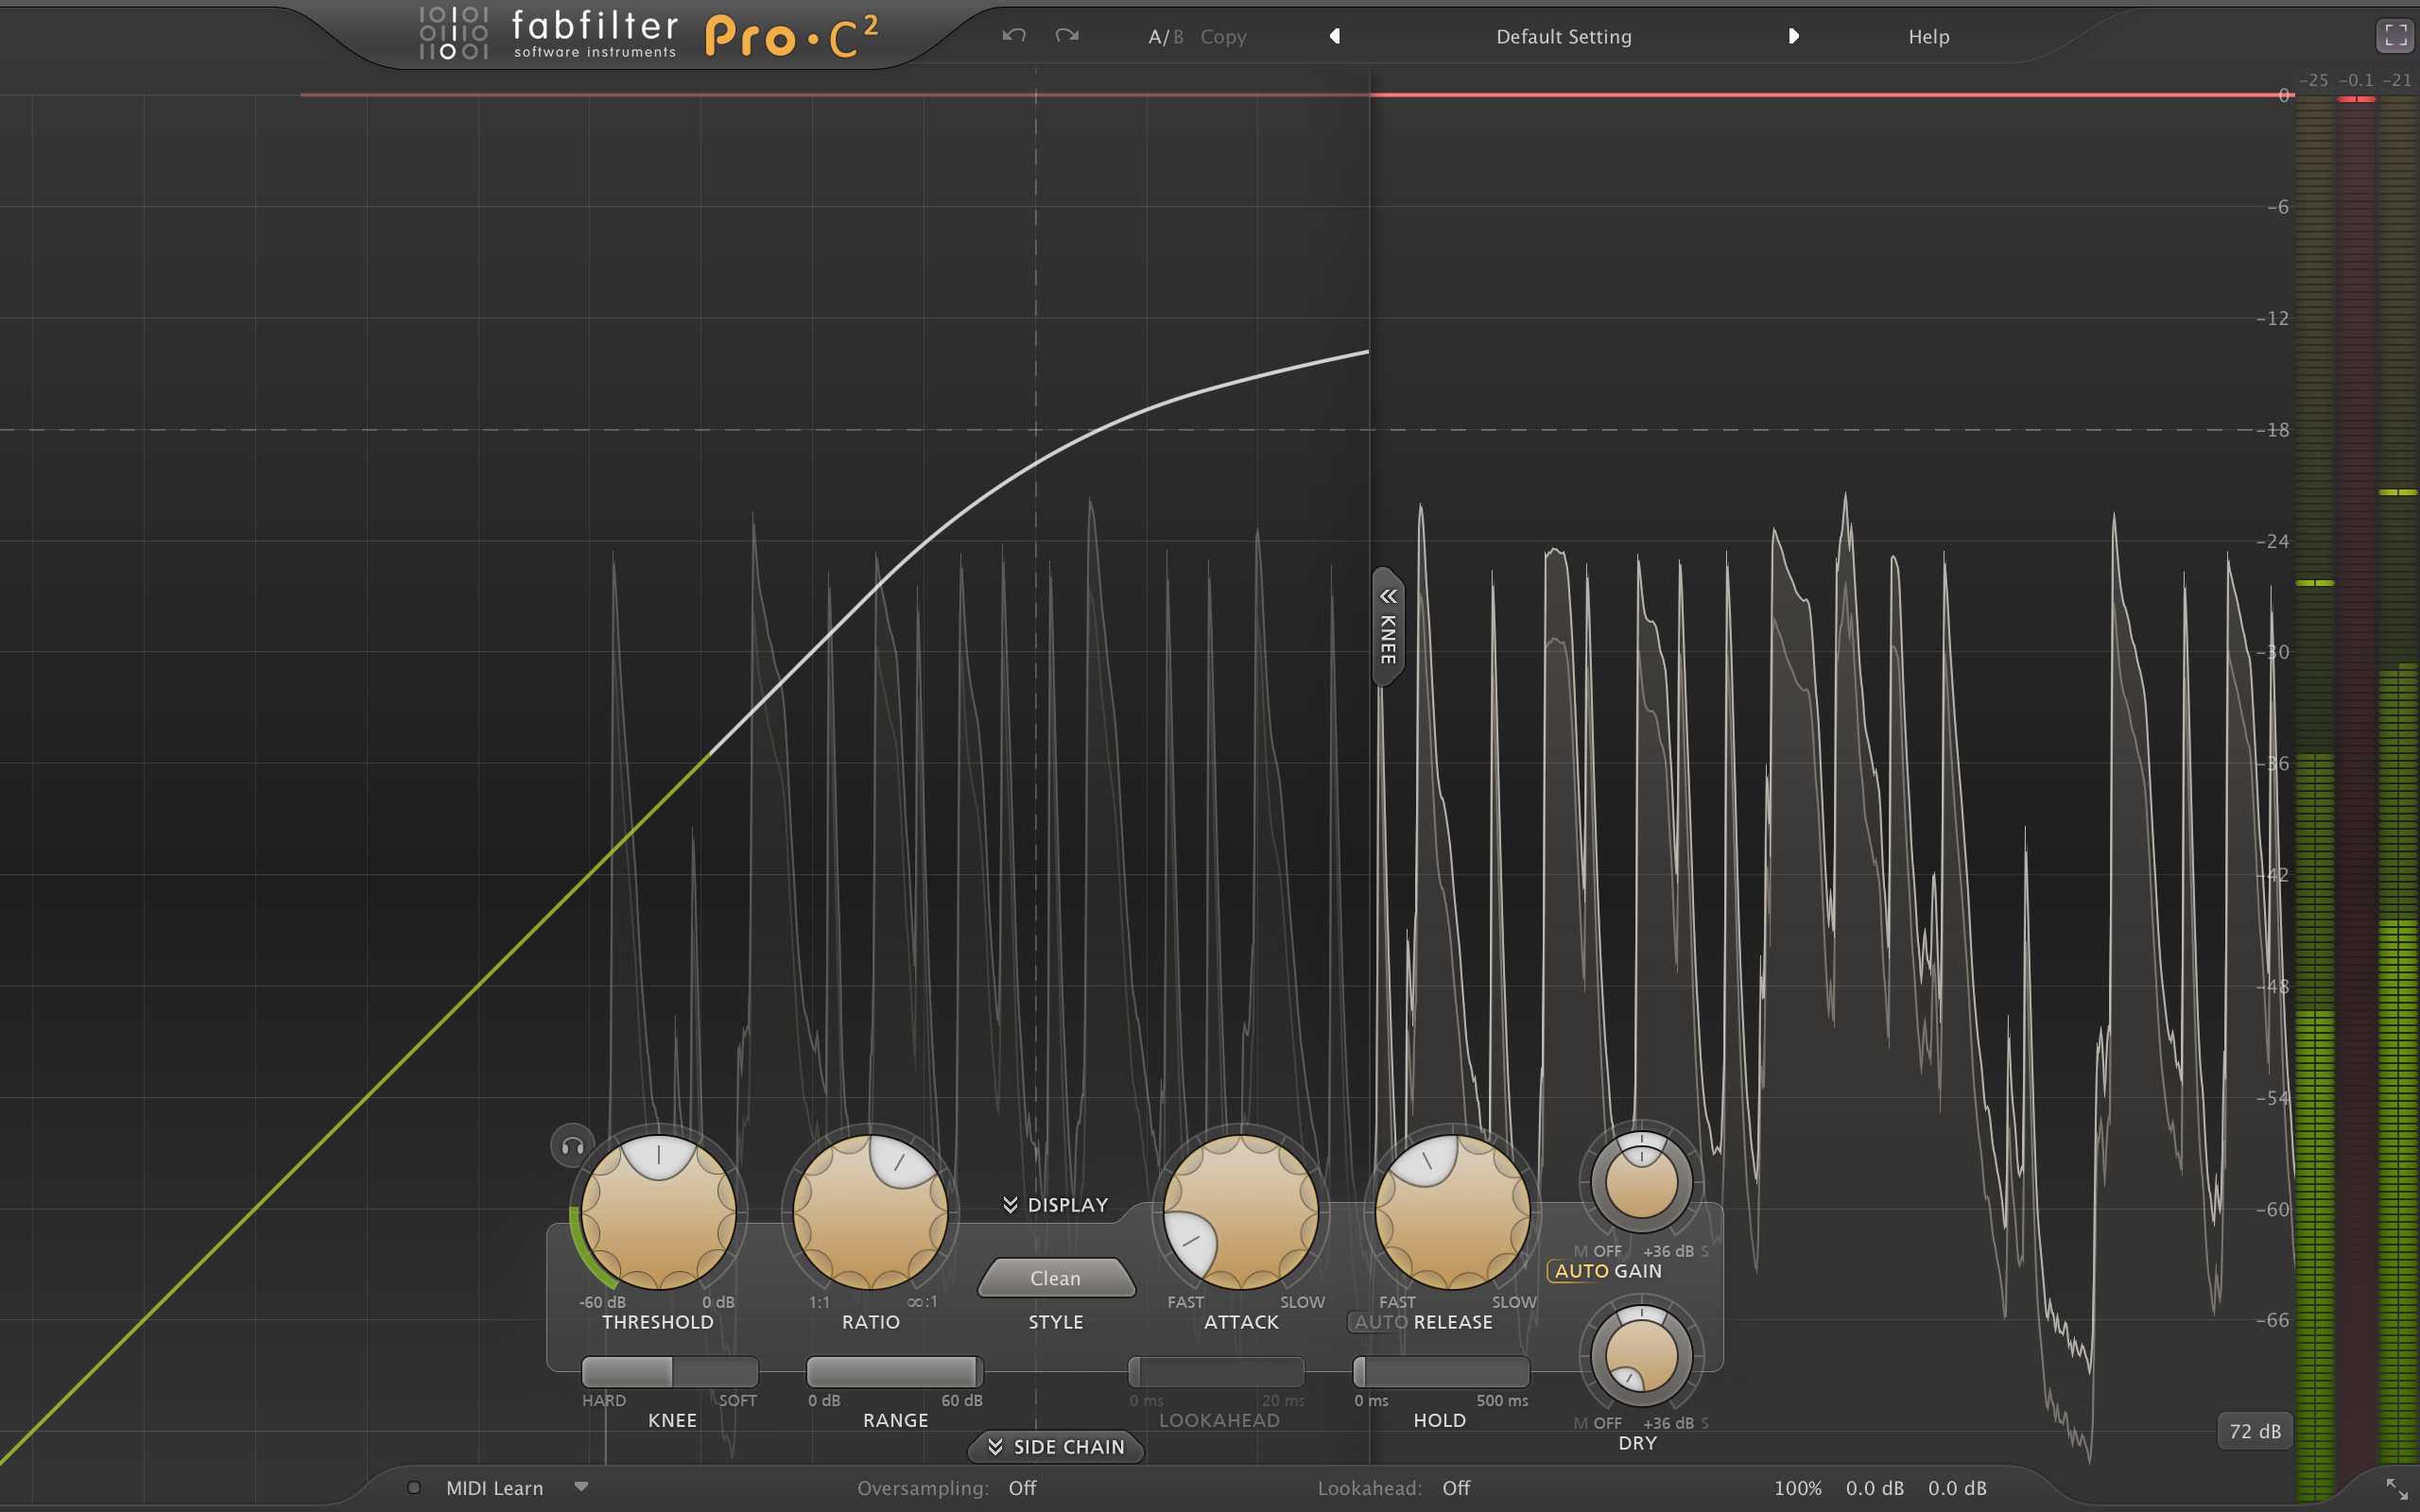
You get a significant new option to open Pro-C 2 up in full-screen mode, which gives you a huge version of the display. This is especially useful if you have a second monitor to show it on.
Two other size options, Medium and Small are also available. If you don’t want to see the snazzy waveform display, you can press the Display button, and the only graphic readout will be the bar graph meters for Input, Output, and Gain Reduction.
Pro-C 2 also introduces Retina Display support on Macs and High DPI support on Windows.
New algorithms on the block
Now let’s look at Pro-C 2's new algorithms. The original Pro C offered three different ones choose from: Clean, Opto, and Classic. Between them you had a pretty nice selection of compressor flavors. Pro-C 2 has taken those three and raised you five, for a total of eight compressor types. Here are descriptions of the new ones.
Vocal: This setting gives you instant vocal compression that sounds smooth and finished. The ratio and knee settings are not user adjustable in this algorithm, but rather are “Automatic, ” which I assume means program dependent. Dialing in the right threshold or changing the input level lets you vary the amount of compression.
In this example, you’ll first hear a vocal line that had previously been compressed. Pro-C 2 kicks in the second time around with a setting featuring the Vocal algorithm. You’ll notice it gets subtly smoother and thicker.

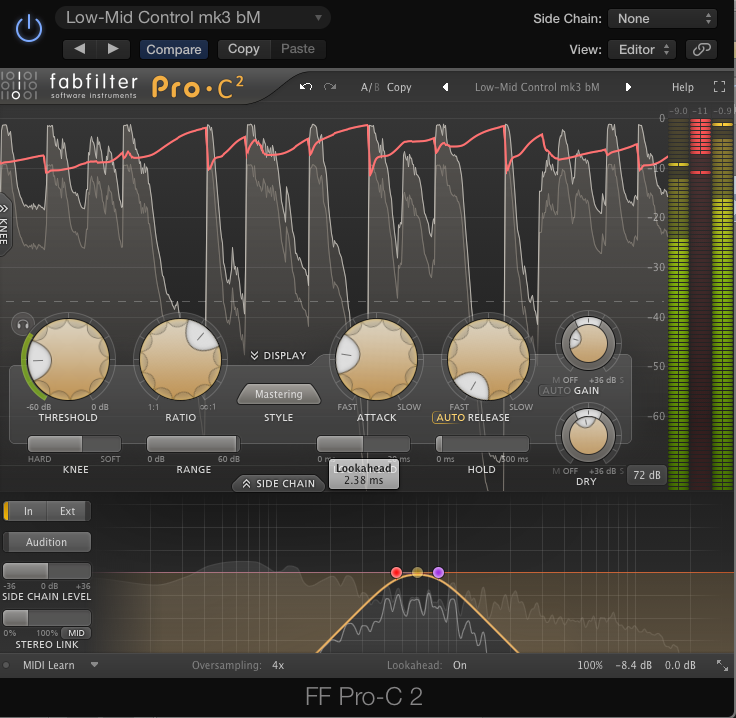
Mastering: If you’re looking for dynamics control without coloration, this is a great setting. According to Fab Filter, the algorithm was designed to minimize harmonic distortion. I found that it worked as advertised. Although they call it “mastering” you can certainly use it when mixing, too.
In this example, you hear five measures of a mix without the Pro-C 2 on. When it repeats, the compressor is active with about a 5:1 ratio, an attack of 3ms and a release of 14ms.

Bus: This algorithm is designed to be used on the master bus. It keeps the signal clean while giving it that “glue effect” that helps add cohesiveness to your mix. I found that it sounded good and worked well in the glue department.
Here, Pro-C 2 is on the master bus with the “Bus” algorithm. It’s bypassed for the first four measures, but comes in on measure 5.

Punch: This algorithm emulates an analog compressor, adding some character to the sound.
Here’s an example with a stereo drum loop. The first two measures the compressor is bypassed, and when it comes it it’s using the Punch algorithm, with a fast attack and release, and a ratio of 2:1.

Pumping: If you want to really squash something. Pumping is the setting to use.
The first two bars of this drum beat have no compression, and the last four are compressed with the Pumping algorithm, a 4:1 ratio, and pretty fast attack and release settings. I also used the 4x Oversampling setting, which I’ll discuss further later in this review.

Processing on the side
New algorithms are only part of the story with Pro-C 2. FabFilter also added a bunch of extremely useful features that let you tailor the compression, or even get more creative with it.
Perhaps the most significant addition is the new Side Chain EQ function. With it, you can trigger the compressor based on a custom EQ curve that you set. First, you have to press the tab labeled “Side Chain” to open up the Side Chain EQ section, which shows up at the bottom of the GUI. You can enable a high- and low-pass filter for the side chain. It’s not readily apparent at first, but you have to individually turn the filters on.
 |
The filters have adjustable slopes, with settings from a very gradual 6 dB per octave to a really steep 96 db per octave. There’s also a mid band, which defaults to a Bell shape, but which can be set to Low Shelf, High Shelf, Notch and Tilt Shelf settings, as well, giving you a lot of flexibility. The side chain can be set to Internal, which triggers from the track Pro-C 2 is inserted in, or External, which triggers from another track (how you configure the external side chain varies a bit depending on your DAW).
The Audition Button of the Side Chain section lets you hear the side chain signal only, which is very helpful for setting it. You can make a lot of finer adjustments using a variety of modifier keys such as Option/Alt and Command/Control.You can even adjust the Q of the filters and Mid Band with your mouse wheel. This kind of detail is indicative of the well-thought-out design of this plug-in.
FabFilter has also refined the control you get over processing a stereo image. The Stereo Linking feature makes it possible to choose whether compression is triggered differently on either side of the stereo spectrum (based on a stereo source) or the same on both sides.
You can also choose between mid-side and stereo processing, which can be extremely helpful if you wanted to, say, compress the bass drum and bass, which are panned to the center (mid), but apply less to cymbals panned to the outside (side).
Pro-C 2 offers four different M/S options: Mid, Side, M>S (triggers the gain reduction only from the mid signal but compresses only the side signal), and S>M, (triggers from the side signal but only compresses the mid). I could see the latter two being particularly helpful in mastering situations.
Hold it right there
The new Hold control extends the duration of the gain reduction peaks. According to FabFilter it’s useful at short settings for making the compression more transparent. It can also be handy at higher settings to increase pumping.
Also new is the Range Control, which according to FabFilter, “Limits the Amount of Applied Gain Change.” I found that explanation a little bit vague (as are some other explanations in the manual, which is only so-so), but put more simply, turning it up increases gain change and turning it down decreases it.
The Mix parameter is yet another new feature, but this one is located with the Input and Output controls, which are hidden unless you hover over the bottom right hand corner. I needed to look up the Input and Output controls in the manual to discover how to access them, which is not particularly intuitive.
You can think of the Mix control as a Wet/Dry knob that goes up to 200 percent. You can use it to dial in parallel compression with lower settings and extra compressed settings when you go above 100 percent.
Another way to dial in parallel compression is via the Wet Gain and Dry Gain knobs. The former controls the output of the compressor, while the latter lets you mix in uncompressed signal.
Overdoing it
With everything already described, you’d be looking at a very significant upgrade, but there are even more new features. One of the most notable is Oversampling. When you’re compressing heavily, you can get artifacts in the signal due to aliasing. In those situations, you can choose 2x or 4x oversampling, which helps get rid of the aliasing, and therefore cleans up your signal.
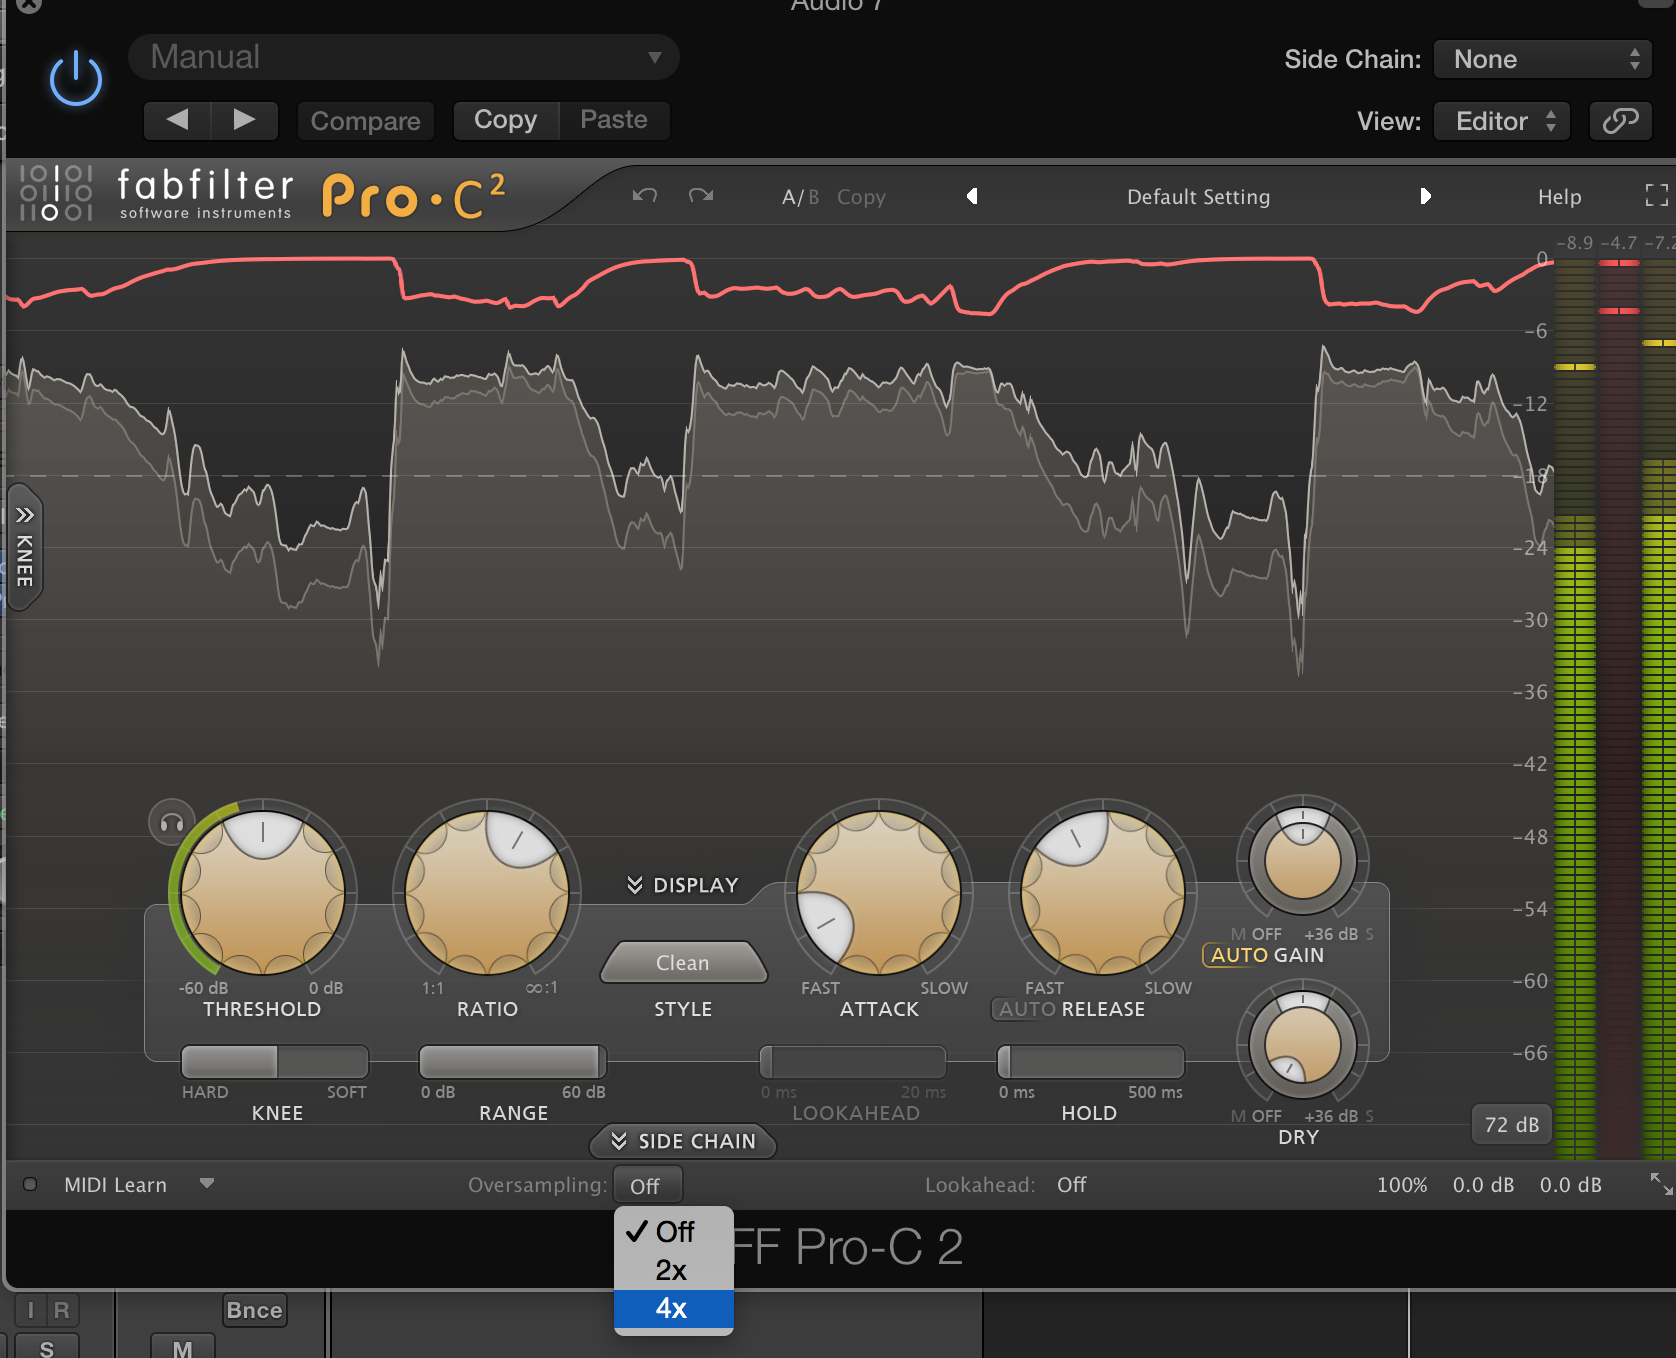 |
The only downside is that it introduces some latency. It isn’t a big deal when mixing, but you might not want to have it on if you’re using the compressor on a live source while recording.
Another new feature is Lookahead, which, when enabled, allows the compressor to anticipate transients and makes the processing more transparent. Like Oversampling, Lookahead adds some latency because it’s so processor intensive.
All that and MIDI too
Unlike the original Pro C, Pro-C 2 offers MIDI control. In MIDI Learn mode, you can associate a knob or slider from your controller to a parameter on the compressor. In addition, you can set it up it so that every time you press a key on your MIDI controller, it triggers compression.
Configuring it is a bit complex. The manual gives setup examples for Logic Pro, Cubase, Pro Tools and Ableton Live, which help a lot. If you have a different DAW than the ones mentioned, you might have to contact FabFilter to find out how to set it up.
This is the first compressor I’ve seen that lets you trigger compression from MIDI note-ons. It’s definitely a cool feature. You could “play in” the compression as MIDI notes on the track controlling Pro-C 2 (in the setup configurations for this feature, you have a separate MIDI or instrument track that’s controlling the instance of Pro-C 2 in your audio track), so that every time that MIDI track plays it will trigger the compressor the same as when you played it live.
Conclusion
Pro-C 2 ($179, Pro C owners get a 50–65% discount depending on how many other FabFilter plug-ins they own) is like having multiple compressors in one. With eight different compressor types, flexible display options, and all the parameter control you could ask for, it’s a superb product.
Although it doesn’t emulate specific hardware compressors, it gives you generic versions of a range of different styles of hardware compressors, and all of them sound really good. If you’re looking for one compressor that can do it all, Pro-C 2 is the one.