When it’s time to mix a recording, you need a strategy
Mixing - The 12 Step Program

 Print
Print |
When it’s time to mix a recording, you need a strategy |
 |
| By Craig Anderton on 06/01/2011 |  Print Print |
|
In theory, mixing should be easy: you just adjust the knobs until everything sounds great. But this doesn’t happen by accident. Mixing is as difficult to master as playing a musical instrument, so let’s take a look at what goes into the mixing process.
Start by analyzing well-mixed recordings by top-notch engineers and producers such as Bruce Swedien, Roger Nichols, Shelly Yakus, Steve Albini, Bob Clearmountain, and others. Don’t focus on the music, just the mix. Notice how—even with a "wall of sound"—you can pick out every instrument because each element of the music has its own space. Also note that the frequency response balance will be uniform throughout the audio spectrum, with enough highs to sound sparkly but not screechy, sufficient bass to give a satisfying bottom end without turning the mix into mud, and a midrange that adds presence and definition.
One of the best mixing tools is a CD player and a really well-mixed reference CD. Patch the CD player into your mixer, and A-B your mix to the reference CD periodically. If your mix sounds substantially duller, harsher, or less interesting, listen carefully and try to isolate the source of any differences. A reference CD also provides a guideline to the correct relative levels of drums, vocals, etc.
Match the CD’s level to the overall level of your mix by matching the peak levels of both signals. If your mix sounds a lot quieter even though its peaks match the reference CD’s peak levels, that probably means that the reference has been compressed or limited a fair amount to restrict the dynamic range. Compression is something that can always be done at the mastering stage—in fact, it probably should be, because a good mastering suite will have top-of-the-line compressors and someone who is an ace at applying them.
Loud, extended mixing sessions are tough on the ears. Mixing at low levels keeps your ears "fresher" and minimizes ear fatigue; loud mixes may get your juices flowing, but they make it more difficult to hear subtle level variations.
Many project studios have noise constraints, so mixing through headphones might seem like a good idea. Although headphones are excellent for catching details that you might not hear over speakers, they are not necessarily good for general mixing because they magnify some details out of proportion. It’s better to use headphones for reality checks.
Scrutinize the arrangement prior to mixing. Solo project studio arrangements are particularly prone to "clutter" because as you lay down the early tracks, there’s a tendency to overplay to fill up all the empty space. As the arrangement progresses, there’s not a lot of room for overdubs. Remember: the fewer the number of notes, the greater the impact of each note. As Sun Ra once said, "Space is the place."
Although there aren’t any rules to recording or mixing, until you develop your own mixing "style" it’s helpful to at least have a point of departure. So, here’s what has worked for me.
You "build" a mix over time by making a variety of adjustments. There are (at least!) twelve major steps involved in creating a mix, but what makes mixing so difficult is that these steps interact. Change the equalization, and you also change the level because you’re boosting or cutting some element of the sound. In fact, you can think of a mix as an "audio combination lock" since when all the elements hit the right combination, you end up with a good mix.
Let’s look at these twelve steps, but remember, this is just one person’s way of mixing—you might discover a totally different approach that works better for you.
Mixing can be tedious, so set up an efficient workspace. If you don’t have a really good office chair with lumbar support, consider a trip to the local office supply store. Keep paper and a log book handy for taking notes, dim the lighting a little bit so that your ears become more sensitive than your eyes, and in general, psych yourself up for an interesting journey.
Take periodic breaks (every 45-60 minutes or so) to "rest" your ears and gain a fresher outlook on your return. This may seem like a luxury if you’re paying for studio time, but even a couple minutes of off time can restore your objectivity and, paradoxically, complete a mix much faster.
Listen at low volume to scope out what’s on the multitrack; write down track information, and use removable stick-on labels or erasable markers to indicate which sounds correspond to which mixer channels. Group sounds logically, such as having all the drum parts on consecutive channels.
Fixing glitches is a "left brain" activity, as opposed to the "right brain" creativity involved in doing a mix. Switching back and forth between these two modes can hamper creativity, so do as much cleaning up as possible—erase glitches, bad notes, and the like—before you get involved in the mix. Listen on headphones to catch details, and solo each track.
If you’re sequencing virtual tracks, this is the time to thin out excessive controller information, check for duplicate notes, and avoid overlapping notes on single-note lines (such as bass and horn parts).
Applying noise reduction sparingly can help clean up tracks. Here, a file is being "de-noised" in Sony’s Sound Forge 9 prior to being re-imported into a multitrack project.
Also consider using a digital audio editor to do some digital editing and noise reduction (although you may need to export these for editing, then re-import the edited version into your project). Low-level artifacts may not seem that audible, but multiply them by a couple dozen tracks and they can definitely muddy things up.
With sequenced virtual tracks, optimize the various sound generators. For example, for more brightness, try increasing the lowpass filter cutoff instead of adding equalization at the console.
Do not add any processing yet; concentrate on the overall sound of the tracks—don’t become distracted by left-brain-oriented detail work. With a good mix, the tracks sound good by themselves, but sound their best when interacting with the other tracks.
Try settings levels in mono at first, because if the instruments sound distinct and separate in mono, they’ll open up even more in stereo. Also, you may not notice parts that "fight" with others if you start off in stereo.
EQ can help dramatize differences between instruments and create a more balanced overall sound. Work on the most important song elements first (vocals, drums, and bass) and once these all "lock" together, deal with the more supportive parts.
The audio spectrum has only so much space; ideally, each instrument will stake out its own "turf" in the audio spectrum and when combined together, will fill up the spectrum in a satisfying way. (Of course, this is primarily a function of the tune’s arrangement, but you can think of EQ as being part of the arrangement.) One of the reasons for working on drums early on the mix is that a drum kit covers the audio spectrum pretty thoroughly, from the low thunk of the kick drum to the sizzle of the cymbal. Once that’s set up, you’ll have a better idea of how to integrate the other instruments.
EQ added to one track may affect other tracks. For example, boosting a piano part’s midrange may interfere with vocals, guitar, or other midrange instruments. Sometimes boosting a frequency for one instrument implies cutting the same region in another instrument; to have vocals stand out more, try notching the vocal frequencies on other instruments instead of just boosting EQ on the voice.
Cubase 4 includes four-band equalization on every audio channel.
Think of the song as a spectrum, and decide where you want the various parts to sit. I sometimes use a spectrum analyzer when mixing, not because ears don’t work well enough for the task, but because the analyzer provides invaluable ear training and shows exactly which instruments take up which parts of the audio spectrum. This can often alert you to an abnormal buildup of audio energy in a particular region.
If you really need a sound to "break through" a mix, try a slight boost in the 1 to 3kHz region. Don’t do this with all the instruments, though; the idea is to use boosts (or cuts) to differentiate one instrument from another.
To place a sound further back in the mix, sometimes engaging the high cut filter will do the job—you may not even need to use the main EQ. Also, applying the low cut filter on instruments that veer toward the bass range, like guitar and piano, can help trim their low end to open up more space for the all-important bass and kick drum.
"Essential" doesn’t mean "sweetening," but processing that is an integral part of the sound (such an echo that falls on the beat and therefore changes the rhythmic characteristics of a part, distortion that alters the timbre in a radical way, vocoding, etc.).
Now place your instruments within the stereo field. Your approach might be traditional (i.e., the goal is to re-create the feel of a live performance) or something radical. Pan mono instruments to a particular location, but avoid panning signals to the extreme left or right. For some reason they just don’t sound quite as substantial as signals that are a little bit off from the extremes.
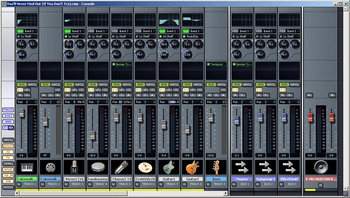
 Like most modern DAWs, Sonar has a console view that allows mixing on a virtual version of a traditional hardware mixer. Note the panpots, EQs, and faders.
As bass frequencies are less directional than highs, place the kick drum and bass toward the center. Take balance into account; for example, if you’ve panned the hi-hat (which has a lot of high frequencies) to the right, pan a tambourine, shaker, or other high-frequency sound somewhat to the left. The same concept applies to midrange instruments as well.
Signal processing can create a stereo image from a mono signal. One method uses time delay processing, such as stereo chorusing or short delays. For example, if a signal is panned to the left, feed some of this signal through a short delay and send its output to the another channel panned to the right. However, it’s vital to check the signal in mono at some point, as mixing the delayed and straight signals may cause phase cancellations that aren’t apparent when listening in stereo.
Stereo placement can significantly affect how we perceive a sound. Consider a doubled vocal line, where a singer sings a part and then doubles it as closely as possible. Try putting both voices in opposite channels; then put both voices together in the center. The center position gives a somewhat smoother sound, which is good for weaker vocalists. The opposite-channel vocals give a more defined, distinct sound that can really help spotlight a good singer.
Minimize the number of competing parts to keep the listener focused on the tune, and avoid "clutter." You may be extremely proud of some clever effect you added, but if it doesn’t serve the song, get rid of it. Conversely, if you find that a song needs some extra element, this is your final opportunity to add an overdub or two. Never fall in love with your work until it’s done; maintain as much objectivity as you can.
You can also use mixing to modify an arrangement by selectively dropping out and adding specific tracks. This type of mixing is the foundation for a lot of dance music, where you have looped tracks that play continuously, and the mixer sculpts the arrangement by muting parts and doing major level changes.
Now that we have our tracks set up in stereo, let’s put them in an acoustical space. Start by adding reverberation and delay to give the normally flat soundstage some acoustic depth.
Generally, you’ll want an overall reverb to create a particular type of space (club, concert hall, auditorium, etc.) but you may also want to use a second reverb to add effects, such as a gated reverb on toms. But beware of situations where you have to drench a sound with reverb to have it sound good. If a part is questionable enough that it needs a lot of reverb, redo the part.
Now that the mix is on its way, it’s time for fine-tuning. If you use automated mixing, start programming your mixing moves. Remember that all of the above steps interact, so go back and forth between EQ, levels, stereo placement, and effects. Listen as critically as possible; if you don’t fix something that bothers you, it will forever haunt you every time you hear the mix.
While it’s important to mix until you’re satisfied, it’s equally important not to beat a mix to death. Once Quincy Jones offered the opinion that recording with synthesizers and sequencing was like "painting a 747 with Q-Tips." A mix is a performance, and if you overdo it, you’ll lose the spontaneity that can add excitement. You can also lose that "vibe" if you get too detailed with any automation moves. A mix that isn’t perfect but conveys passion will always be more fun to listen to than one that’s perfect to the point of sterility. As insurance, don’t always erase your old mixes—when you listen back to them the next day, you might find that an earlier mix was the "keeper."
In fact, you may not even be able to tell too much difference between your mixes. A veteran record producer once told me about mixing literally dozens of takes of the same song, because he kept hearing small changes which seemed really important at the time. A couple of weeks later he went over the mixes, and couldn’t tell any difference between most of the versions. Be careful not to waste time making changes that no one, even you, will care about a couple days later.
Before you sign off on a mix, check it over a variety of speakers and headphones, in stereo and mono, and at different levels. The frequency response of the human ear changes with level (we hear less highs and lows at lower levels), so if you listen only at lower levels, mixes may sound bass-heavy or too bright at normal levels. Go for an average that sounds good on all systems.
With a home studio, you have the luxury of leaving a mix and coming back to it the next day when you’re fresh, after you’ve had a chance to listen over several different systems to decide if any tweaks need to be made.
One common trick is to run off some reference CDs and see what they sound like in your car. Road noise will mask any subtleties, and give you a good idea of what elements "jump out" of the mix. I also recommend booking some time at a pro studio to hear your mixes. If the mix sounds good under all these situations, your mission is accomplished.
Originally published on Harmony Central. Reprinted with permission.
Reproduction and distribution rights reserved © Audiofanzine 2024.
For personal use only. The user of the site acknowledges that he has read and accepts the general terms of use and that he will respect them.