

Learning by your mistakes is definitely an effective method, but it’s not a lot of fun. In this article, we’ll talk about some common mistakes that are made by home recordists and how to avoid them. There's no reason you have to learn these lessons the hard way...
Don’t be overeager
Recording is a fun and exciting process, most of the time, but eager as you might be to get a track recorded, it’s always useful to be patient about getting a good sound. Whether you’re recording with a mic or mics, or going direct, take the time to get the best sound you can. Whether that means experimenting with mic positioning, or making sure you’re in tune or that the drum kit is tuned, or that you change those old strings first, or that you take the time to attach a pop screen before singing — do what it takes to maximize your sound In recording. As in many parts of life, “Garbage in—Garbage out” is the operative principle.
Don’t clutter your arrangement
If you throw everything but the kitchen sink into your recordings, doubling, and tripling vocal parts, adding percussion that’s not there when you play the song live, “sweetening” it with strings or horns, you’re likely to have a real mess when it’s time to mix. Less is almost always more in recording. If you do a good job of arranging your song, it will make the eventual mix a lot easier. If you’re feeling like your mix is too cluttered, try muting some of the non-essential parts, you just might end up with a much more clean sounding track.
Don’t neglect to practice your songs before recording
Without doubt, some good songs started out with somebody just noodling into a recorder, but unless you’re in a jam band, you generally need to be well rehearsed in order to do a good job of recording your songs. Especially if you’re tracking in an ensemble situation, being well rehearsed will make for a better recording, because everyone will be playing with confidence, rather than tentatively feeling their way through and hoping not to make mistakes. So take the time to learn your parts and practice in advance, so that your recordings reflect your abilities, not your shortcomings.
Don’t make crucial mix decisions at 3 AM

Mixing can be a long and tedious process, and sometimes you glance at the clock on your computer and notice that hours have passed since you started, and you’re still tweaking the snare drum sound, trying to find elusive perfection. There’s definitely a point of no return in a mix session, after which everything you do will be detracting from, rather than adding to the quality of the mix.
There are a couple of solutions for this: First, you want to leave a virtual “bread-crumb trail, ” so that you can find your way back to the point where your mix was sounding its best, before it went off the rails. This can be done by incremental saving, where every time you make a significant change to the mix, you save with a descriptive name so you know what you did. For instance, “Song name mix 1.3 lead vocal down 2 dB, ” or “Song name mix 12 percussion muted on verse 2,” you get the idea. Having those descriptions makes backtracking a lot easier.
But even if you think you absolutely aced by the end of your night-time session, check it the next day with “fresh ears.” You’ll be surprised how much stuff you hear that seems glaringly obvious, but that you completely missed when you last listened at 2AM.
Don’t assume your mix is done until you’ve checked it elsewhere
Even top engineers in good studios often take their mixes and listen on other systems (such as their cars) before they’re confident the balances are right. So don’t make the mistake of finishing up and releasing or uploading a song the the Web before you’ve checked it on a number of speaker systems. Remember that what you hear in your studio is influenced substantially by the acoustics in the room, and unless you’ve had it professionally treated, or are incredibly lucky, it will exaggerate or under-represent certain frequencies.
So before you start sharing your music, take a break from it (as mentioned in the previous section) and then listen in your car, listen on your friend’s boombox, listen through your computer speakers and listen through earbuds (since most people will experience your music that way), and make sure your mix sounds balanced everywhere. Take notes if you hear issues, and reopen the session and make corrections until you’re satisfied.
Don’t drown your mix
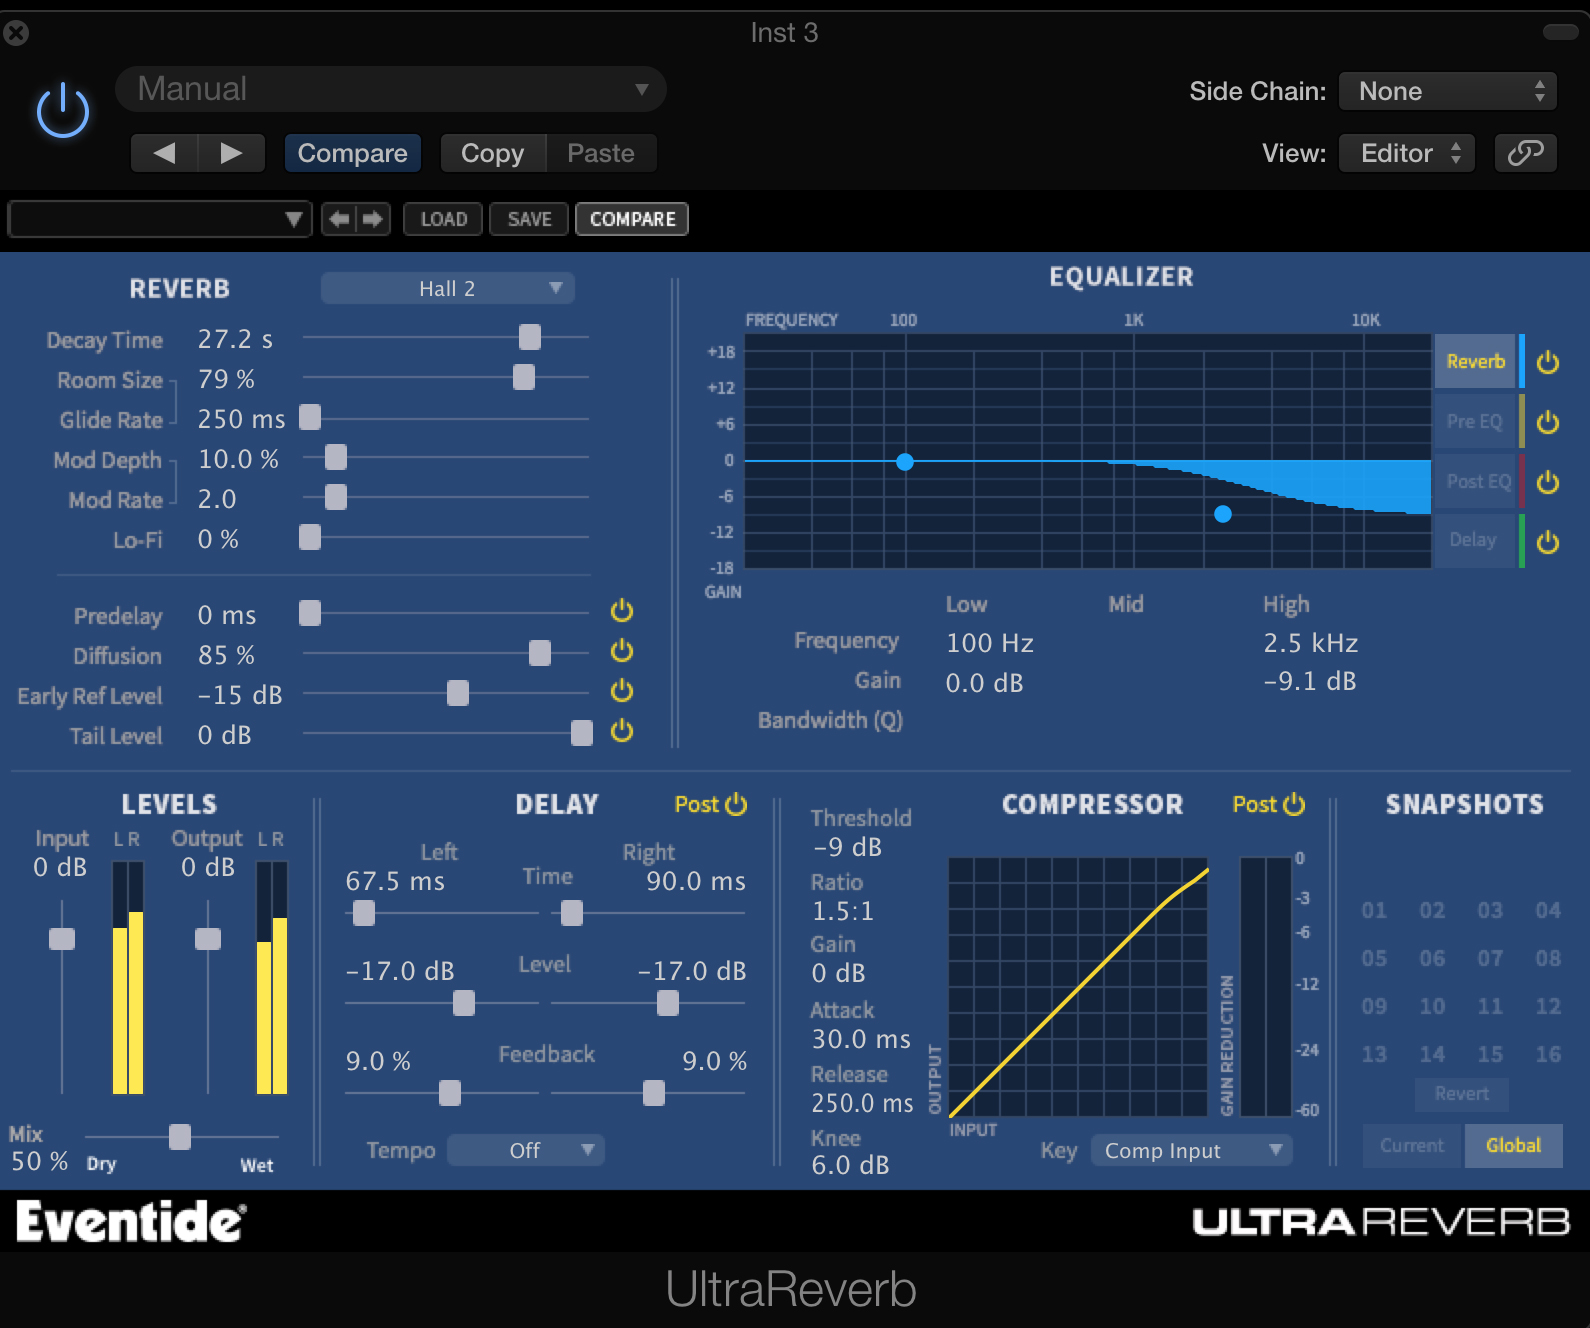
Especially for novice mixers, the temptation to heap on the effects is hard to resist. It’s awfully tempting to use that convolution reverb to make the listener think he or she is in Seat 23, Row G of the Sydney Opera House or the North Rim of the Grand Canyon, but don’t give in to the temptation. Unless you’re going for a special effect, you want your reverb to give the vocal some space, but not to make it sound like it’s coming from the bottom of the ocean.
Find a reverb setting that seems good, and try dialing it back just a tad. Most likely, the latter will sound better.
Don’t squash the life out of your mix
Compressors are great tools, which can be used both for controlling dynamic range, and for adding pleasant coloration. Like with reverb, though, less is more. Unless you’re going for a particular heavy compression effect, such as parallel compression on drums, try go get by with just enough compression to achieve your goal. Otherwise, transients will lose their snap, and the whole track might end up sounding squishy and weird.
Stay away from extremes with your threshold and ratio settings. Be mindful of the attack settings. Too fast an attack will squash the transients of the signal, and the track is something with sharp transients like drums, percussion, or acoustic guitar, you risk neutering its sound. The rule of thumb is if the compression that you apply makes a natural sounding element like a vocal or acoustic instrument sound unnatural — and if you’re not going for a special effect — you’re over-compressing it.
Don’t be overly “boostful”
If you’ve been reading our mixing series, you’ve probably gotten the message already that it’s generally better to be subtractive with EQ rather than additive. In other words try to cut more than boost, because excessive boosting can add artifacts to the sound. There are many situations where boosting is called for, and that’s fine, but go easy, and use as narrow a Q factor (bandwidth) as you can get away with and still achieve your sonic goal.
Don’t neglect important details
As mentioned previously, sometimes eagerness can get the best of us recordists, and we’re so anxious to get started that we don’t pay as close attention to details. One area in particular that can be a real drag to mess up is your session settings. Imagine how bad you’d
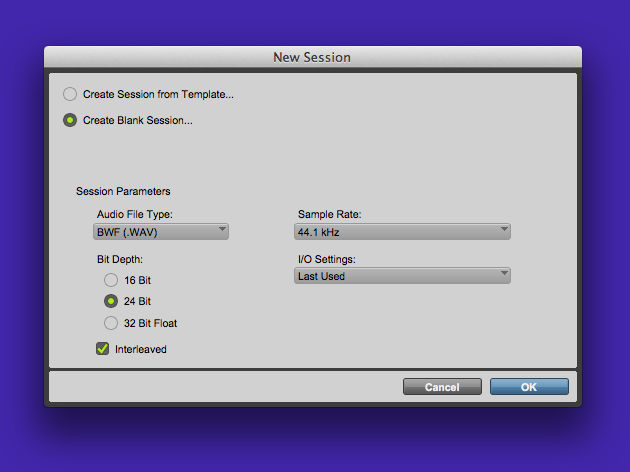
feel if you finished a great recording, and realized that you’d created it as a 16-bit session rather than a 24-bit one.
Take the time to confirm that not only is the bit-depth correct, but that the sampling rate matches your regular session settings. While it’s not a deal breaker, it will add inconvenience down the road if you accidentally record one of the songs on your album at 48 kHz while the others are at 44.1. If you’re a Pro Tools user, make sure to check the “Interleaved” box, or all your audio files will end up split left and right in the dual mono format.
Don’t forget to take notes
Most settings get saved as part of your DAW session, so you don’t have to write all settings down like they used to have to in the pre-digital days. But some things don’t get saved to your session automatically, such as what mic you used, or through which preamp, or which guitar you played, etc. If you don’t write down those bits of information somewhere — most DAWs have handy comments fields for this — it can come back to bite you.
Imagine if well after the original session, you discover a mistake that needs to be fixed on an otherwise great take. No sweat, you’ll punch it in, right? But wait, what pickup was your guitar set on, were you going through your Tube Screamer or your compressor, or both? If you write that kind of information down, either in your DAWs comments field or some sort of note program, then recreating that sound will be easy. But if you didn’t, you might not be able to get the sound to match and you’d either have to re-record the whole part, or have a note or phrase that sounds obviously “punched in.”
Get in the habit of taking notes with all your sessions. Sooner or later, you’ll be really glad you did.
Don’t lose track of your files
If you’re disorganized in how and where you save session and audio files, you’re destined to lose track of them. Try to come up with an organized file structure so that you don’t have to use your computer’s search function every time you want to find a song you previously recorded. As much as you can categorize your session files by project or client or musical style — whatever makes sense for your circumstances — the quicker it will be for you to find stuff. Also make sure that the song’s audio files always stay in the song folder along with the DAW file for the song. If they get separated, you could be screwed.
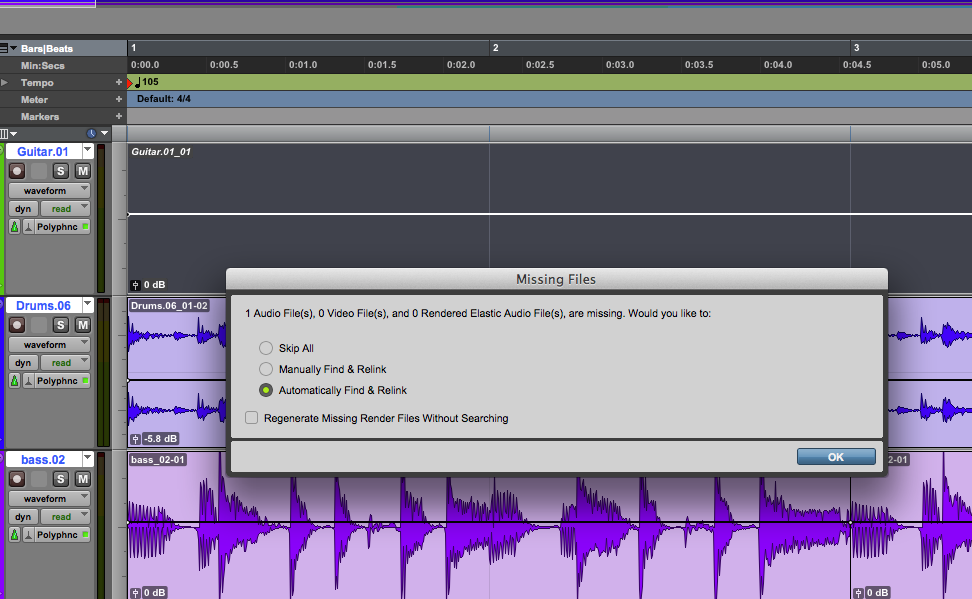
Within a session, name all your tracks before you record on them, so that the corresponding audio files have the appropriate track names on them. If you’re looking through the session file folder looking for a particular audio file at some later time, and they’re all just named “audio 11” or audio 35," you’re going to have a hard time finding what you want. Again, getting into good habits will pay dividends in the long run. And of course, always backup your session files! That’s a no brainer.