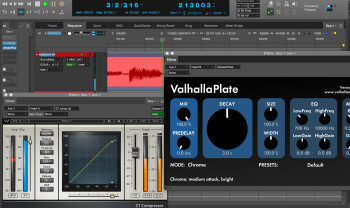
Today we'll see how to make reverb and compression work together. At first sight it might seem weird to want to compress a reverb. And yet a compressor placed before or after the reverb can prove quite useful for controlling the reverberated signal.
Pre-reverb compression
Placing a compressor before the reverb is common practice when you want to smooth out a reverb whose response to transients is a bit too aggressive and invasive. This usually happens when the signal feeding the reverb already shows these qualities. Consequently, reverberated transients have the annoying tendency to mess up the original transients and “soften” the overall sound.
As you have probably figured out by now, this phenomenon applies mainly to percussive instruments (drums, percussion, etc.), but not only. In fact, a slap bass line, heavy-handed piano strokes and even an aggressive rap vocal can often be affected by a reverb that’s too sensitive to transients. In short, if you notice a loss of punch after the signal has gone through the reverb, you might want to resort to this trick.
And it’s pretty easy to implement! On the reverb aux bus, insert a compressor right before the reverb plug-in. Now, dial in the compressor as follows: Threshold low enough so the compression is triggered by the slightest transient, Ratio between 6:1 and 10:1 to really rein them in, short Attack and Release times to limit the action of the compressor to the peaks, and, finally, no Make-up Gain, since your goal here is not to increase the level.
With these settings, all transients present in the signal feeding the reverb will be considerably attenuated, making the reverb smoother. In other words, the reverb won’t interfere with the source signal, leaving its punch intact and making the overall sound more precise.
And you could always make your life easier and replace the compressor with a transient processor. In this case you would only need to reduce the transients with the appropriate knob to achieve the same result. And the beauty of it is that the attenuation doesn’t depend in any way on the level of the signals sent to the reverb. Hence, if you were to increase or decrease the send level of a track feeding the aux bus, you wouldn’t need to rack your brains thinking how it affects the pre-reverb dynamics processing, something inevitable when you use a compressor, and which will force you to review the threshold level.
But despite that, I personally prefer using a compressor because I have control over the release time, which is a true groove machine! I often find myself playing with this time constant more than reason dictates whenever I use the trick described above. Why? Because not only do I want to make the transients disappear from my reverb, I also want to give the latter a vague sense of rhythm to punctuate the groove.
Next week we’ll discuss the use of post-reverb compression.


