In the previous article we saw how multiband compression can be used at the mixing stage. Today I'll show you how to dial in a multiband compressor to get the best results.
Frequency is the key
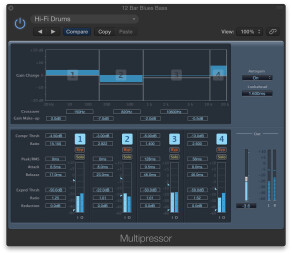
In order to correctly set a multiband compressor, it’s crucial to know your real needs, so you can split the bands accordingly. Indeed, the correct splitting of frequency bands is key to successful multiband compression. This kind of processor usually offers the possibility to solo each band to listen to it separately. I cannot recommend enough that you use this feature to fine tune the frequency zones you want to target. On the other hand, in keeping with the less-is-more ethos, I encourage you to use as few bands as possible. This will spare you lots of headaches and disappointments.
Once you’re done with this splitting, the procedure to adjust the compression of each band doesn’t differ from what we’ve seen in the previous article. Do note, however, that there are a couple of things you should bear in mind to get a transparent result.
First, it’s better to avoid completely disparate settings from one band to the next, or you risk completely distorting the source signal. The most sensitive parameters are ratio and threshold, as well as release time. The attack time is the one parameter where you have more leeway.
By the way, the fact that you split the frequency range in several bands doesn’t mean they all need to be compressed! If you recall the example in the previous article regarding the sibilance in vocals, the frequency range was divided into three bands, but the only band being compressed was the one where the sibilant energy was concentrated. Once you’re done with multiband compression, you’ll have plenty of time to process the whole track with a full-range compressor. So, in short: Use multiband compression to achieve particular results in specific frequency ranges, no more and no less.
Finally, once you have finished compressing all the bands that require it, take another look at your frequency divisions. It might be that the corner frequencies of the bands aren’t exactly right. If that’s the case and the plug-in you’re using offers different crossover slopes, try tinkering with them. Otherwise, experiment a little with shifting the boundaries of your frequency bands. The goal is to get results that are as transparent as possible. I know there’s no science to this approach, but unfortunately groping is the only way to go, since it all depends on the source signal.
And that’s it for today. Next week we’ll close this chapter dedicated to compression with a list of plug-ins and their potential uses.


