

You may have already utilized the editing features in your DAW to make vocal comps and move individual words or lines around in time, but you can also use them to get rid of, or minimize, the sonic glitches that are typically found on vocal tracks.
This article will focus on techniques for getting rid of several of the most common of these problems.
Pop Goes the Vocal
Let’s start with a big one: plosives, which are popped consonant sounds like “p”, “b”, and “t”. You can help reduce the instance and severity of these by using a pop filter when you’re recording the vocal, but even so, some loud plosives may still be captured along with your vocal track. They’re even more apparent in a spoken-word track, where there’s no music to mask them, but either way they’re unpleasant sounding and it’s best to deal with them.
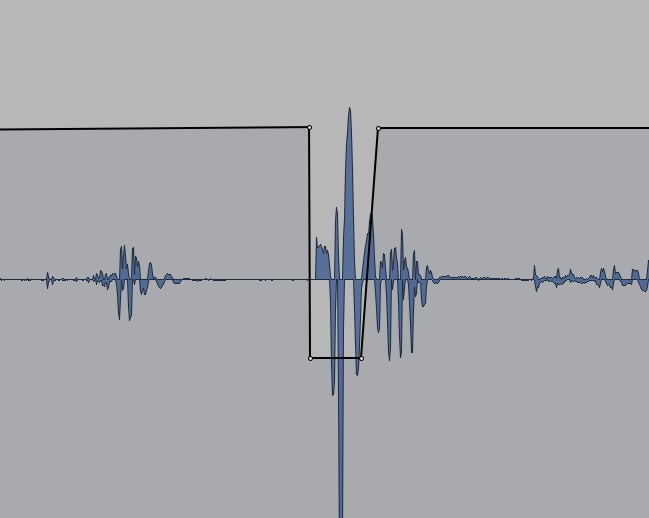 Here’s a popped “p” sound in a vocal track that’s been treated by reducing the volume of the plosive with automation.
|
In your DAW, find the plosive in the track waveform display, which you can do by zooming in around the area where you hear it, until you see it. Plosive waveforms have a pretty distinctive look, which you’ll learn to spot quickly.
Audition your selection, to make sure you only chose the audio that you want to reduce. You typically don’t want to remove the plosive entirely, because those sounds are part of the words, you just don’t want them in the exaggerated form in which they were recorded. For instance, if you have the word “please”, and remove the plosive “p” entirely, you’ll end up with a word that sounds like “leez.” (See below the video “Reducing Plosives” to watch the reduction techniques demonstrated.)
So the trick is to reduce, rather than completely eliminate the plosive sound. A good way is to use volume automation to lower the level of the offending event. You’ll have to experiment with how much, but I find that a cut of between 8 to 12 dB usually does the trick. Experiment, and see what sounds most natural. Sometimes, you’ll find it sounds better to angle the automation lines a tiny bit going into and out of the part you’re reducing. In essence, you’re creating a small fade out and in around the volume change.
Take a Deep Breath
You may also want to minimize breaths from between sung or spoken lines. It’s best to make that determination after you have the compression set for the track, because a compressor can exaggerate the breath sounds.
A lot of producers will tell you that a vocal sounds more natural with the breaths left in, to some degree, but if they seem overly loud, go through them one at a time, selecting and reducing them with your volume automation.
The Little Things
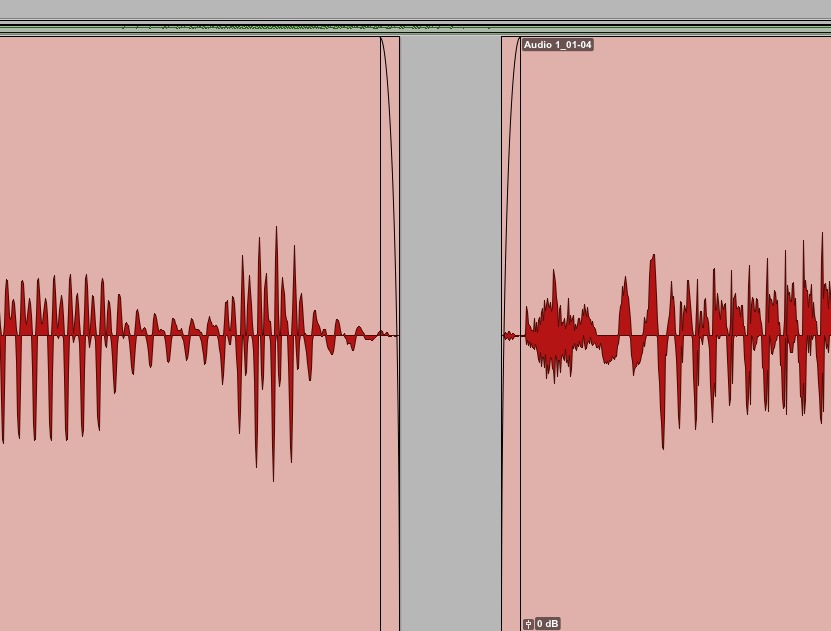 If you cut out a glitchy event from a track, make sure to add fades at its boundaries, as shown here, so that you don’t introduce clicks.
|
The strategy is different with mouth clicks, coughs, and other extraneous noises. These, you want to completely get rid of. Again, zoom in and find them in the waveform display, select the sound you want to cut, and then either use your volume automation to turn it all the way off, or actually cut the offending portion out. If you’re cutting, make sure to add short fades to the boundaries of the waveforms around the cuts, to avoid creating clicks, which can sometimes occur at edit points.