

Your DAW is a powerful piece of software, and the more you can take advantage of its capabilities, the better your results will be. In this article, we offer up an assortment of DAW-related tips to help you get the most from the tracking process.
Set your buffer low
Every DAW has an audio buffer setting, which determines the length of time that’s allotted to process incoming audio. To reduce the distracting latency delay when you’re recording, you want to set the buffer as low as possible. But unfortunately it’s not simply a matter of setting the smallest buffer size you can. The corollary to “smaller buffer means lower latency” is “smaller buffer means more strain on your CPU.”
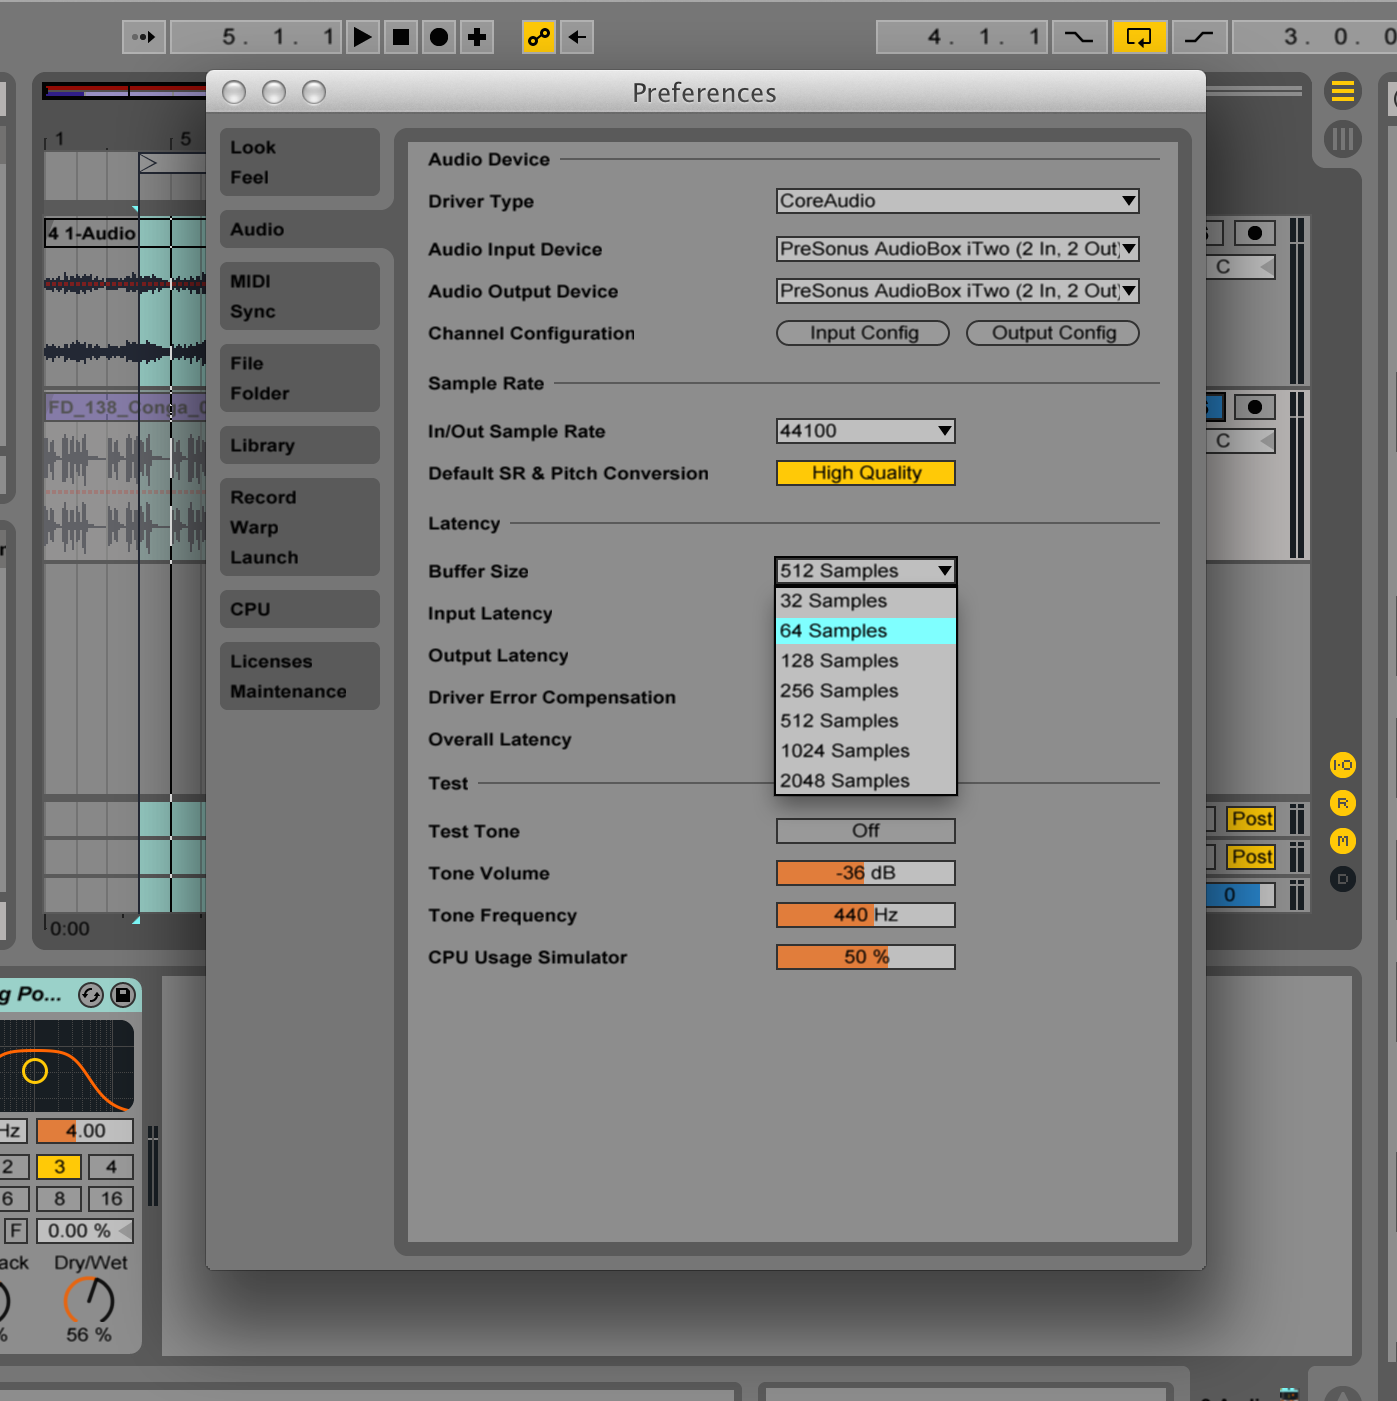
Why? Because processing the audio more quickly makes your computer work harder. So a buffer set too small can result in pops, clicks, and other nasty sounding audio artifacts. So for tracking, you’ll want to find as low as setting as possible where the audio still sounds good (conversely, when mixing, where latency isn’t an issue, you can set your buffer really high).
If your audio interface has a low-latency monitoring feature, it’s usually best to use that. Just be aware that you won’t be able to monitor with your DAW’s effects, because in a low-latency monitoring (aka “hardware monitoring”) setup, you’re hearing your input signal before it gets converted to digital and sent to the computer.
Allow enough headroom to avoid distortion

Anyone who was recording before 24-bit audio came into being — and especially those who recorded to tape — likely still think that it’s important to get as loud a level as possible without clipping, in order to get the best quality audio. But in fact, the signal-to-noise ratio on a 24-bit system is much higher (which means better) then it is with 16-bit recording — and way better than with tape.
You can safely record at about –20 dB with peaks around –8 or –10 dB, without losing quality. Those 8 to10 dB of headroom, between your loudest recorded signal and 0 dB, allow you to record without having to worry about going over 0 dB, which would result in clipping. For more on this subject, read Why Headroom is Important.
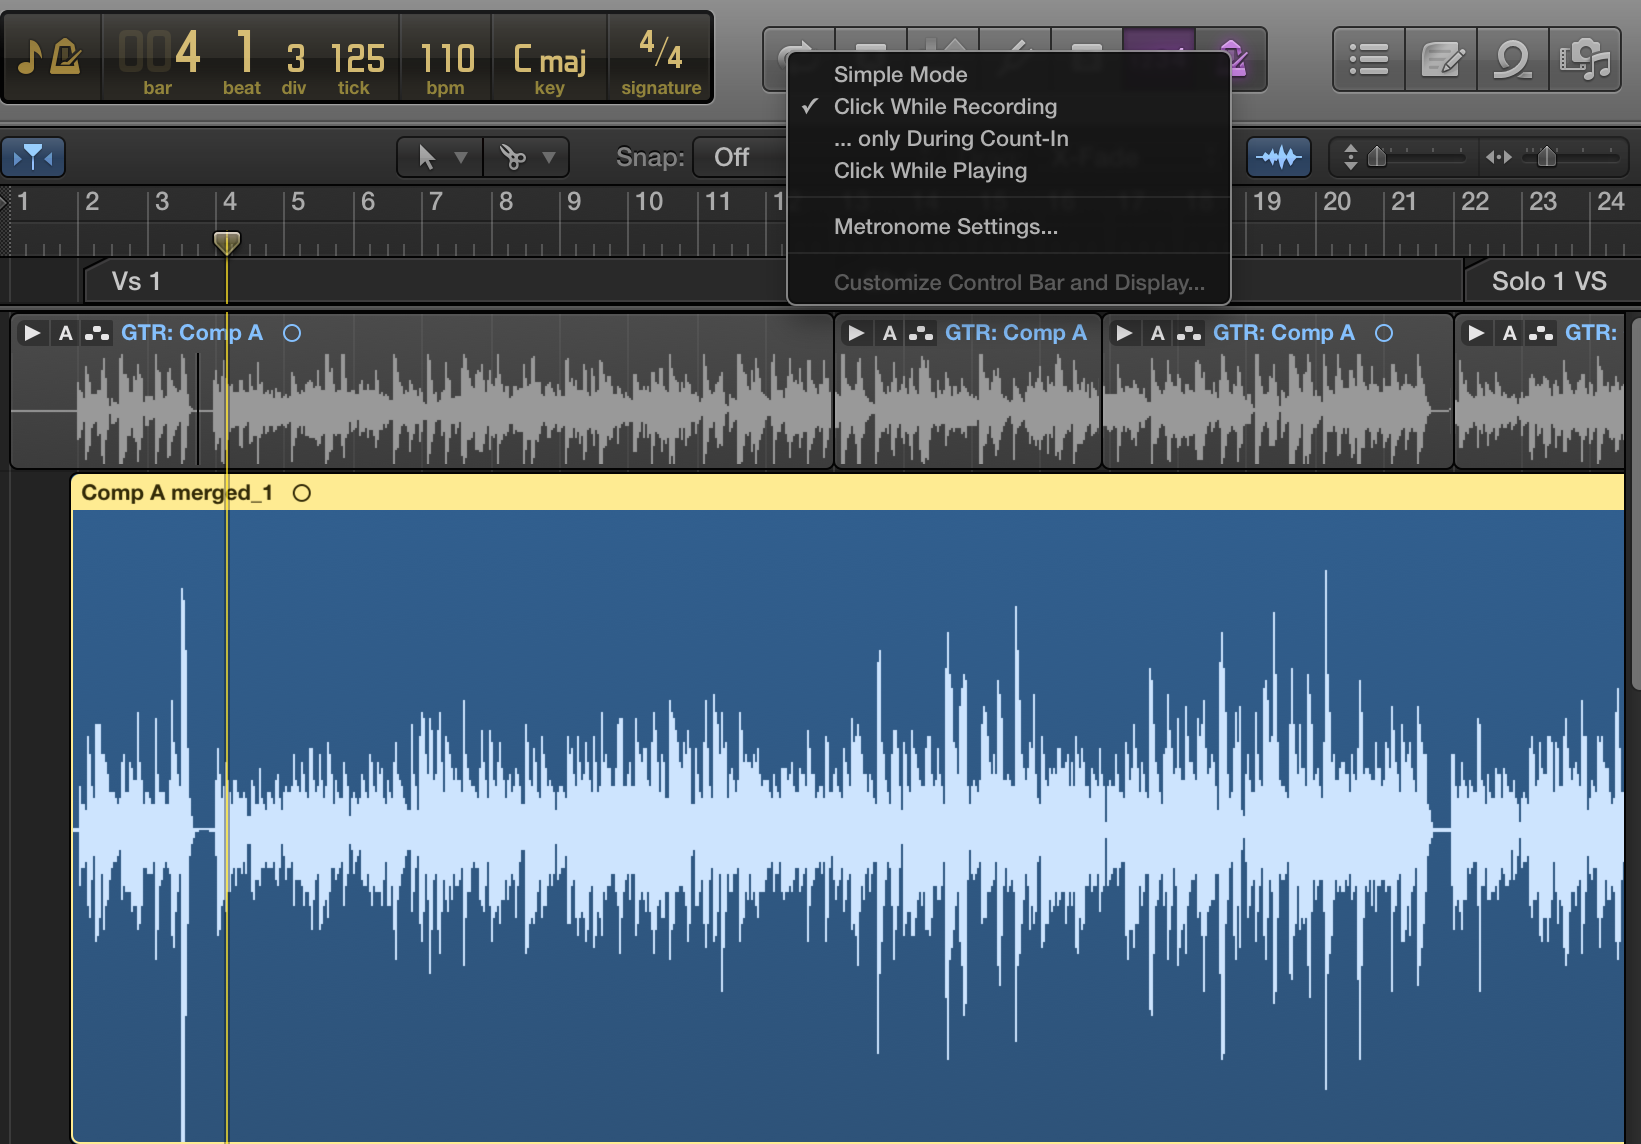
Record to a click
It takes some getting used to playing to a click, as it constrains a musician’s natural tendency to push and pull the tempo. But with a little practice you can get used to it, and the benefits are plentiful. For one thing, a song played to a click is much easier to edit. You could, say, replace verse 3 with verse 2, if it was played better, or move the bridge from after chorus 2 to after chorus 3, etc. This can all be done after the fact, and the cut-up sections will usually flow together naturally because they’re at the same tempo.
If you want to quantize MIDI or audio parts (assuming your DAW has audio-quantizing features), you can’t do it unless you recorded to a click. Why? Because quantizing entails conforming the notes to a grid. If there’s no fixed tempo, the music won’t correspond to the grid lines, making quantizing impossible.
As you’ll see in the next tip, there are scenarios where it’s helpful to use a repeating drum loop instead of a metronome sound when you’re tracking prior to adding a drum loop part. Another advantage to using a loop for your click is that it can help players relax whereas a harsh metronome sound can make them uptight. Some musicians think they can’t play to a click (and, in fact some can’t, at least without practice), but if they can, it will be very helpful to the production.
If you want to get crazy, you could use the tempo map feature in your DAW to program a custom click that speeds up or slows down slightly in certain parts of the song to try to imitate the natural tendency to push or pull tempo.
When possible, record to the groove
When you’re tracking with a drummer, your guitar, bass, keyboard, or other instrument playing will naturally fall into the groove he or she is laying down. But be wary in situations where there’s no live drummer, you’re recording to a click and you plan to add a looped drum part later on in the production. The natural assumption is that since you’re recording to a click, everything will sound locked once you add loops at the same tempo. In fact, that’s often not the case. Unless you’re creating music that’s totally quantized, when you add drum loops or MIDI drums after the other instruments, it can feel like something’s not quite right — not locked in
Drum loops for rock, country, blues, and other non-electronic music styles that were played by a real drummer generally aren’t quantized, although they are recorded at a constant tempo. As a result, the parts may be a little behind or ahead of the beat in places (not enough to be out of time, we’re talking subtle “feel” stuff here), but enough to make your previously recorded parts sound like they’re not “in the pocket.”
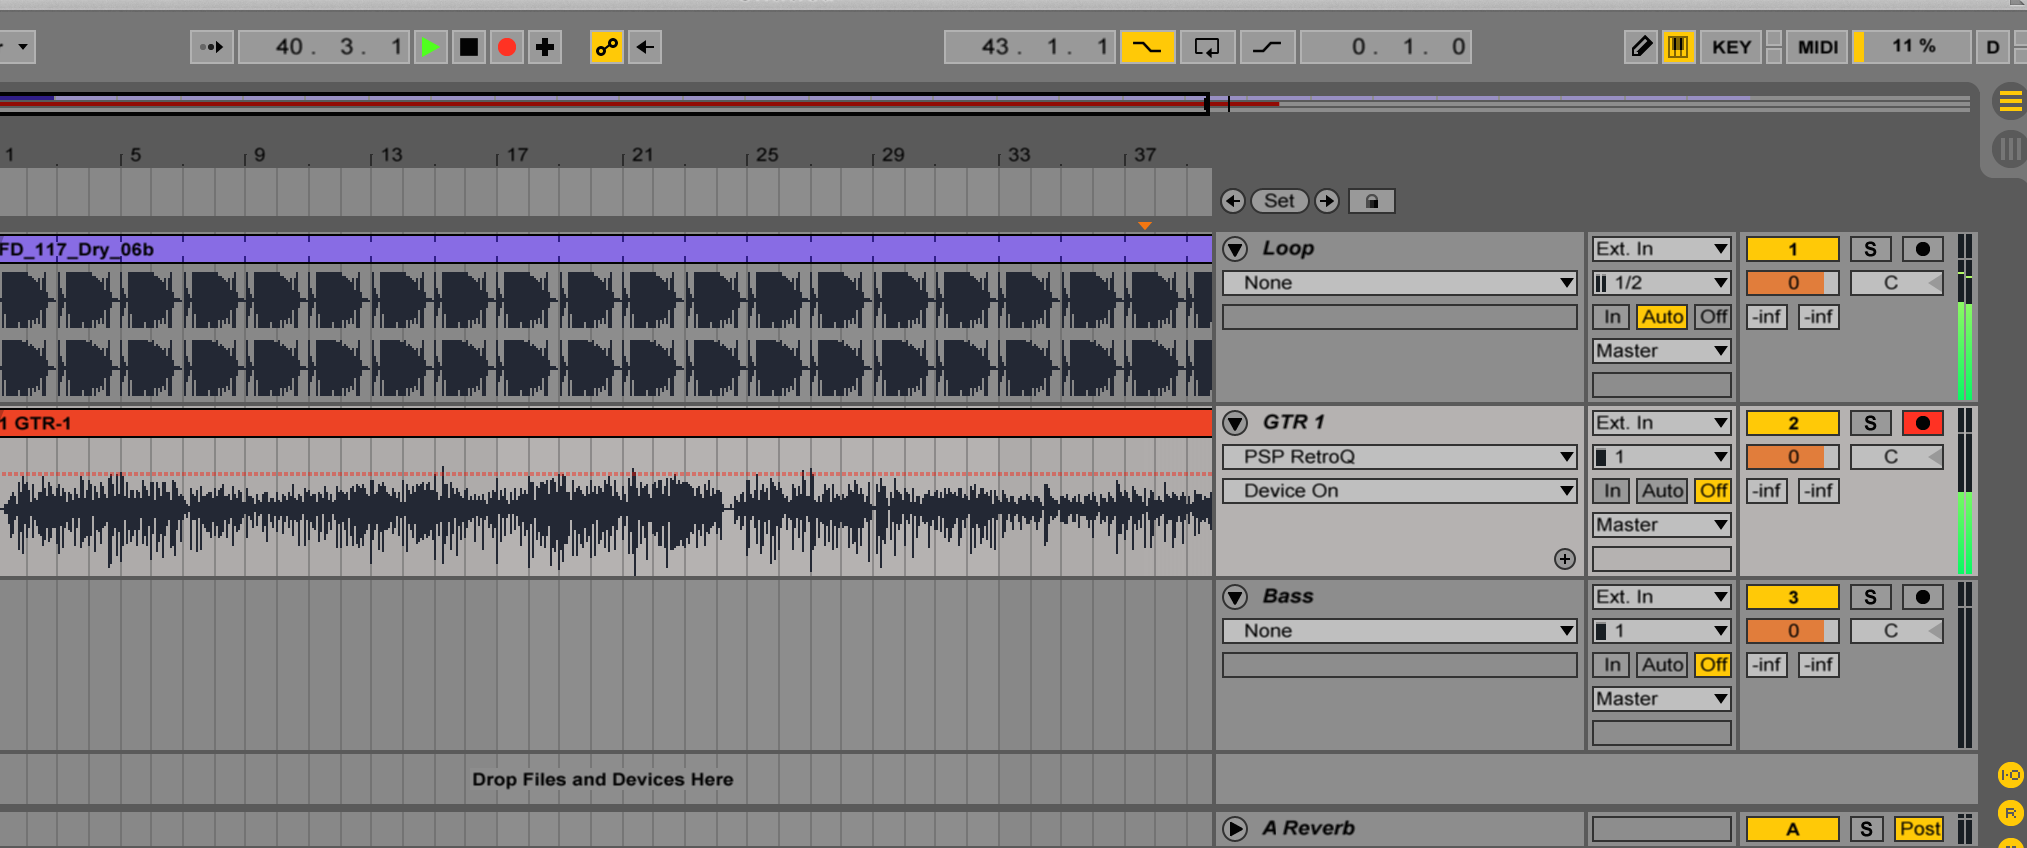
The way to avoid this is to figure out in advance what the basic drum groove will be (do a little pre-production, if necessary, and experiment with different loops and feels), and then use the loop (audio or MIDI) that will be the main groove of your song as a substitute for the click. Paste it into a track, make sure you’ve adjusted it’s tempo to match your DAW tempo or vice versa, and then duplicate it enough times so that it will play beyond the end of your song. Now you can track to it — and fill in the rest of the drum-loop part later — and you’ll find your instrument parts will sit a lot better with the drums, and the whole song will sound a lot more natural.
Take advantage of auto-punch
Especially when you’re recording by yourself, your DAW’s auto-punch feature (which could be called “auto drop” or some other variation) can be your best friend. It allows you to set super precise in an out points, so that you can record over mistakes seamlessly, while using both hands to play your instrument.
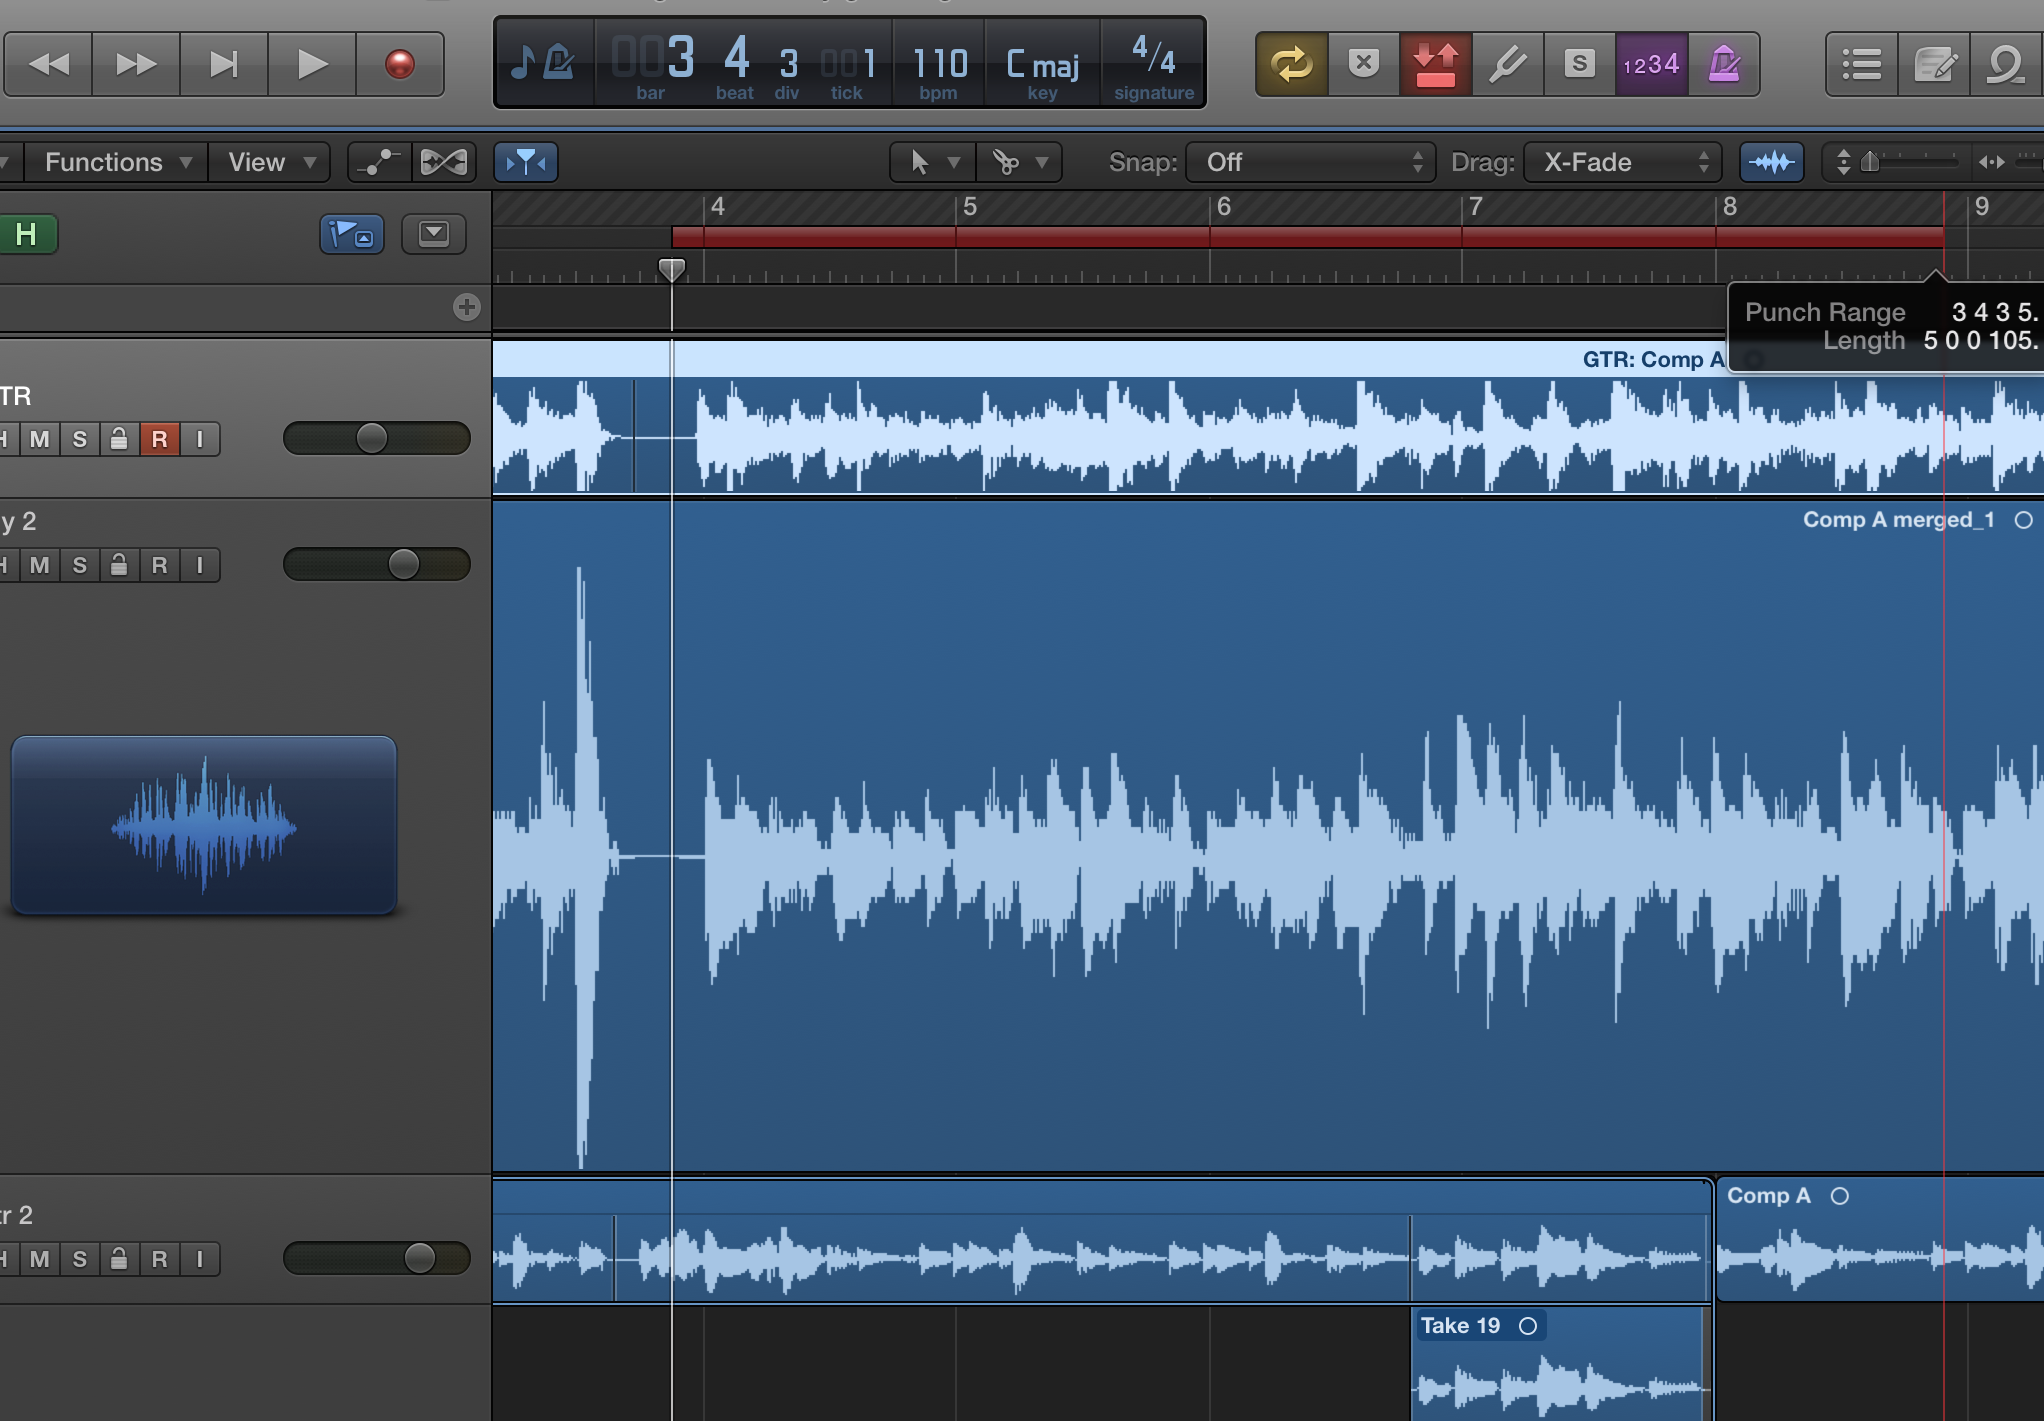
A few tips when using auto-punch. First, it’s best to punch in and out where there’s a tiny bit of space, or, if possible, at the beginning and end of a phrase. You never want to punch in to replace part of a sustaining note, because the transition will almost never sound natural. If you zoom in enough on the waveform display of your track, you can generally find spaces for setting your auto-punch boundaries.
Make sure you have a couple of bars of pre-roll set so that you hear enough to feel the tempo before the punch-in point (plus you’ll need time to get your hand off the record button on the computer keyboard and to your instrument before the punch happens. A couple of measures of pre-roll is usually enough, but sometimes you’ll want to set a longer duration. It also helps to play your instrument (or sing your vocal), along with the pre-roll, to make sure the transition from the previously recorded part to the punched-in part is as natural as possible, especially if there’s a slight ringover at punch point. In many cases, you’ll want to add short crossfades to the left and right boundaries of the punched in section, to further smooth it out.
Name your tracks before recording on them
Typically, your DAW will create a file name for the file created each time you stop and start recording in that track, based on the track’s name. So it’s useful to name each track before you start recording on it. If you don’t, you’ll look in your audio bin later, and the files will all have names like “Audio 1_01”, “Audio 2_05”, “Audio 7_03”, or something like that (see image A below).

If you’re bouncing or exporting individual tracks out of the session, or just trying to find a particular track later, it’s going to be very confusing. But if you name your tracks first, you’ll get files like “Rhythm guitar_01”, “Bass_09”, or “Lead vocal_25”, which will make searching for particular files in your audio bin a lot easier (see image B).