
Time for the third installment of the Mixing Rap Vocals series: Compression.

Compression is a difficult subject because there is a lot you can do with it. So let’s look at the main reasons to grab a compressor before getting into some of the more intricate uses.
Quick Macro-Dynamic Control
Macro dynamics refer to words and phrases. These are the clear dynamics you can hear as “this part is louder, that part is softer.” The most transparent way to get things sounding even is to actually automate the vocals manually. But sometimes time doesn’t allow for this approach. So if you aren’t automating, a light ratio, slow attack, slow release, just catching the louder moments with the threshold is a good way to even things out.
Micro-Dynamic Control
What volume automation might not catch is the very quick dynamic changes – loose spikes at the fronts of words. These spikes aren’t heard so much as “volume” but more as an overall quality to the vocal.
The issue with these spikes is two fold – first, they eat away at your headroom pretty quickly– second, they will trigger any compressors you are trying to use for purposes besides micro-dynamic control.
Getting a Vocal to Stay Audible Through a Mix
The power of compression is that you can make something louder while not actually raising the peak volume of the signal. This becomes extremely useful for making something cut through a dense mix or to come forward. This is probably where the majority of compression work for rap vocals come in.
Rap is generally an in-your-face, visceral style of music. The kick is physical, the snare is physical, subtlety isn’t really the overall goal. And the vocals are paramount. I’ve mixed a number of rap records where the vocals are lower in the mix, but never have I thought it was a good idea. Generally I want the vocals to be equally as strong as the drums or stronger, and I want them as “forward” as possible. Compression is usually a part of that equation.
Optical Compressors
The smoothest way to get those vocals forward is through optical compression. The rounding quality of the attack and the unique shape of the knee in an optical compressor makes them ideal for vocal work. Examples of optical compressors would be the CL1B, the LA2A, LA3A, your stock Logic compressor has an optical mode, RComp has an optical mode – and don’t quote me on this but RVox has an “optical” sound to it, as does the “smooth” setting on the UBK-1. One of the advantages to opticals is that they tend to have easy access. Many have just one knob to control the degree of compression.
Attack and Release Time
Of course you’re not limited to simply optical compressors or fixed time settings. Many other compressors work very well for rap vocals – in fact, any decent compressor can yield great results if set properly. The key is setting the attack and release times appropriately. People will suggest milliseconds or time ratings for the best attack and release for vocals but the issue is that 300ms on one compressor might give you the same results at 75ms on another. So, I’d rather advise your compression technique based on the expected results. Your goal is to pull up as much of the “sustain” of the voice – the weight of it – while minimally affecting the articulation. Taking notes? – It’s about to get heavy.
When dealing with the articulation of the words, you’re primarily gauging your attack time. There’s generally a substantial range of attack speeds that work for vocals. What you don’t want to do is set the attack too short, or the shaping of consonants will be blurred. Nor do you want to set the attack too long, because you’ll allow the consonants to poke through too hard. So you want to find a middle ground. A good way to experiment is to temporarily pull the threshold down a little farther than you normally would and find your attack setting that way, as the effect of the attack time will be more exposed with the lower threshold.
With the release time, my goal is to pull up as much of the body of the voice as possible. So I’m going to set the release on the faster side. I don’t want the voice to distort or become unnatural sounding, but I want as much body as possible before I get to that point.
In terms of both the compressor ratio, and the release time, I tend to be a little more aggressive with rap vocals than “softer” music. The “integrity” of the vocal sound is not really as important as the prominence of it. For a more relaxed, natural sound I might do a medium release and 3:1 or 4:1 ratio. For a rap vocal I’m going for a pretty quick release, and I’m doing 4:1 up to 8:1. Rap isn’t really supposed to be “pretty”, so I don’t worry if the compression becomes a bit audible.
Thicker Vocals
Another great use for compression on vocals is to make the vocal sound thicker – particularly in rap. Rap is frequently recorded in home studios, even by big name artists. And home studios rarely produce the thick, full vocal sound that one can get at a professional facility. So being able to thicken and give weight to a vocal is an extremely important skill. In order to do it right though, you need a little more than compression. You need an EQ to make sure the vocal is as even and smooth as possible. Then you need some “saturation”. Saturation is just a nice name for friendly distortion. Saturation moves and enhances the harmonics of the vocal. Over saturating will sound like crud, but just the right amount gives the impression of a richer sound.
So the formula is – get the vocals sounding clean, saturate to get the vocal sounding richer, and compress that signal. You have to tread carefully though as over EQ’ing, over saturating, or over compressing will make your vocals sound horrible. Unless you do all of that in parallel!
Parallel Compression
The advantage here is that you can get really liberal with the effects, and just blend it in to where it doesn’t sound unnatural. This is great is you are trying to fill-out frequencies that weren’t really there in the original recording, because you can really saturate and compress the parallel signal and generate some very consistent dense harmonics. Then just blend that in until just before it starts to sound too effected. One of the reasons I really like the UBK-1 for vocals is because it gives you a saturation stage followed by a compression stage and the ability to blend both in parallel.
Distortion Free Equalization
Lastly, compression can be used to tame frequencies without the artifacts from EQ. Often with vocals you’ll have moments where the vocalist changes their tone. A common example is vocalists will often become more midrangy as they project because they tighten their neck and push more air through their nose. If you simply notch out some midrange – that might work, but it might also take away some of the energy of the overall performance, or some of the frequency information you need to make the vocal stand out.
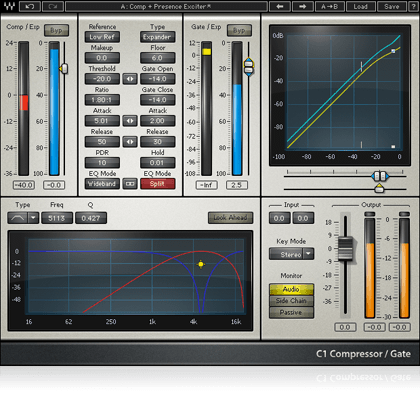
A good alternative is to use a compressor with either an adjustable side chain, or an external side chain input. The side chain signal is what the compressor reacts to – so if you can EQ the side chain to target problematic frequency areas, the compressor will “intelligently” react to those tones and pull them down.
Conclusion
Compression is a powerful tool that many people struggle to fully understand, so try to get your hands on one and start experimenting. As always I’ll keep an eye on the comments in case there is anything that needs clearing up. I also encourage you to share your own compression tips!
For more articles on audio recording, mixing, and production visit The Pro Audio Files.
Matthew Weiss is the head engineer for Studio E, located in Philadelphia, PA. Recent credits include Ronnie Spector, Uri Caine, Royce Da 5'9", and Philadelphia Slick.
