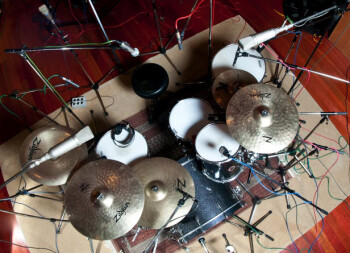
This installment is the last one dedicated to overheads. Yes, I know four articles discussing that topic exclusively seems like a lot. But I insist, the overall result of a drum kit recording depends largely on the overheads, so it makes sense to take all necessary precautions, doesn't it? Here is some last advice to help you on the quest to getting the perfect drum sound.
Game Over
For starters, a word on mic selection. The overhead track ought to cover a pretty wide frequency spectrum, from the low frequencies of the kick to the brilliance of the cymbals. Condenser mics are particularly well suited for such tasks. But do note that some of these mics can be a bit aggressive in the high end. So choose those which are smoother in the highs or you risk perforating the eardrums of your listeners with every cymbal hit.
Next, remember that none of the stereo miking techniques for overheads we’ve been reviewing in the last couple of weeks is better than the other. It all depends on the context, as usual. So you should choose the technique best suited to the current situation at any given time.
Furthermore, depending on the size of the kit, you won’t always have a lot of freedom regarding the placement of the mics. This is something you should take into consideration when taking your pick.
On the other hand, another very important thing to consider when placing the mics is the drummer and, more specifically, how he or she will play the song you are about to record. Whether he/she is aggressive in terms of cymbal playing or his/her hitting of the snare isn’t too powerful or if the ride plays a very prominent role in the song, because you will need to adapt the placement of the mics according to that.
Finally, the best advice I can give – as weird as it sounds – is the following: don’t listen you your eyes! I have met several people that place the mics with the eyes rather than the ears. They apply a formula, but the results seldom meet their expectations. The truth is there are no formulas. Every situation is different and you will need to adapt correspondingly. The best way to get it right is to listen to your ears. But the idea is not to listen to the drummer bang the hell out of the kit while you are in the same room as he/she is. You need to hear the sound recorded. If you are lucky enough to have a “control room, ” that’s where you’ll need to do this. And don’t hesitate going back and forth between the control room and the live room in order to move the mics and hear the results.
If you don’t have a control room, you can always make a couple of short test recordings and listen to the result without being perturbed by the sound of the drums playing right next to you. It will take you more time, granted, but it’s definitely worth it. Trust me!
Join me next time for an episode dedicated exclusively to the snare drum.


