Log in
Log in

or
Create an account

or
Tutorial

Tips for Recording Woodwinds

By moosers on 01/03/2010 - (Anyone)

Introduction

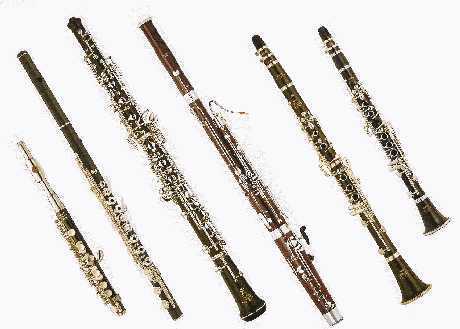
Woodwind instruments can be some of the toughest instruments to record, and although most modern day engineers won't find themselves recording them all the time, knowing how and being prepared is a good idea.  The following tutorial hopes to give those with little experience recording woodwinds a solid basis to work off of...

Step 1

There isn't any one approach that will work universally when doing any sort of recording, and this is especially true for recording woodwinds.  There are all sorts of woodwind instruments, many of which are very different and may require completely different approaches.  It is a good idea to take a fresh approach to recording these instruments as they are generally unlike recording rock or pop instruments.  As we go through some of the different instruments, please try to keep this in mind!

Step 2

The first instrument that I would like to discuss is the saxophone.  This is probably the most recorded woodwind instrument for engineers who mostly record rock and pop music like myself since it crosses over more than most other woodwinds.  Of course there are many different types of saxophones, each of which should require a new line of thinking, but there are a few basic ideas we can talk about relating to all saxophones.  I generally take the approach of placing either a dynamic or condenser microphone by the bell of the instrument, which gets you an up close and personal account of the sax.  When to use a dynamic mic and when to use a condenser is totally up to you, as both will produce varying tone; it just depends on the type of sound you're going for.  If the sax parts are driving and rhythmic I tend to use a dynamic mic, while if the part is more melodic I'll probably use a condenser.  While you may not always know off the bat what type of part the player will be playing, keep in mind that you can always communicate with them before hand to get a better idea of the type of sound they're going for!

Step 3

The next instrument I'd like to say a few words about is the clarinet.  I find that recording clarinet is a lot trickier than the saxophone because the sound isn't directed in one area.  Rather, it comes out of the sides of the instrument as much as it does the bell.  While this is true of the saxophone as well, it is on a different scale with the clarinet.  For this reason I almost always use more than one microphone to capture the sound of the clarinet.  Again, there are different types of clarinets, but for the standard size Bb clarinet, using two or three microphones seems to get me a fuller sound than a single mic.  I almost always use condenser microphones for clarinet as I'm usually looking for as much clarity as possible with this instrument...

Step 4

Another popular woodwind instrument that I haven't recorded as much as the clarinet or saxophone is the oboe.  The oboe is a very interesting instrument that can be recorded using a variety of different approaches.  However, I tend to use the same starting point for the oboe as I do the clarinet.  However, one main difference between the two that I try to keep in mind is the type of parts that they generally play.  This really will dictate the overall approach that I take, as often I find that the oboe part is more airy than the clarinet and therefore I will place the microphone or mics a bit further away to give it some more room to breath...

Step 5

Lastly, I'd like to focus on maybe my favorite woodwind instrument, the bassoon.  Like the oboe, the bassoon is a double reed instrument which produces an extremely unique sound.  Although it maybe one of my favorites to listen to, it is not one of my favorites to record as it is probably the hardest in the woodwind family.  The reason for this is because of how large the instrument is and because the sound comes from so many different places.  However, once you find the sweet spot I think you'll really enjoy capturing this elusive instrument, and there is definitely a sweet spot in terms of mic placement!

Conclusion

Like with all of my tutorials, I try to encourage those of you reading this to try to use this as a guideline and a starting point rather than any kind of rule.  There are an endless amount of approaches you can take, all of which are just as valid as mine.  Remember to experiment and have fun!
Be the first to post a comment about this tutorial

    Would you like to comment this tutorial?

    Log in
    Become a member