
Introduction
Need a drummer but don't have one? Session Drummer 2 is your answer. Session Drummer 2 is a drum sample playback synth and is included in Sonar 6 Producer Edition and Sonar 7 Producer and Studio Editions. With it, you can add professionally recorded drum patterns or even create your own. It can be a powerful tool to use and can add that crucial element to your mix. This tutorial will provide basic instruction to use Session Drummer 2.Step 1
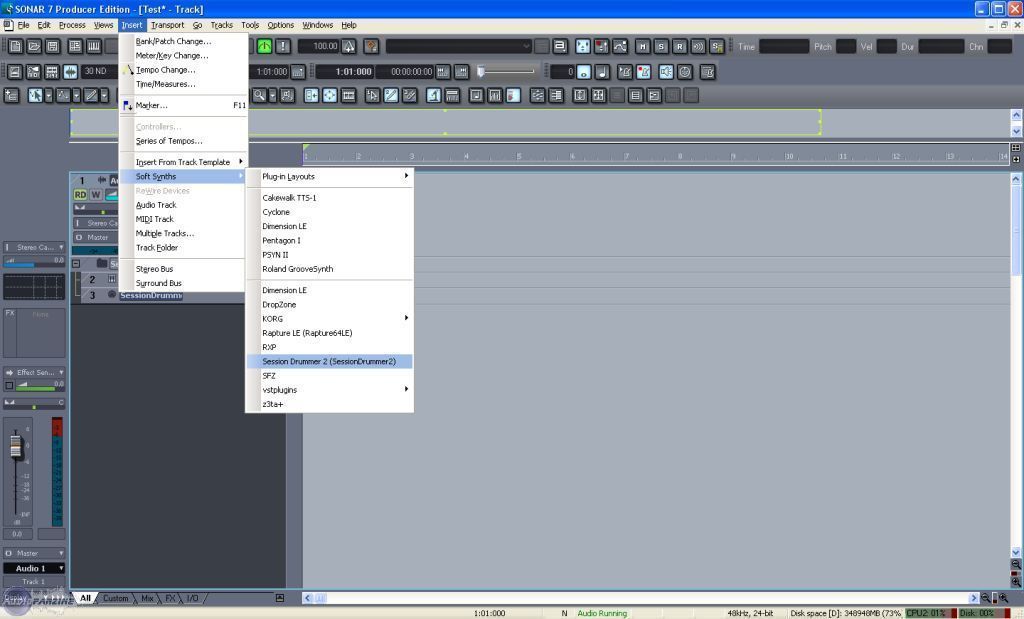
a) Open Sonar 7 and create a new project.
b) Click on Insert > Soft Synths > Session Drummer 2 (SessionDrummer2).
c) When the Insert Soft Synth Options Window appears, click OK. A new track folder will be created for Session Drummer 2. It will contain an audio track and a midi track.
Step 2
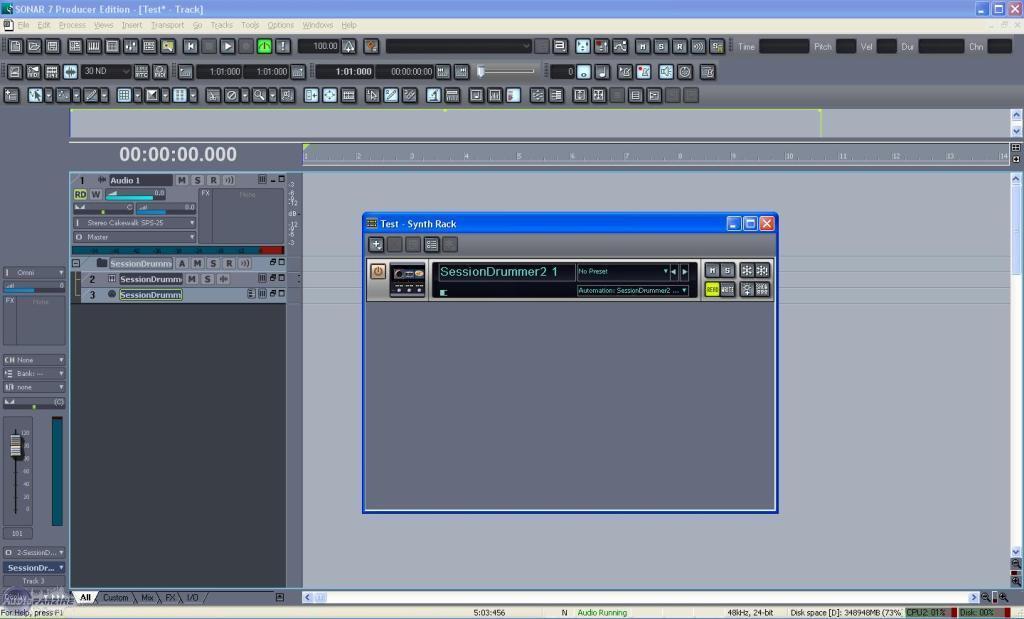
a) Open the Synth Rack. This is done by either clicking on Views > Synth Rack, or by using the default shortcut "Alt + 8". It will show that the soft synth is already inserted.
b) Double click on the Session Drummer 2 icon on the left side of the synth rack.
Step 3
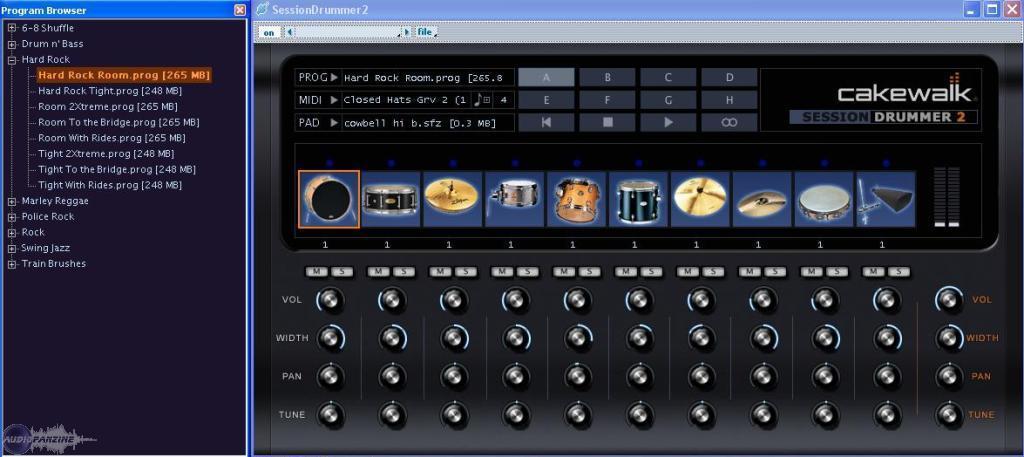
At the upper left corner of the Session Drummer 2 window, there are three menus.
The PROG (also called Program) menu is where the type of drum set is selected.
The MIDI menu is where the drum patterns are selected.
The PAD menu is where the individual drum sounds can be changed.
Click on New Program to open the Program Browser and select the drum set of preference by double clicking on the program. The drum set will now load into Session Drummer 2.
Step 4

To the right of the menus is a 3x4 grid. The bottom row contains buttons to Rewind, Stop, Play and Loop. Letters A through H contain different patterns and fills. Click on one of the letters and then click Play. The assigned pattern will play once. Click on Loop if you want the pattern to loop.
To change the Midi patterns, click on the letter of the pattern you want to change, then click MIDI > Load Pattern to open the Load MIDI Pattern window. You can search the folders for different patterns. To open one, click on the fill or groove file you want, then click Open.
Step 5

Directly below the menus and grid is a series of ten pictures, called pads, each representing a part of the drum set, followed by an audio meter. If you click on one of the pads, that drum will sound. The audio meter will show the volume of the pads as they are played.
To choose a different pad, click on the one you want to change then click PAD > Load Instrumet. A Load Instrument window will appear where you can search the folders for a replacement drum sound. Click on the instrument file then click Open.
Step 6
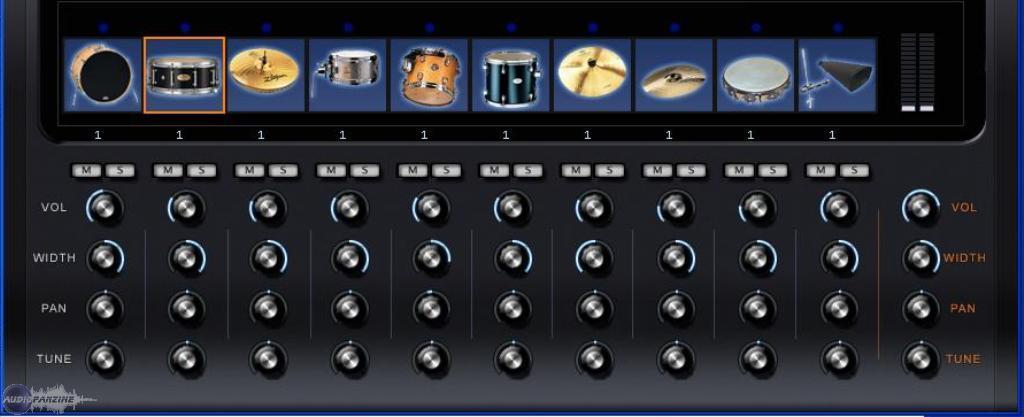
The bottom half of the Session Drummer 2 window displays the mixer controls. Here, you can change the Volume, Width, Pan, and Tune of each individual pad. To the far right directly below the audio meter are the Master Controls where you can change parameters for the entire program.
To adjust parameters for a pad, click and hold the knob you want to adjust, then drag the mouse up or down to your liking.
There are also controls to mute or solo individual pads. Beneath the pad, click on either M to mute or S to solo.
Conclusion
With the basics of Session Drummer 2 explained, you can now experiment with different sounds and patterns. There is more to learn, so another tutorial will be added soon which will explain adding the patterns to your project, along with other tips. So keep an eye out for Part 2.Did you find this tutorial helpful?00
Be the first to post a comment about this tutorial
View also...


