In part 1 we looked at different ways to setup your gear for an A/B comparison. This time, we’ll offer some suggestions for specific aspects to focus on during your referencing session.
Apples and apples
Before going into those specifics, let’s talk a little about choosing a reference song (or songs). You want to find a song that’s in the same genre to the song you’re mixing, and has a similar feel and instrumentation. The more like your song it is, the easier it will be for you to compare. In other words, you want to compare apples to apples.
For example, let’s say your mix has a drum part that’s played on brushes. You most likely would want to choose a reference song where the drummer was using brushes, as well, because the sound of the drums, and of the rhythm section in general, will be different than if the drummer was using sticks. You want to find the closest match that you can, and, you want to compare your mix against one that sounds really good to your ears. No point referencing against something mediocre.
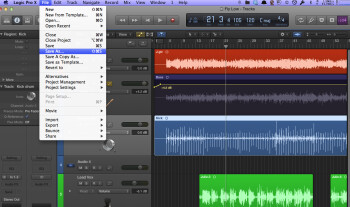
Since you’ll likely be tweaking your mix during the referencing session, make sure to Save As with a new file name so that you have a copy or your DAW file from before you start making changes. That way, if you listen tomorrow and you’re not happy with your adjustments, you can revert back to where you were.
Listening tips
Here are some key elements to listen for:
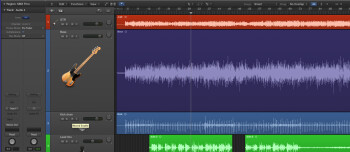
Bass level: As mentioned in part 1, one hardest aspects of mixing is getting the level of the bass guitar or bass synth correct. Unless you’re mixing on great monitors in a room with accurate acoustics, it’s very hard to get this level balanced correctly. Try to match the bass’s level on your mix with that of your reference.
Vocal levels: Listen to the level of the lead vocal (and the vocals in general) vis-a-vis the rest of the mix. It’s easy to make the vocals too loud against the music. It’s also very helpful to hear how successful engineers in the genre you’re working in tend to set the balance between vocals and instruments, which varies between different styles of music. For example the vocals in a jazz song would likely be a lot louder against the instruments than they would in an indie rock song.
Vocal Treatments: How does your vocal ambience stack up against the reference? Is your vocal drowning in reverb compared to the other one, or is it too dry? Are you over compressing your vocal?
Lead instrument levels: Like the vocals, lead instruments are easy to mix too loud compared to the rest of the instruments.
Overall EQ: Another thing you’re likely to notice is that all the elements on the reference mix sound brighter. If this is the case, try to focus in on individual elements (vocals, keyboards, guitars, etc.) and work on matching the EQ of your similar tracks, as best as you can, as long these changes don’t detract from your overall mix. Bear in mind that you’re listening to a recording that’s been mastered, so your tracks are unlikely to sound as polished, but try to get in the ballpark.
Stereo Imaging: Listen to how the instruments are panned on the reference, and think about whether a similar scheme might work for you. If so, try it.
Final thoughts
The reason to use A/B referencing is not that you want to copy somebody else’s mix exactly, but to give you something to use as a standard to compare your mix with. There are no rules, so if you want to deviate from your reference in certain ways, it’s totally your call. Remember, if it sounds good, it’s not wrong. By utilizing referencing, however, you’ll help make sure that it sounds good everywhere, not just in your studio.


