Referencing your mix against an existing recording via the process known as “A/B-ing,” is a great way to check the quality of your work and help you overcome inaccurate studio acoustics. Here in part 1 of this 2-part article, we’ll look at why referencing is so useful, and offer some setup options.
Why A/B?
A/B referencing is a technique used by many mix engineers. By comparing your project to one that you know was professionally mixed provides you with perspective (always in short supply in a mix session) and allows you compare EQ, bass levels and more, and even to tailor your mix to sound similar to other songs in a specific genre or sub-genre. Home recording musicians whose studios are not acoustically treated will also benefit from A/B referencing, because it helps compensate for sonic issues caused by the room acoustics.
Let’s say your room accentuates bass frequencies. That means you’re probably going to mix the bass too low because the room is making it sound louder than it really is. But if you compare your mix against a song that was mixed in a treated environment, you only need to match your bass level (versus the rest of the instruments in the mix) with that of the reference, and you can feel pretty confident that your bass will sound balanced when your mix is heard on other systems.
Setups
The concept behind A/B referencing is to switch quickly back and forth between a short section of your mix and a similar length segment on a reference track you’ve chosen. If you pause between mixes, it’s much harder to make a true comparison.
The volume levels of A and B must be matched as closely as possible. This is key. Otherwise, whichever one is louder is is going to sound different (for example, louder sounds bassier), and you’ll be comparing apples to oranges.
Here are some different options for setting up an A/B comparison, listed in order of preference.
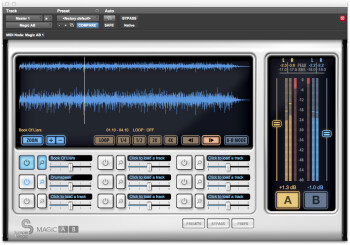
- The Magic AB plug-in: This is the best referencing option in my humble opinion. No, I’m not trying to turn this into a commercial, but I don’t know of any other software that’s designed specifically for referencing besides Magic A/B, and it works really well. Available for Mac and Windows, it’s a plug-in that you insert in the master bus of your DAW. It has two big buttons labeled “A” and “B”. “A” plays your mix. When you hit “B”, “A” stops and the reference starts playing until you hit “A, ” and your mix plays again, and so forth. It has facilities to load multiple reference files, balance their volume with your DAW mix (balanced volumes are essential to effective A/Bing), even loop sections and more. It’s under $60, and worth every penny.
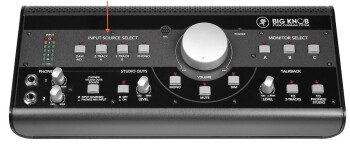
- Hardware switching: If you have a monitor controller or mixer that lets you switch your monitoring between two different sources, you can use it to A/B effectively. Connect it up so that your DAW mix comes in on one monitor source setting and the reference song — coming from some type of audio player software (iTunes would work) — on another. Then you can use the source buttons to switch back and forth between your mix and the reference. Again, be careful to balance the volumes.
- The two-music-player method: Open your mix in your DAW, and open the reference mix in any music player app (you could use the iTunes’ MiniPlayer window). Play a few seconds of your mix, hit stop, play a similar amount of the reference, hit stop, etc. The problem is that it takes time to stop one program and start the next, and the longer the pause between”A” and “B, ” the less useful the comparison will be. Place the music player so it’s near the transport of your DAW, so you can quickly move between them. If you have to move across the screen with your mouse it will add more dead time between your song and the reference.
In part 2, we’ll discuss some specific aspects of the mix to pay attention to when A/B referencing.


