While Avid and Cakewalk launched the new versions of their respective flagship sequencers just before Christmas, Steinberg chose NAMM 2011 to present the wistfully awaited version 6 of Cubase. This new version doesn't mess too much with the foundations of the sequencer but rather brings many new features regarding handling and functionality.
Like every two years, Steinberg face lifted its sequencer and the owners of the previous version will have to pay out again. For them, the question is whether the update (sold for about $150) is worth it or not. Users who have never used Cubase will probably want to compare it with their current sequencer. The price of Cubase 6 ($500) is average among the top sequencers. “Should I buy this new Cubase?” is a question almost impossible to answer because user profiles are very different and everyone has his own way of making and producing music. In fact, the new features can cause tears of joy for some users while others will be totally indifferent towards them.
What we intend to do here is to carefully review all the new features in Cubase 6 so that anyone can decide for himself if they are useful or not. This version brings numerous new features that will interest a wide range of users, from the guitar player living in a small apartment to the freak who spends his life tweaking loops, to the MIDI and sound bank fan, or the drummer with unstable timing.
But let’s start with the test protocol: we installed Cubase 6 on our iMac with Snow Leopard, which allows us to test the 32-bit and 64-bit versions of the sequencer. Both versions were quite stable (the system only crashed once), but some plug-ins couldn’t be loaded in the 64-bit version because of a compatibility issue with the VST Bridge developed to allow the user to use 32-bit plug-ins with a 64-bit sequencer. We also noticed that plug-ins using the VST Bridge don’t allow drag 'n’ drop between the software window and the sequencer, which can be a handicap in some cases. Moreover, all plug-ins using the VST Bridge will share 4 GB of memory, even if your computer has 16 GB RAM… If you want to go for the 64-bit version, you have to know that some functions are still unavailable, i.e. MP3 and OMF export, the Tonic, Embracer and Monologue virtual instruments, and ReWire (because of Propellerhead). You should also check if your plug-ins are available in 64-bit version or if they support the VST Bridge.
Now that we know these details, we can start discovering this sixth version of Cubase… This review addresses only the new features in version 6. We recommend you read the review of the previous version if you don’t know the program at all.
Aesthetics, Comfort and Wellness
Before installing the software with the disk image we downloaded (7.25 GB), we got the PDF documentation. We regret the lack of a printed documentation, but considering the size of the user’s manual (700 pages), we appreciate the search function in the PDF and the consideration for the trees. We also like the fact that Steinberg provides a dozen video tutorials which are very useful and will help beginners to take their first steps with the product.
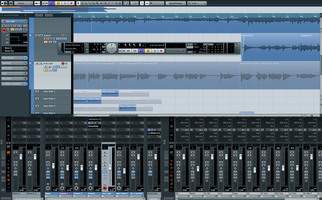
As soon as we open Cubase 6, we immediately notice that the GUI got a slight face lift: it seems clearer and it looks a bit nicer. Nothing revolutionary but still we appreciate it. You can even change the colors of the meters in the mixer, the luminance of the controls, their nuance, clarity and intensity!
For improved comfort, the MIDI Learn function is now directly implemented in Cubase’s interface for all VST3 plugins. You’ll find it in the Quick Controls window in the left column of the project window. This column plays an important role and is very useful for several reasons. For MIDI and audio tracks, it gives you direct access to many parameters (in addition to the Quick Controls): insert effects, EQs, effect sends, notepad, audio track, expression map, Note Expression (we’ll come back to this later) and MIDI inserts for MIDI tracks. You’ll also find this column, with different parameters, in the key editor (quantify, transpose, length) and sample editor (markers, audiowarp and other functions) dedicated to MIDI and audio files respectively. This provides coherence between the project window and the editing windows. Before diving into the sample editor’s new features, we noticed that it’s now possible to save files from the MediaBay (which includes the samples and loops) to an external hard drive that you can take with you anywhere. You can also export the notepads of each track to a text file, which can be very useful. A last remark: it is not possible anymore to delete a track using the “Delete” key of your keyboard. Deleting tracks by mistake is history!
But let’s get serious now. We’ll start by loading some audio files and opening them with the sample editor.
Slicing Slices
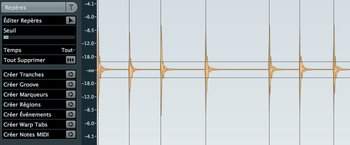
After double clicking an audio event, the sample editor window opens displaying new functions on the left column. Regardless of whether you want to slice audio data or use the AudioWarp function (introduced in Cubase version 5), you’ll have to define the hitpoints first. In order to do that you have a very practical and effective tool: the threshold fader allows you to set more or less hitpoints on transients depending on your needs. In most cases, you want a hitpoint on the attack of each note so that you can create slices (useful for rhythm parts), Warp Tabs (if you want to use AudioWarp to repair the timing of vocals or an instrument) or MIDI notes (in order to replace drums for example). You also have other possibilities, like creating a groove to use it in the quantize menu (convenient to sync a bass part with a drum groove in the blink of an eye) or creating markers, regions and events. Here is an example of a guitar whose timing has been repaired with AudioWarp:


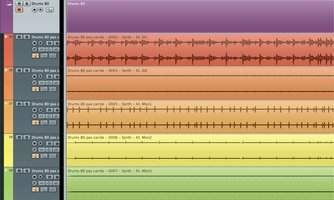
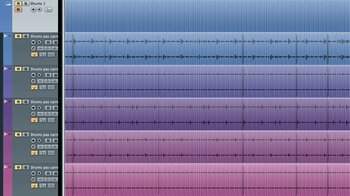
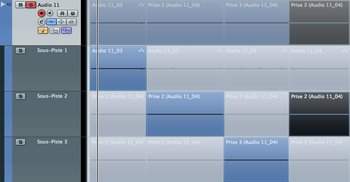
If you want to slice a drum part, you can convert the hitpoints into slices, which you can quantize on the grid. So what’s new, you ask? Well, Cubase excels with multitrack drum parts. You can group all tracks into a folder and define hitpoints in any given track (generally bass drum, snare drum and hi-hat or, in rare cases, room or overhead tracks) so that you have the possibility to cut the whole folder into slices depending on certain rules. You can then set the priority of the slices depending on the bass drum or snare drum track. Once the folder is sliced, all tracks are sliced at the exact same points and editing (move, quantize) applies to the whole track group. This means there are no phase problems. You can then choose to add auto-crossfades to avoid audio clicks. And all this is available in a single window (the quantize panel) and requires only about 10 seconds… Now you see how easy and fast it can be to sync a multitrack drum recording to the song tempo. As an example, we used a multitrack drum (overhead, room, kick, snare, hi-hat) with serious timing problems and quantized it with Cubase in a few seconds. The result is quite satisfying even if there are some audible edits in the overhead and room tracks. On the second sound sample it is due mainly to the fact that the hi-hat is played open, making every crossfade almost impossible! You might have probably noticed that the result is more convincing on the first sound sample where the hi-hat is closed.

- Drums 80 pas carree00:19
- Drums 80 quantifiee00:19
- Drums pas carree00:19
- Drums quantifiee00:19
Considering that the hitpoints were set, we took the opportunity to make drum replacement. We created a MIDI track and assigned it to Groove Agent. The result after a couple of minutes is very satisfying. The big advantage of Cubase 6 is that it provides tools that allow you to work fast and get very usable results, which nevertheless will need to be optimized in some cases.


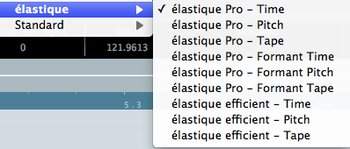
One of the most important new features implemented for loop users and people who work a lot with pitch shifting is the introduction of Zplane’s Elastique Pro and Elastique Efficient algorithms. In version 5, Steinberg already added Elastique Soloist V2 for its VariAudio, which allowed you to adjust the tonal height and the timing of vocals or monophonic instruments. The manufacturer hit the nail on the head by including these new algorithms that allow you to pitch shift with a quality never heard before in Cubase. In order to test this feature, we quickly composed a small song using the loops included in the MediaBay and then decreased/increased the tempo using the appropriate track. Everything in real time — no bounces.

As you can hear, the result is very convincing, even with extreme settings. The Efficient version allows you to save CPU power without losing audio quality, while the three modes allow you to give preference to rhythm or tonal height precision, or even to link both, like with a tape recorder.
Finally, also notice that you have the possibility to scan an audio file in order to extract its tempo. This function is very convenient for tracks that were recorded without a click: after just a few seconds, Cubase creates a fluctuating tempo track following exactly the original track. Thus, editing becomes faster and it gives you the possibility to add virtual instruments to the song and to quantize them to the groove of the song much easier. Nice feature for musicians with timing problems.
The latter will also be happy to know that comping has been improved and is much more user-friendly now…
Nice Take
Not every musician is a great performer and some of them need several takes to reach their best level. In such cases, there are probably several audio files in one track which need to be edited to create the best possible take in order to get THE perfect performance. This process, called comping, was already possible in previous Cubase versions, but Steinberg improved the approach so that now comping is a real pleasure. Why? Read on…
When you record, you have the possibility to use the loop function so that the different takes are automatically stacked. They are all accessible with the track’s Lane function. You can now cut the takes in different parts (one cut with the scissors cuts all lanes simultaneously) and click on the parts to be kept. You don’t need to move the events anymore, which means you’ll make less mistakes and save time. Solo buttons are available for each lane allowing you to monitor a single take before selecting or discarding it.
Another small improvement is the fact that all tracks within a group are linked for editing. This is very useful for multitrack recordings (one instrument, several mics) as we already mentioned in the previous paragraph. Finally, these new features are not spectacular but they provide real improvements in terms of comfort, they minimize handling mistakes and save you time.
But the new features aren’t limited to audio, MIDI also got some improvements…
Expressionism
Let’s start with the most interesting of the new MIDI features: Note Expression. What is the secret behind this name? Something very simple but very powerful. Previously, when you recorded a polyphonic MIDI instrument, the different simultaneous notes could be controlled by different parameters like modulation, pitch or volume. But these parameters always applied to all notes of a chord. It is now possible to edit these parameters for only one note of a chord, which increases the possibilities a lot: if you play three virtual violins at the same time with your keyboard (i.e. a chord), you have the possibility to apply a parameter (for instance modulation) to only one of the three notes. This can be useful for sound bank fans who want more authenticity, or for sound explorers who are always on the look for new possibilities.
The scaling tools are another new MIDI feature. These tools allow you to edit a complete group of MIDI notes with only one click: to increase/decrease their values with respect to one parameter while keeping the same scale, or to add a fade in or out.
Also notice the possibility to import key switches for some compatible virtual instruments (i.e. HALion Symphonic Orchestra or Sonic SE) or to manage the Dynamics in the key editor. This way you have the pianissimo, mezzo forte or fortissimo (among 12) symbols of the score editor available in the articulations of the key editor. This can come in very handy when using a VST-3.5 compatible plug-in. Also notice that nuances can be controlled by the velocity, the volume or another CC.
Now, it’s time to lay your MIDI keyboard aside and grab your electric guitar: let’s rock!
In the Rack
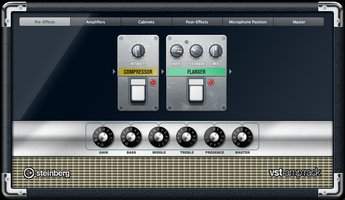
Like Logic and its Amp Designer, Samplitude and its Vandal, Pro Tools and its Eleven Free, Sonar and its Guitar Rig 4 LE, or Digital Performer and its Custom '59, Cubase now offers its own guitar amp simulator called VST Amp Rack (2011 award for the most original name). This plug-in includes seven models that emulate the most famous guitar amps: Marshall, Fender, Vox and co.
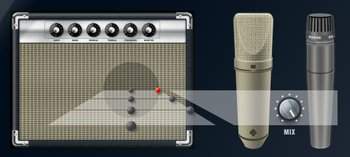
Each model has its own speaker cabinet. It’s also possible to connect a wide range of stomp boxes before or after the preamp: delay, chorus, overdrive, fuzz, octaver, tremolo, flanger, phaser, reverb, EQ… It includes everything except for a whammy, a distortion, a harmonizer or a ring modulator. Steinberg developed a simple but effective GUI: you get six tabs for pre-preamp effects (up to six stomp boxes), amp selection, speakers, post-amp effects (also up to six effects), mic position, and the master section including a 3-band EQ, a tuner and a master volume. Notice that you can connect the effects in any order you wish.
Generally speaking, the sound is convincing, considering the plug-in is provided with the sequencer. It’s easy and fast to use, the crunch sound is not too compressed and distortions are ok. This software allows you to start working without a problem. We just regret the lack of a bass amp or the fact that it only includes two mics (SM57 and U87). Moreover, both mics must be placed in the same position (out of seven options). We are far away from the versatility of Guitar Rig 4, but don’t forget that this tool is free (even if you first have to buy Cubase 6!). The tuner seems to be asleep and is rather imprecise when it awakes. However, this new plug-in is a useful addition and fills a gap in previous Cubase versions.

- Les Paul Sature00:26
- Les Paul Sature 200:12
- Esquire Clair 100:31
- Esquire Clair 200:31
- Esquire Crunch 100:21
- Esquire Crunch 200:16
HALion
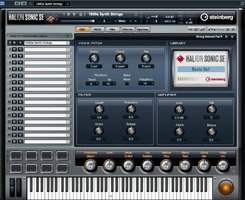
Another important new feature in Cubase 6 is the addition of a light version of the much praised HALion Sonic. A very good idea! Note that if you like this light version, Steinberg has a special offer to upgrade to the full version. But what are the main differences between this light version and the full version? First of all, the SE version provides no editing, although several quick controls allow you to modify some parameters chosen by the manufacturer. Considering the editing possibilities of the full version, it will be very appealing for all sound tweakers to pay for the upgrade. There is no standalone mode available nor does it include the REVerence reverb (even though it is included with Cubase 6). We also noticed that the Flex-P arpeggiator/arranger (which we really liked in HALion Sonic) disappeared. And of course, the sound bank includes less presets and sounds. However, it’s nice to get a workstation like HALion Sonic directly with Cubase 6, even if it’s a light version. HALion Sonic SE replaces HALion ONE, but all the sounds of the latter are included in Sonic SE. In short, this software is a real swiss army knife that can become indispensable very quickly. Last but not least, also notice that all Cubase 6 users also get a 60-day trial version of HALion Symphonic Orchestra.
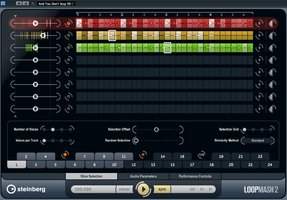
As for Loopmash, it got a face lift and is now in version 2. We noticed the addition of 20 new effects conceived for slicing applications as well as twice as much scenes (24 scenes). These scenes can be sliced and freely arranged. An undo/redo function allows you to experiment without risk. You can also drag and drop slices between tracks and even to Groove Agent One. Sweet! These improvements will be very valuable for electro and dance music fans.
Now, let’s talk about the price. Cubase 6 is available for $500 on the manufacturer’s website and can be even cheaper in stores. This price is average for top sequencers. Moreover, the plug-in offer can now compete with similar products thanks to the addition of VST Amp Rack and HALion Sonic SE. While a function like VariAudio is still missing in some competitors, we also noticed the lack of live tools in Cubase 6, like Logic’s Mainstage.
Conclusion
Two years after the launch of version 5, Cubase is back with add-ons to fill the gaps of previous versions, mainly thanks to VST Amp Rack and HALion Sonic SE. It provides numerous improvements in design, especially due to the addition of the scaling tools and the lanes, and also the multitrack editing, which has become much more simple. Add to this a new time-stretching algorithm from Zplane, a better transient detection and the VST Expression 2 (nuances, note expression) and you get a valuable update for guitar players, loop freaks, MIDI fans, and sound designers. We just regret that the instrument tracks were not improved and we miss the possibility to edit frozen tracks. It’s also a pity that some features are unavailable in the 64-bit version and that its VST Bridge is not always perfectly stable and convenient with some setups. Otherwise, Cubase 6 is a very good achievement!


