In most Genre’s the Kick Drum will be the Low End foundation of the song. So really we should treat it with respect and try and get the best out of it while mixing. If you have recorded the Kick Drum well then you have a much easier time ahead, but we still want to give it the old “Spit ‘n’ Polish”.
Basic Tools
A noise gate/ Expander is a useful tool to use on your kick drum, not only does it remove any unwanted spill from the track, but it allows your processing and effects to sound clearer and more concise. Each gate you will set up will be different so I won’t try and prescribe any settings to you, but there is often a “Noisy Instrument”, “Kick” or “Drum” preset on most gates, find one of these, and tailor it until it fits your Kick Track.
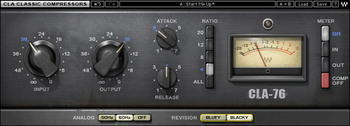
Compressing the Kick drum really can make it sound thicker and more consistent. You can achieve this with minimal ease using the following starting settings. A higher ratio of around 5–8:1 can yield great results and gives a more uniform, constant volume throughout the track. A medium attack setting 1–5ms combined with a release time of about 0.2s can allow the kick drum to breathe. Look to get a gain reduction of approximately 3–8dB, however experiment, I’ve mixed some Kick tracks in the past, where 12dB of reduction gave me the sound the client and I were looking for.
EQ
The Kick Drum is one instrument that can need a bit of work from an EQ, to help support a better low end to you mix, and to keep it out of the way of the Bass Guitar. Here are a few frequencies, present in the Kick that can really react well to EQ:
- 40–85Hz can add sub-bass, too much in these region will cause boom
- A High-Pass Filter, set to around 50–60Hz can really tighten up your Kick.
- 80–125kHz can add power and weight to the Kick
- 200–400Hz is a good area to cut to reduce that boxy sound
- 450–1kHz can give more punch, but proceed carefully, too much can sound harsh.
- 4–7kHz is good for adding snap to the kick drum
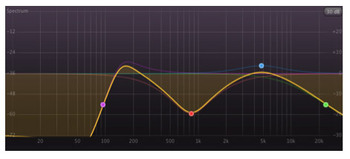
- To get the Kick and Bass Guitar to sit together nicely, cutting at 160Hz, 400Hz, 800Hz and 1.3kHz by a few db each can create some space.
All of these frequencies are good starting points; Boost/Cut values and Q settings are very much to taste. And depending on the size and tuning of your Kick, the actually figures could be slightly higher, or slightly lower, have a play around and see what results you can get.
Sometimes when EQ, you can walk away not being that happy with the extreme low end, but don’t worry, there are a number of great Psychoacoustic products for “increasing” the amount of low end that a track has. Acting like a low end EQ, these processors add other frequencies, to create the perception that more low-end has been added, without making it sound wooly, and boomy. One product that comes straight to mind is Waves’s MaxxBass; it allows you to create a balance between your original low end, and this “artificial” one. Meaning you can give your Kick, a lot more low-end without upsetting the balance of your mix. It also allows you to mold you kick drum, to whatever you want. If you’ve never used one before, then start off with a Kick drum presets, and have a play around with the setting. Worst comes to worst, just reset the plug-in and start over.
Little marvels for the perfect touch
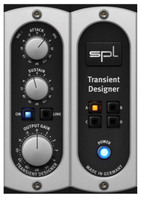
Once you’ve got your solid kick sound, you may find that the transient of the kick is a little lost, and lacks a little bit of punch, A Transient designer will help, allowing you to shape the transient envelope of your source. It allows you create more punch, more sustain, and a sound that can cut through better, or create a new flavours of sound all together. SPL’s Transient Designer is a famous Hardware Transient Designer, and a number of plug-in versions are available. It allows you to control the attack and sustain separately, as well as the output gain to compensate for how you’ve set the first two settings. If you don’t fully grasp how Transient processing fully works, then by all means select a preset, and edit parameters until you hear what they are doing, and then ease them back until it fits your Drum track.
In some genres of music a synth can be used to back up the low end of your Kick. Creating a Sine wave at the frequency that you are after, and create a single Midi note the length of the song can do this. Setting up a gate, keyed to open when the Kick drum plays, this stops the Sine wave playing all the time. To get flawless results, the attack and release times of the gate must be tailored to the kick you have in front of you. You can then add more or less of the Sine wave, to taste.
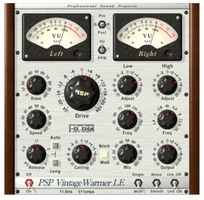
One final thing we are going to look at is adding some harmonic Processing. Harmonics to the nth degree can sound great for all drums and are often added in one way or another through plug-ins and hardware to the drum buss. But how about adding them to each independent drum, this allows you to drive some harder than some, and some softer than the rest. There are 101 different plug-ins for the task, but a few worthy mentions are TapeHead by Massey, which is partially free (non-expiring demo with no save functions, Pro Tools Only), Nomad Factory’s Magnetic, and PSP’s Vintage Warmer, can all add harmonics, warmth and mix glue to your tracks. Have a play around with one and try a number of different settings, and use trial and error until you find something that works.
Conclusion
And there we have it, a few useful tips on mixing your kick drum. One last thing I will mention is regarding Panning, because of the nature of the Kick drum, and how the Low-End is perceived, it is probably best to leave your Kick Drum panned to the Middle, rather than placing it anyway, either to the left or the right.
Well as ever we hope you find this article useful and let us know how you’ve applied these tips, and what results you’ve achieved via our comment box below.
This article was originally published on Home Studio Review. Reprinted by permission.


