Despite the preponderance of exceptional drum samples and loops on the market, for certain genres of music (notably country and rock) there is no substitute for a great session drummer playing on a well-recorded and mixed drum kit. One thing that samples and loops can’t provide is the great rhythmic instincts an accomplished live player draws upon when responding to a specific song. However, getting a great player (while certainly a significant element) is not the entire story.
Despite the preponderance of exceptional drum samples and loops on the market, for certain genres of music (notably country and rock) there is no substitute for a great session drummer playing on a well-recorded and mixed drum kit. One thing that samples and loops can’t provide is the great rhythmic instincts an accomplished live player draws upon when responding to a specific song. However, getting a great player (while certainly a significant element) is not the entire story. The appropriate treatment of the drums in a mix with EQ and compression can make the difference between a lifeless, vague sound and an exciting, textured and genuinely rhythmic drum track.
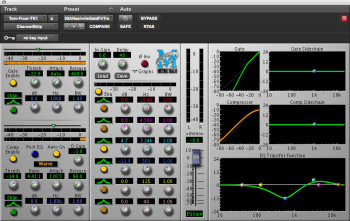
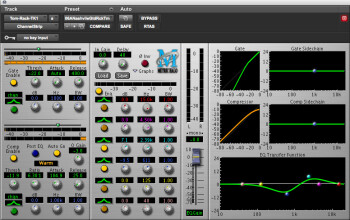
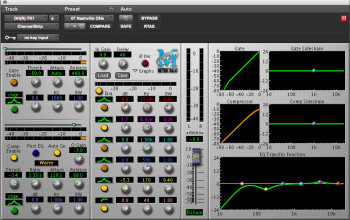
In this article, I’m going to go drum by drum providing EQ and compression settings that will, hopefully, provide you with a jumping off point to getting great drum sounds in your mix. Because of its all-in-one mixing board channel approach, I’ll be using Metric Halo’s Channel Strip plug-in with its EQ, compression and noise-gate to illustrate my comments about various EQ and compression settings.
Kick Drum
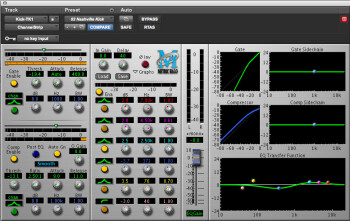
As far as compression settings go, the trick is to preserve the transient attack of the kick drum with a fast but not too fast attack time (9ms in this instance) and then a quick release (11ms) so the compressor is ready to respond to the next kick drum hit. The ratio I use is a relatively mild 2.5:1 and I adjust the threshold until I hear the kick sound I’m searching for. Finally, in order to give the kick drum sound some separation from the rest of the kit, I use a noise gate and adjust the threshold to allow the kick sound to come through while essentially muting the majority of the other drum/cymbal sounds. Also, while setting the attack to the Channel Strip’s fastest “auto” setting, I allow for a long (400ms) release.
Sub Kick
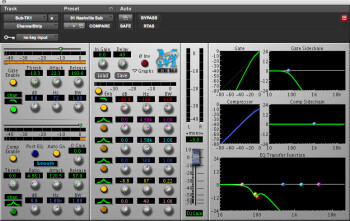
In order to accentuate the most important elements of the sub kick’s sound, I tend to use a low pass filter approach to my EQ that removes all frequencies above 500hz and drops off even more dramatically below 100hz. This is to make sure that only the essential parts of the sub kick’s sound come through. The sub kick should be felt more than it is heard. In terms of compression, a ratio of approximately 5:1, a relatively slow attack (120ms) and medium fast release (57ms) allow the sub kick’s tone to stay present and full underneath the sound of the kick drum’s regular miked sound. Then, I’ll use a noise gate with a fast attack (20ms) and slower release (200ms) to keep out any other kit sounds that might otherwise bleed into the sub kick sound.
Snare
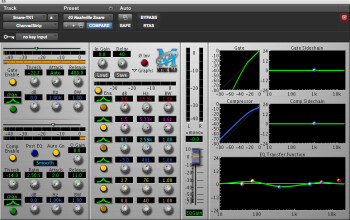
Compression on a snare is a real balancing act where too much will take away the energy of the performance and too little will make it practically impossible to find an appropriate level for the snare in the mix. I use a ratio of 2.5:1 with a very quick attack (2ms) and release (11ms). If you’re finding that you’re losing the snap of the snare, slow your compressor’s attack a little but remember that slowing the attack too much will take the compressor too long to grab onto the sound and will leave the snare much less manageable in the mix. Adjust the threshold settings until things sound right to your ear. This basically allows you to decide how much overall compression you’ll be applying. Don’t overdo it or the drum will lose its energy but don’t go too lightly or the snare won’t stand up in the mix. Gating the snare is a trial and error process as well. Depending on whether the snare approach in the song is aggressive or soft will have a lot to do with your threshold settings. Like on the kick drum, I use the very fast “auto” attack and a slower release on the gate in an attempt to keep out the ambient sounds of the cymbals, toms and kick.
Hi-Hat
Low (Floor) Tom
High (Rack) Tom
Overheads/Room Mics
Limiting the Sub Mix
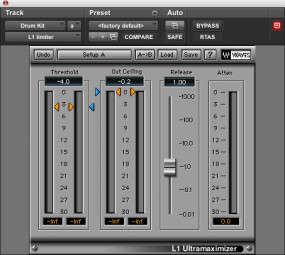
A final trick to add punch to the overall drum kit is to send all of the individual tracks to a stereo sub mix and place a limiter like the Waves L1 on that stereo auxiliary track. By adjusting the threshold until the attenuation is between 5–7dB, you’ll find that the kit has a really satisfying overall punch and presence.
Conclusion
While I’ve been painfully specific about EQ, compression and gate settings, it’s important to remember that every mix situation is different. Use all of these settings as a jumping off point and then use your ears to tweak the sounds until you’re happy. Good luck!


