



As part of Softube’s Console 1 controller series, which has been in development for several years, here’s Compact: a downsized control surface that controls plugins from the Swedish brand (among others), designed to slip into your bag so you can mix on the go. Is this a practical design?

Console 1: the story
Softube continues to build on the Console 1 franchise, which has already been quite successful in recent years. The Swedish brand offers its plugin controller in various formats, including Console 1 Channel mk3, unveiled two years ago and Flow Studio, released earlier this year. The latest version is Compact—the mid-size model.
If you missed the previous installments, here’s a recap. More than ten years ago, Softube launched the first model in this series: a physical controller for a channel-strip-style plugin chain. The goal was to recreate an analog feel using digital processing. A second, then a third version of this Console 1 Channel was released, along with its companion Console 1 Fader MK3 to mix the different tracks. Together, they make a very small digital console! Three months ago, we discovered Flow Studio, a much more compact version of the controller designed for quick handling and fast actions.
Console 1 Compact: dimensions, encoders, and accessories
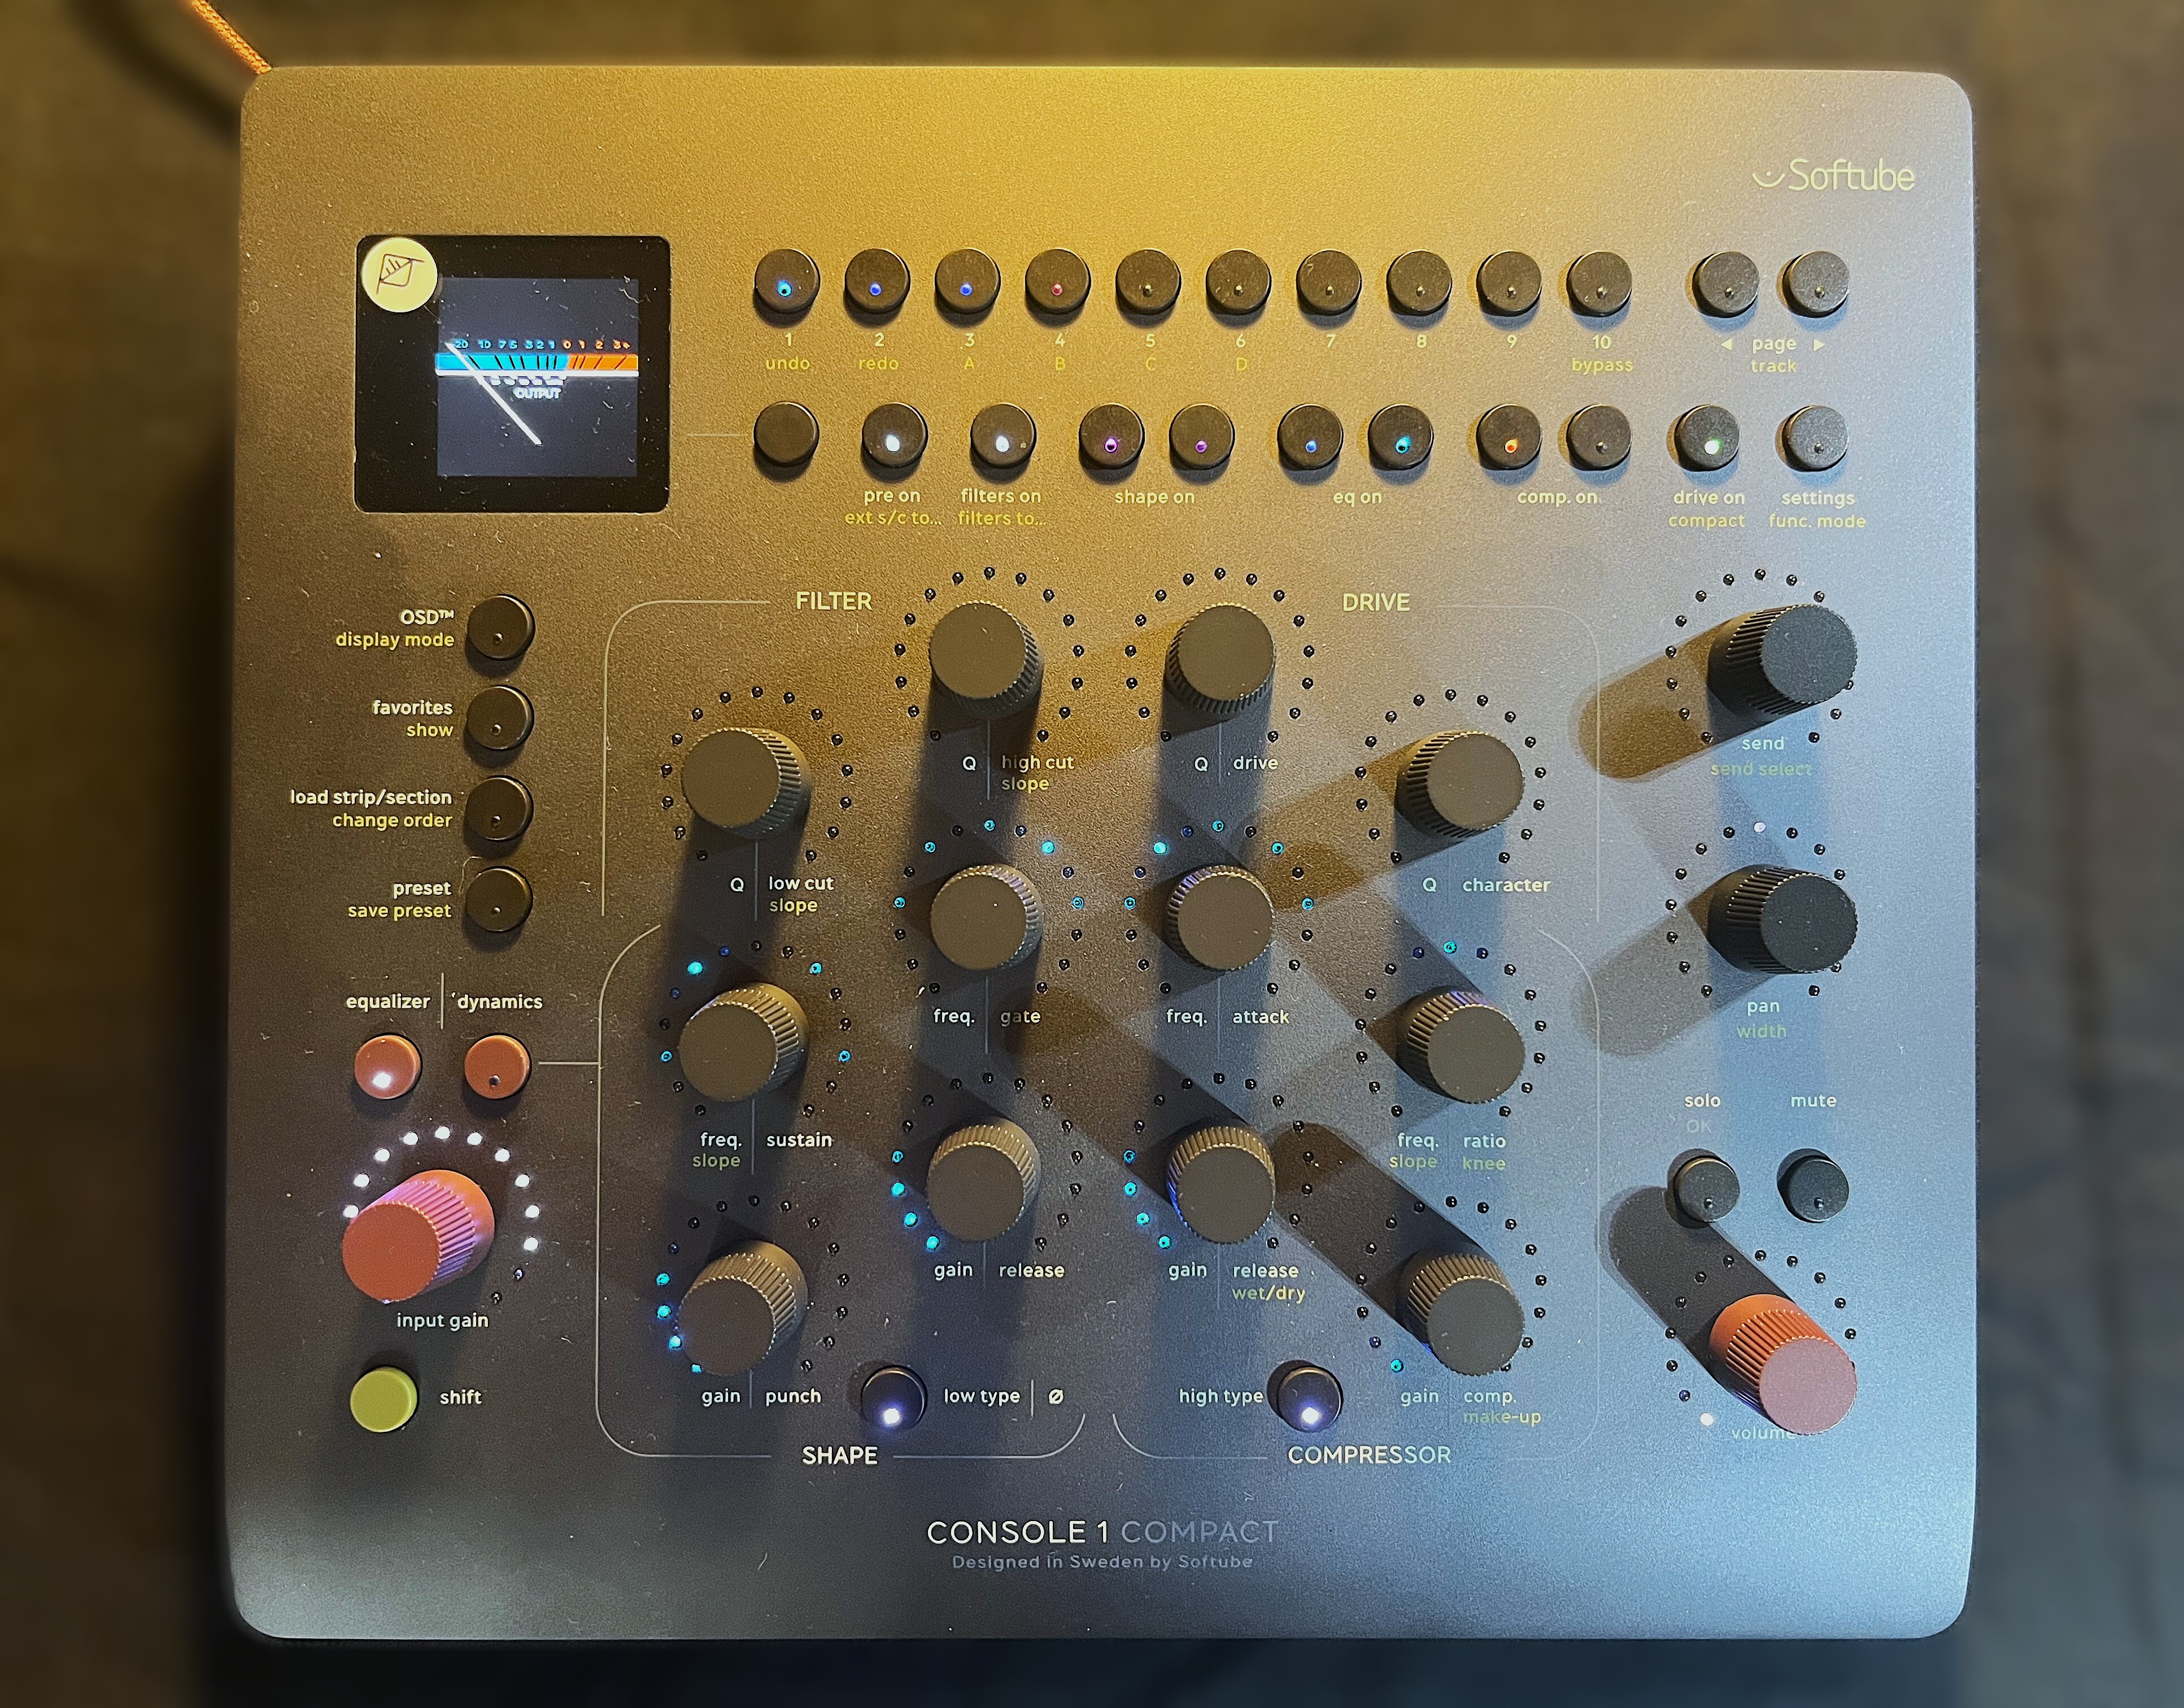
The new unit is 240 mm wide (9.44 inches) as compared to 435 mm (17.12 inches) for the Channel. It features 16 rotary encoders, compared to 27 for the Channel, and a single screen. It comes with a two-meter (roughly 6.7 feet) USB-C cable and four small screws for mounting it on a rack.
The box the brand sent us also included two nice wooden side stands that provide a Moog-style look. Those are optional and will cost you an additional 85€ ($79). Speaking of which, Console 1 Compact sells for around 490€ ($499). By comparison, Console 1 Channel costs around 800€ ($882) and Flow Studio 390€ ($399)
Beyond the physical controller unit itself, there’s a suite of plugins—which is the one you control by default—called Core Mixing Suite . As we’ll explain shortly, you can also use the controller with other Softube plugins, as well as with certain third-party plugins. However, you must own or purchase these alternatives first. Later, we’ll also take a look at the sonic characteristics of the suite that comes with Console 1 Compact.
Setup and installation
After downloading and installing the included software, you connect the unit to your computer via USB-C using the included cable. The Compact draws its power through this cable and, therefore, from the computer. The setup process takes a while because, in addition to what we’d already installed (Console 1 System and Core Mixing Suite), you’ll need an essential component called On-Screen Display, which wasn’t included or installed by default in the package—you’ll have to download it from the manufacturer’s website. This third piece of software enables the controller to function; it will first update the controller’s firmware, and it will also be crucial for using the Compact, as we’ll see a bit later. We can now begin testing and using the device by opening our DAW (in this case, Pro Tools), and then inserting the Console 1 plugin onto a track.
Getting started: pages, subpages, and On-Screen Display
Here we’ll compare Console 1 Compact to Console 1 Channel. Because of its reduced size, it has fewer physical controls, so Softube had to assign many of them multiple functions. This is especially true with the rotary knobs, which provide that signature analog feel. For example, while Channel offers separate sections and different controls for equalization and compression, Compact uses the same rotary knobs and requires you to navigate through pages to switch between them.
Add to this the fact that Core Mixing Suite offers, by default, two equalizers, two compressors, and so on, meaning you must navigate subpages—and, within a single plugin, certain parameters become accessible by holding down the Shift key on the same knob as another. As you can see, each encoder has numerous functions, and all these labels on the surface make getting the hang of the controller a bit tedious. 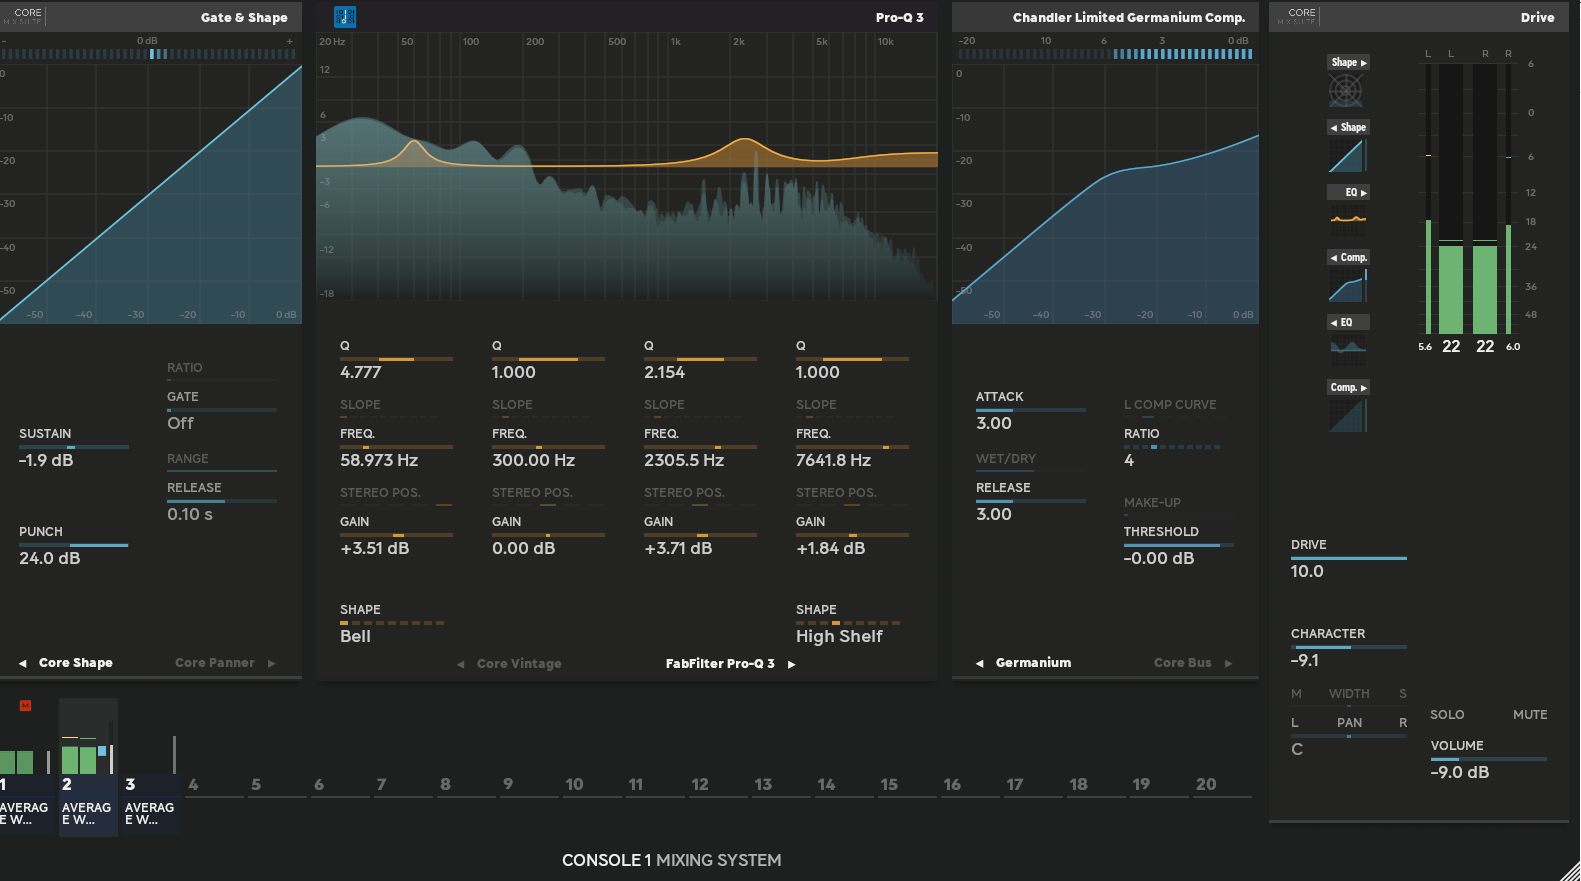
During the test of Control 1 Channel, we were somewhat overwhelmed by the On-Screen Display app, which shows up as a window on your computer screen displaying the various plugins, their graphical representations, and the settings adjustable via the controller. Because we already had a DAW open, the Console 1 plugin running, and one or more screens on the controller, our attention could get scattered across all these windows.
That said, we found On-Screen Display indispensable because navigating the controller’s various pages was much clearer when viewed on through the app. This window can also offer different views, including an overview of all the channels processed by Console 1 Compact in a single session.
Here’s a detailed look at how the controller is organized: on the upper left, a small screen displays the active processing, followed by a row of buttons that let you select the track being processed (from the first ten), plus two more buttons to navigate through pages of ten tracks.
To use Console 1 Compact in a session, insert the plugin on all the tracks you want to work on. You’ll see their colors reflected on the LEDs of the small buttons mentioned above. 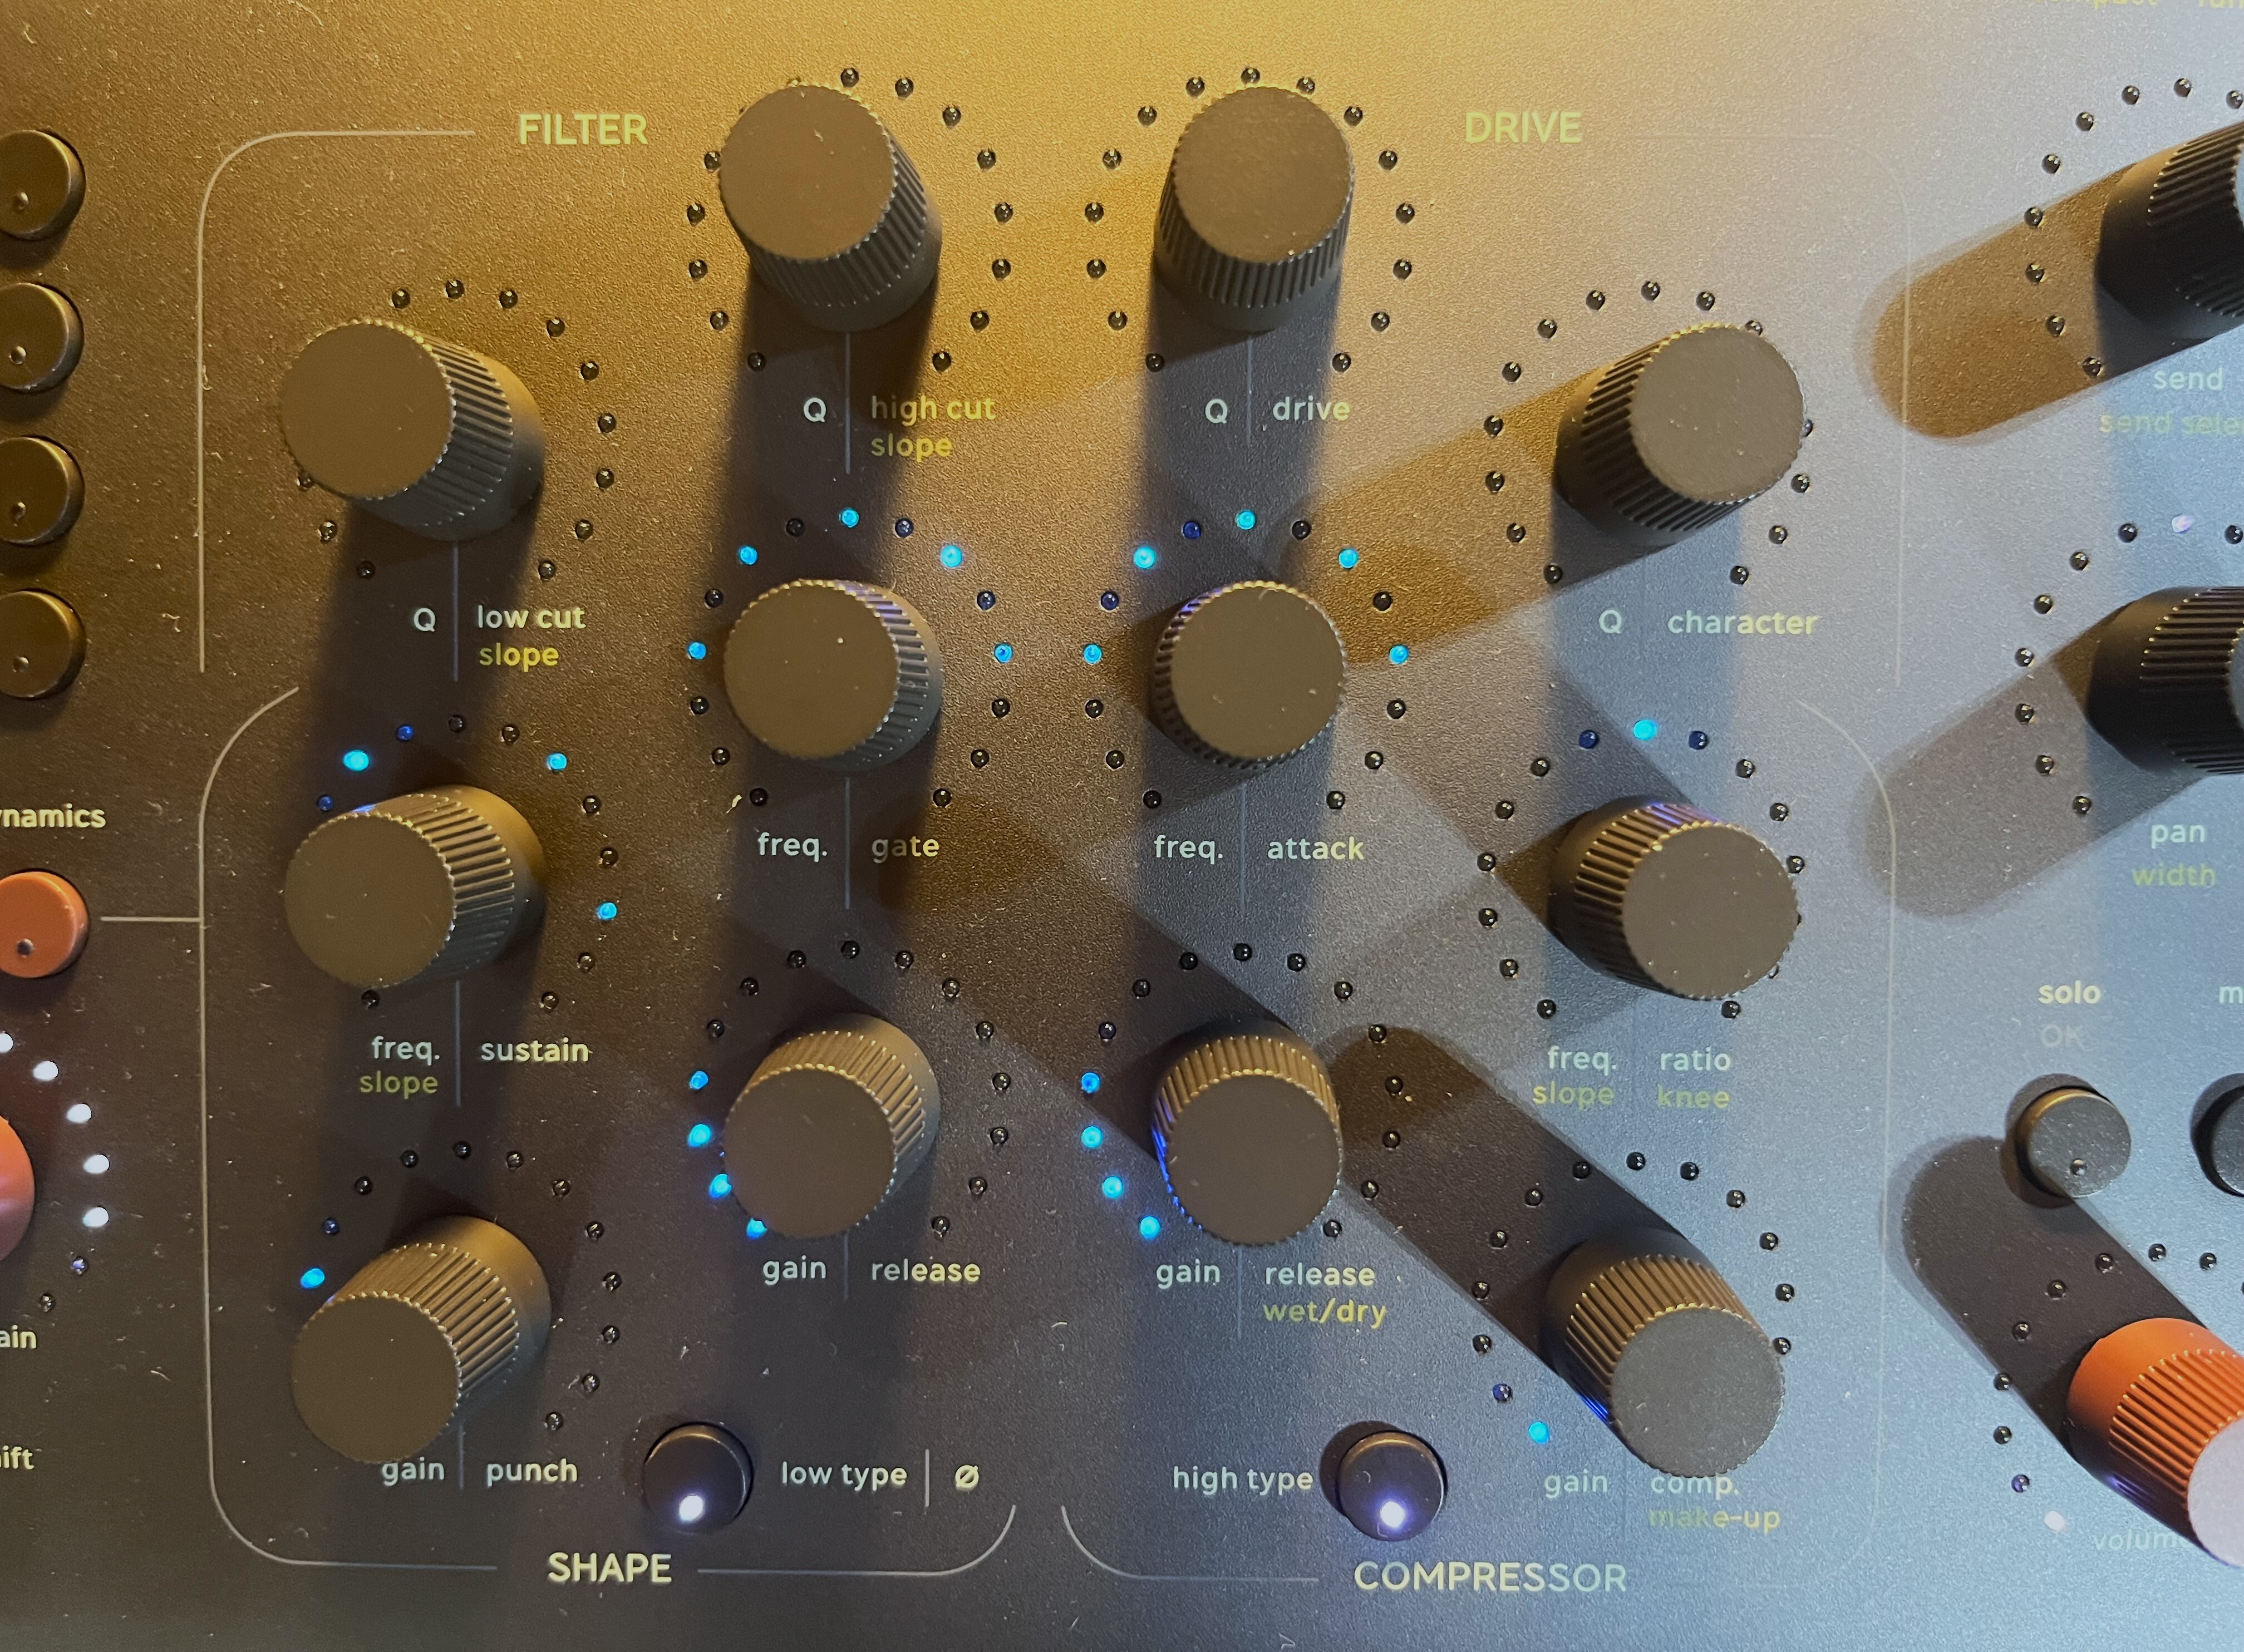
In the center are twelve knobs that can be assigned to the four EQ bands or various dynamic processing options; on the right, the last few large knobs control routing to an auxiliary track, pan, and finally volume. One row of small encoders remains to describe, the second from the top: these let you navigate between the two plugins for each processing type (shape, equalizer, or compressor) and enable or disable them individually.
Core Mixing Suite and other tools
By default, the Core Mixing Suite’s processing options are pre-selected when you open the Console 1 plugin inserted on a channel strip. You can change them, opening up an ever-increasing number of options. For starters, you can load any other Softube plugin you own, and, frankly, many are very interesting. What’s more, the company, in recent years, opened up Console 1 to UAD, then FabFilter, and now has expanded the list to include models from Plugin Alliance and Brainworx.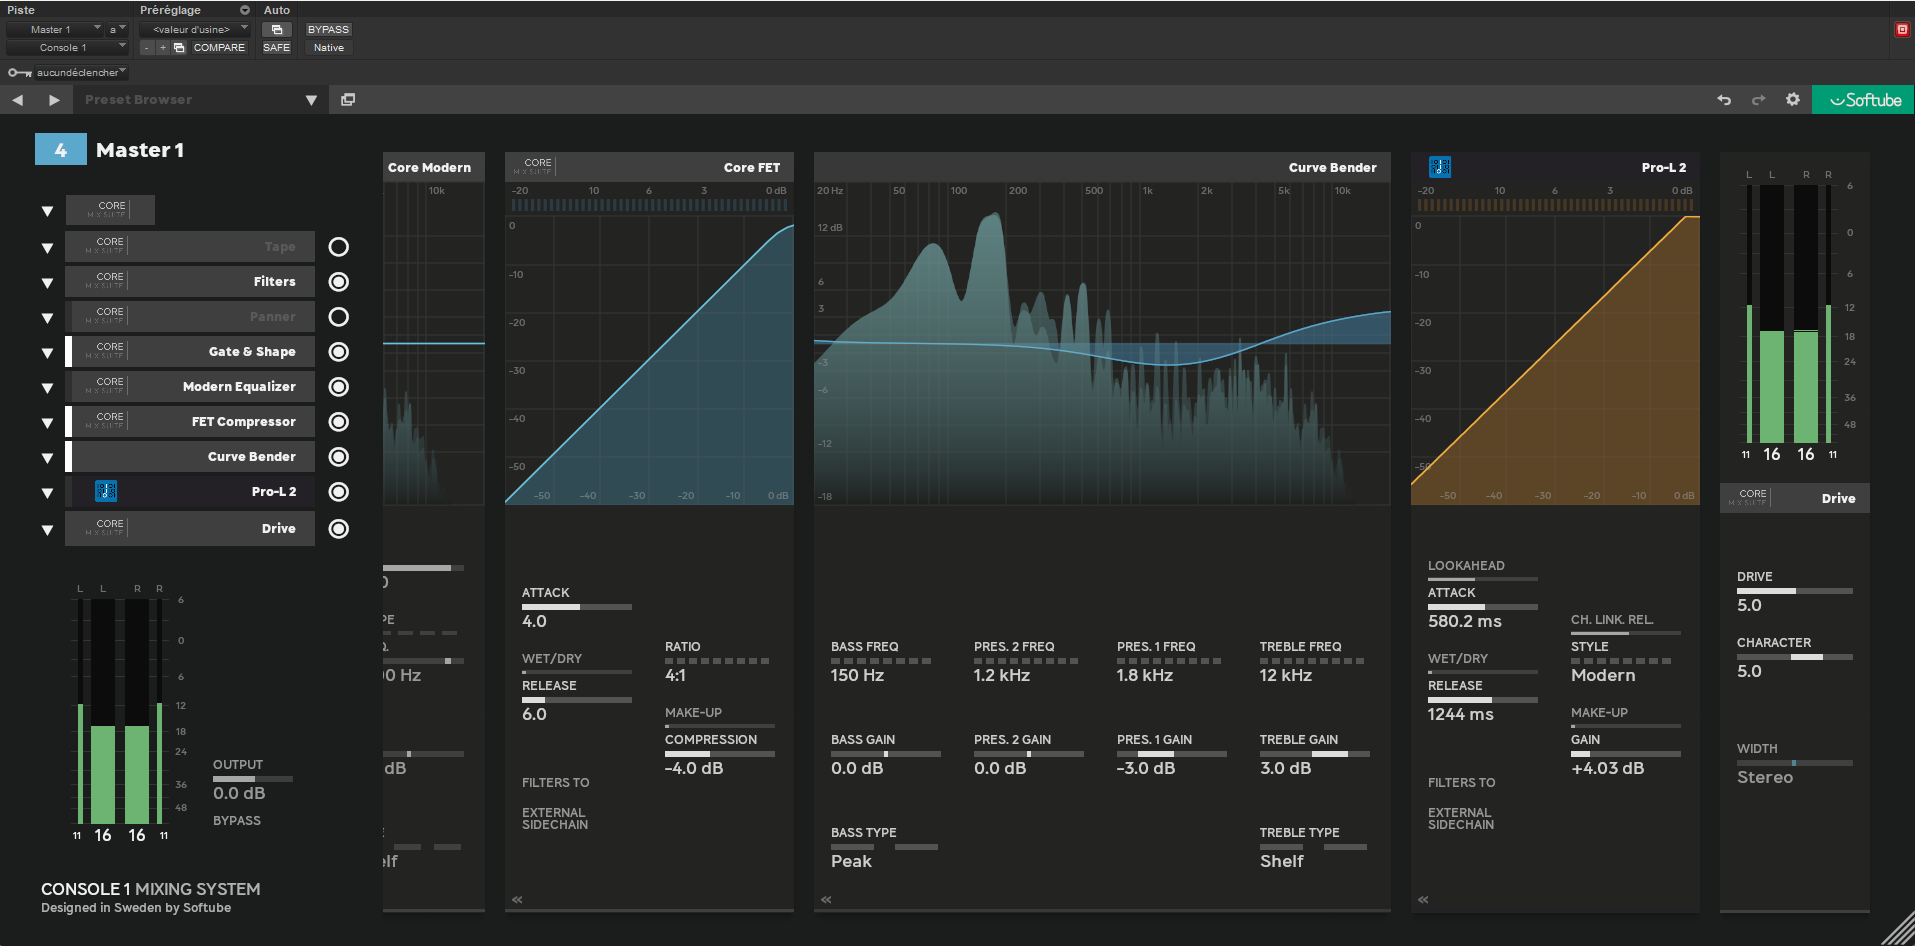
Mixing with Console 1 Compact
We put Console 1 Compact to work in a Pro Tools session, using it on three group tracks from a current project. The session included a drum track, a bass track, and a guitar track.
Starting with the drums, the first processing module we used was Shape, which lets you adjust transient and resonance levels. We went all out and significantly increased the transient level to add more attack. We also did some quick EQ and compression work, taking the opportunity to test the FabFilter Pro-Q 3, and we realized that we couldn’t access its dynamic EQ function via the controller. Too bad! We moved on to the Drive module, which, despite its simplicity, won us over very quickly. We found a nice saturation setting, then fine-tuned it to limit harmonic distortion in the high frequencies.
Next up was a DI bass track, for which it’s best to add some character right from the input without letting it distort, so we boosted the input level by 10 dB while adding 6 dB of (headroom) to push it right to the edge of distortion. After adding a bit of attack with the Shape module, we spent some time on EQ and inserted the Tube-Tech Equalizers mkII, a Softube plugin that’s not part of Core Mixing Suite. The emulation responded very well (as we already knew), and we shaped the frequencies to achieve a deep, gritty low end, eliminating the muddy low-mid range, and bringing out the devilish sound of the Jazz Bass strings. The only minor drawback was that the bass roll-off function is controlled by the Low Type switch, which toggles between a standard shelf filter and a shelf filter with complete roll-off of frequency bands above the set cutoff frequency. Progressive attenuation is available in the Console 1 plugin, but not via the controller.
Now for the guitar, which sounded rather bright, lacked aggression, and needed a bit more depth. The Shape module offers spatialization on the depth axis, not just a classic pan, and that was well suited for this track. We moved the slider all the way to “far” and appreciated the result—it felt like it affected both the frequency response and the dynamics of the transients, and perhaps with a light touch of short, transparent reverb?
Once we set the EQ with the Chandler Limited Curve Bender, which removes excess midrange frequencies and brings out the guitar’s attack and harmonics, we adjusted the Core FET compressor, but realized the frequency spectrum was too hollow. So we changed the order of the modules using the Change Order button (on the left, accessible with the Shift key). To adjust the EQ without affecting the compressor settings, we placed the compressor before the EQ. A little added saturation at the end of the chain put the finishing touches on the sound, this time with the character set to 10 and maximum distortion in the highs.
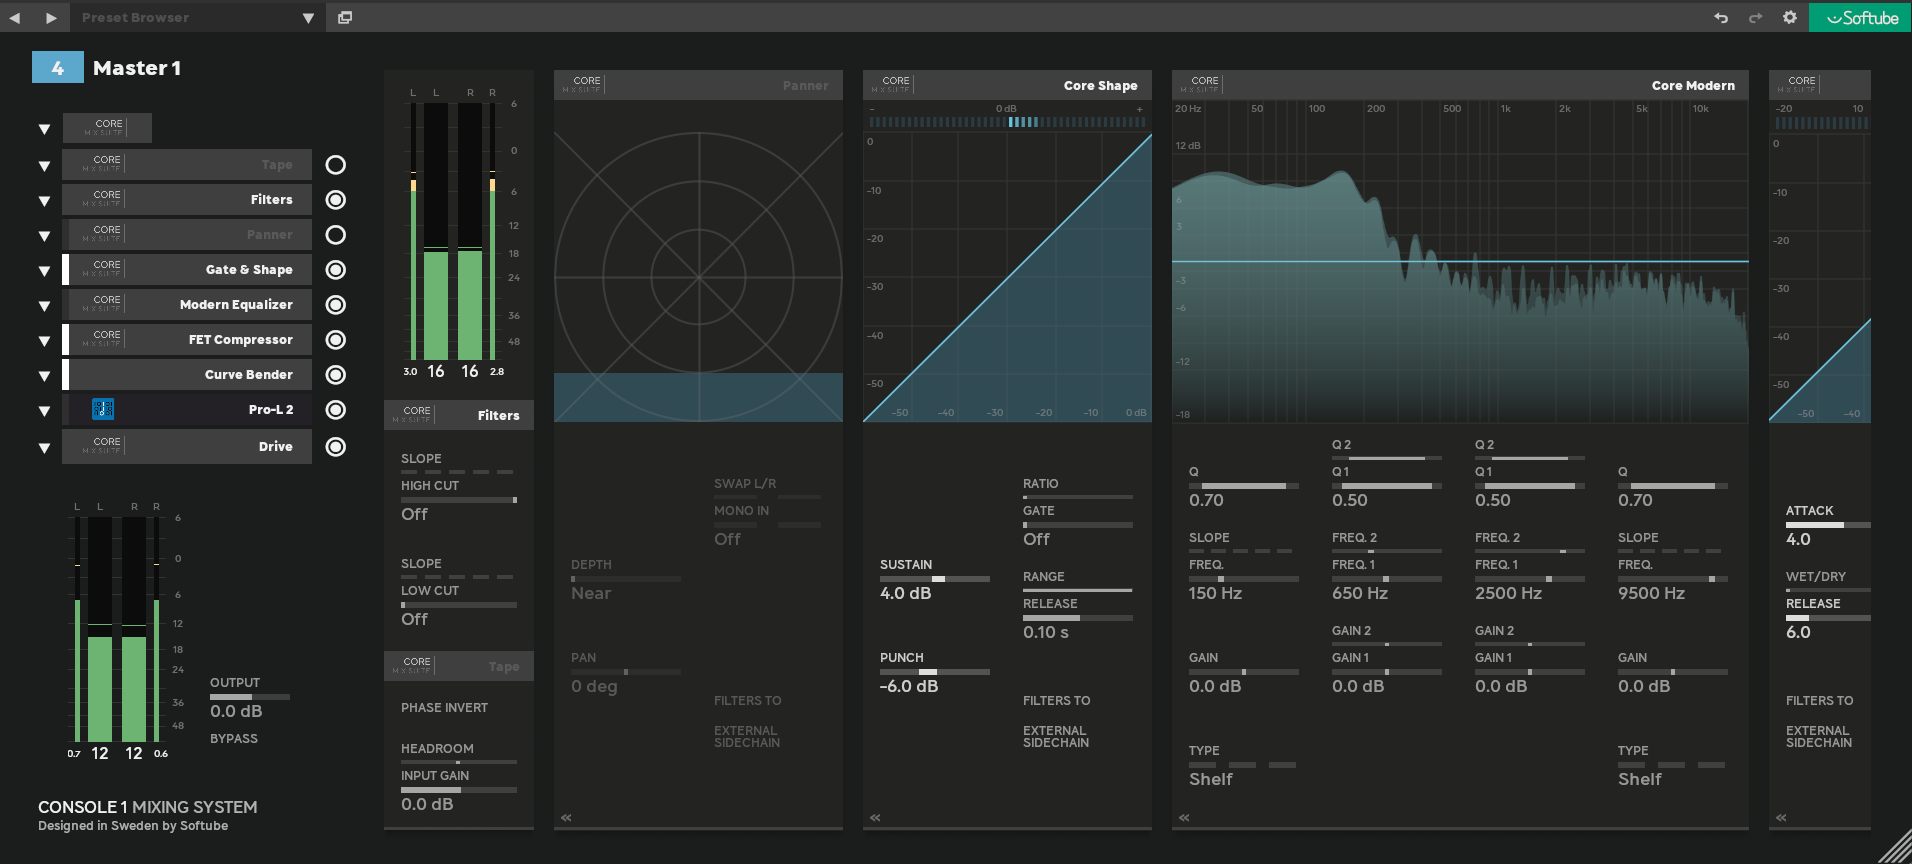
Now let’s talk about processing the master bus. After fine-tuning the input level, then the corrective EQ and compression, you’ll want to add some character and boost the level a bit. So, for the first time, we used the second stage of EQ and dynamic processing, and we chose a Tube-Tech PE1C (a replica of the Pultec EQP1) to roll off the mids and open up both the highs and the lows, followed by a limiter at the end of the chain using a FabFilter Pro-L2.
The order of the processing in the chain was particularly important at this stage; the only downside was not being able to end with the limiter, because, after adding a bit of saturation at the end of the chain, we exceeded the 0 dB peak threshold. The first of the following clips is an export with no processing applied to either the tracks or the master; the second includes processing on the tracks; and the third adds processing to the master.