Log in
EN
FR

Mastering software suites

80 products found

Filter
Sort by
Evaluation
  • Reviewed or not
  • Editor’s award
  • Reviewed by Audiofanzine
Availability
  • Available or not
  • Sold new or used
  • Sold new
  • Sold used
Must-have products
  • All products
  • Flagship products
  • Best rated products
  • Hot products
  • Popular products
Price
  • Freeware
  • Low-cost (< $80)
  • Mid-range ($80 - $250)
  • Premium (> $250)
€
Clear
Sort by
  • Popularity
  • User ratings
  • Price - low to high
  • Price - high to low
  • Used price, increasing
  • Used price, decreasing
  • Name (from A to Z)
  • Name (from Z to A)
  • Added on
Sort results
  • Popularity
  • User ratings
  • Price - low to high
  • Price - high to low
  • Used price, increasing
  • Used price, decreasing
  • Name (from A to Z)
  • Name (from Z to A)
  • Added on
Filter results 80 results found
Evaluation
Availability
Must-have products
Price
  • Freeware
  • Low-cost (< $80)
  • Mid-range ($80 - $250)
  • Premium (> $250)
Show results

The best Mastering software suites reviews

The reviews Audiofanzine members found the most helpful.
  • « ...Perfect. »

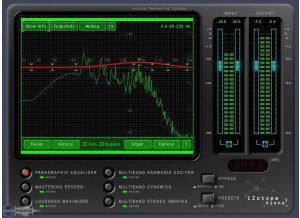
    Izotope! There is nothing bad anyone could ever say about this plugin/mastersuite! I have had not one problem with it and i don't expect to, it is my "holy grail" in my studio setup. Absolutely easy to use and understand and if you do get stuck the manual is one of the best compared to most vsts... As soon as you open this vst you will understand the basics straight up. master EQ, reverb, loudness maximiser, multiband compression, width enhancer and a harmonic exciter! and if your a do it yourself kinda person you can easily hear what each setting does just by fiddling with knobs haha. SUITABILITY/PERFORMANCE This software has been well made and thought out. compatible with all daws that i have used so far including ableton, protools, logic etc. As i said earlier this plugin is my holy grail! It amazes me how much better it can make a mix, you can get a really super live sound or a perfect studio sound just byt he touch of a button or rather move of a slider. I have only been using this version for a bit over a month but have already fallen in love haha. Just be careful because of the amazing power, it is quite easy to get carried away and come close to destroying your mix. OVERALL OPINION The BEST (and worst) feature of this program in my opinion is the snapshots button in the parametric EQ. Tis feature literally allows you to "copy" the EQ of an other song/sound source. As i say this can also be a bad thing in the wrong hands when used as an imitation device rather then a tool. I plan on continuing using this program for as long as I can before the world throws a whole new world of plugin greatness at me! Sound quality is just amazing! the live feel you can get out of just turning up a master reverb slider is unmatched by anything i have used.

  • « Good software but zero sequels »

    I use the Standard version at home, and the Advanced version at work. Since I didn't buy advanced, I will indicate the price for which it was purchased. I Have Ozone standard...but it's similar... For professional postproduction good with ProTools. I have to say that I really like this plugin and have done a lot of work with it in the past. Especially for music, it has very interesting presets that lead to a quick goal. Over time, however, I use this plugin less and less. And if I use something from it, then multiband comp /Dynamic/, whose settings really work very well and exciter. I use them both in TV post-production for words and for music mastering. Stability is good. As for the graphic interface, it's already a little worse, especially the equalizer resolution is on the dB side, and its expansion bothers me. Any change in the equalization is very subtle - almost unnecessary, the same applies to the dyn eq. As a disadvantage, I would like to point out that some parameter names on the plugin do not match the names in the automation window. So it's confusing when you want to automate a certain parameter and it has a different name in the automation window (!). I don't know why the standard shortcut /when working in ProTools/ for setting the automation of the selected parameter directly on the plug-in does not work, as it is customary with other plugins. I am always forced to automate only through the automation window selection. For other plugins, just click Ctrl+alt+cmd and click on the parameter you want to automate. Not with iZotope, and it's terrible!!! One more thing bothers me. When I adjust the output volume on the plugin and change the presets, the output volume always jumps back to 0.0dB! It's tearing my ears off!!!! I want to have the volume turned down to the same level and scroll through the presets. I want to mention, like my colleague, about the prices. Although I am a client of iZotope, the new offers are not financially interesting. In addition, whenever a person wants to choose a product at iZotope, the company's website is constantly confusing, because they don't know which package contains which plugins... I consider this a thieving practice. It would be enough to simply write: This package contains these plugins... When you receive an email with an offer, you are usually directly directed to the purchase without being able to check what you are buying in the selected package. For this reason, I will no longer purchase any more products from iZotope. Regardless of the fact that, for example, the newer version of the RX software is worse than the older version... And what pissed me off was when the next day after I bought Ozone, I got a good customer offer with a discount on the Ozone product. Total mockery and slap in the face. Like, thank you for buying our software, don't you want another one of the same? Why didn't they offer me anything else... Well, because they are stingy.

  • moosers's review

    Nomad Factory's Analog Mastering Tools is a plug-in bundle of three separate processors. As the name obviously states, these plug-ins are intended for mastering purposes and design themselves after analog gear. However, I've mostly used these plug-ins for mixing and they do the job just the same. The bundle is quite cheap, even if it just has three of them in there. The three plug-ins included in the bundle are the Max Warm, Multi Max, and Amp Leveling plug-ins. The Amp Leveling plug-in is a brick wall limiter, while Max Warm is both a limiter and EQ and Multi Max is an extended version of this. I wasn't the one to install this bundle on the systems at the studio where I work, so I can't speak up on this process at all. All of the plug-ins are fairly easy to use so I don't think users will be needing a manual for them. SUITABILITY/PERFORMANCE We've got the Nomad Factory Analog Mastering Tools bundle running on all of our systems at the studio where I work. I've used them on most of the systems we have, but mostly in our A room which is Pro Tools HD based and has a Mac Pro computer that has 10 GB of RAM and dual 2.66 Ghz Intel Xeon processor. I've yet to have a problem with running any of the plug-ins on this system, but it's not the best judge since it's so powerful to begin with. OVERALL OPINION Nomad Factory's Analog Mastering Tools bundle is definitely one to look into if you're looking for a few extra mastering and mixing plug-ins. While they're supposed to be for mastering, and that's their best use, they're definitely suitable for mixing purposes as well and I've used them a good deal for that. These aren't professional mastering plug-ins and are really meant for the DAW user who wants to get some inexpensive mastering tools for home mastering jobs for demos and the like. I wouldn't master anything with this on a professional basis, as they just couldn't get the job done. Having said this, the bundle is very cheap and worth looking into if you're looking for some mastering plug-ins that can also serve as mixing tools as well.

  • « Complete Mastering Bundle Worth Every Cent »

    EQuivocate Part of the Elevate software bundle by Newfangled Audio, Equivocate is such an easy tool to use when adjusting frequencies and for two reasons. First, and although you can use a blank template, there are several presets from which to choose, such as Synth Scream, Guitar Scoop, Punchy Drums, Tight Low End, etc., all designed with a particular purpose in mind. As well, you can edit/tweak any of the presets. Second, Equivocate’s auditory filters sound very natural to the ear as it employs all 26 bands for a wide and smooth sound progression – although you can reduce the number of bands, and even customize the filters and their frequencies. There are several other features or options I have yet to experiment with, since I find the various presets so easy to apply and they sound great, such as using the automatic level compensation, the draw EQ curve and the incredible tweaking abilities for each of the 26 bands (both level and band width) Being a modest home musician I certainly don’t make use of Equivocate as some would, including the Match EQ feature to make the sound of a track match or complement a sidechain audio signal, or trying to match the tone of a reference track. My main use is to sculpt various tracks in order for them to stand out better in the mix (or to subdue them more so they are less obvious – beyond merely reducing a track’s volume). Being able to engage and disengage Equivocate also is ideal when comparing the raw track to the new EQ’d track. Overall, this is one of the better EQ plug-ins I have tried and its effects really pop in the final mastered mix. Saturate Saturate is a Spectral Clipper algorithm that overdrives a sound, ideal for any instrument, including acoustic or electric guitar and even vocals (to add some hair or grain). Best of all, it does this without affecting the tonal balance no matter how hard you push the signal. You can add up to 24 dB of overdrive without producing a muddy or muffled sound and while adjusting the Shape of the curve to range from incredibly smooth to hard clipping. The Saturate presets range from very subtle, starting with A Hint of Paprika, to incredibly boisterous and intense with the Busted Compressor preset. You can apply this plug-in to any track or the entire mix and it always sounds natural and pleasant to the ear (although adding too much Saturation eventually becomes obvious!). There are independent input and output levels, but you also can use the Auto output, which scales the level naturally and easily. Of course there are meter displays so that you know how the signal is hitting the selected clipping shape, as well as any peaks. Most of my compositions involve playing melody and some rhythm over tracks developed in Band-in-a-Box, and often the instruments in those pre-designed tracks are straight-forward. Saturate is so perfect for adding more energy and dynamics to the Band-in-a-Box instruments, whether acoustic, bass and even drums (and consider assigning Saturate to only a portion of a track if desired and for specific emphasis). As well, one of my favorite guitars is a Parker Dragonfly, which sounds great, but it’s not quite as ‘hot’ as I want it to be (and cranking the gain on a preamp/OD pedal often introduces extra hiss or noise). Adding Saturate in the mix makes a significant difference in making a guitar tone sound hotter and with no added noise. Punctuate The Punctuate plug-in allows you to control the transient emphasis or suppression of 26 frequency bands with just 4 controls, making it very easy and intuitive to use. Mixing engineers use transient shapers either to emphasize the attack or sustain or to soften transients of an instrument. What makes Punctuate different is that it does not work with the whole signal of the entire frequency range, but allows you to tailor the attack of individual instruments, busses or entire mixes (depending on how you want to use the software); and with a host of presets designed for bass, drums, guitar, piano, experimental effects, etc., you have a lot of options without having to tweak a thing. There are plenty of functions you can do with this plug-in, such as make a guitar passage flow smoother, or perhaps have a sharper attack. You can adjust the volume of a kick drum without affecting the snare. You can increase a bass guitar without affecting the kick drum. You can bring some instruments forward or back in the mix. Punctuate also helps to add excitement into flat sounding or over-compressed mixes. Depending on my mix and style of composition, sometimes I find the drums dominate or are too subdued and often only certain elements (e.g., cymbals vs. kick) – something needs to be brought forward or pushed back. In other instances I want my rhythm to be more aggressive, but without having to increase the amp’s gain (which can introduce more hiss or noise). And with lead I may want to accentuate the plucking/picking or smooth out the sound for more legato. Punctuate can do all these things. Elevate Elevate is the ‘brain’ behind the mixing and mastering software by Newfangled Audio/Eventide (see my other demos using Punctuate, EQuivocate and Saturate. Elevate is a multi-band plug-in that includes a Limiter, a ‘human-ear’ EQ and audio maximizer to increase loudness while maintaining and even enhancing transient nuances and reducing artifacts. With several presets ideal for anything from Jazz to Metal, there is a lot of tweaking to be done as you create new versions and do sound comparisons in a matter of seconds. Even better, you can adjust any of the parameters in real time to improve the tonal balance and to achieve unique outcomes, whether you want to emphasize some bass, perhaps a drum snare, etc. No matter how hard you push it, Elevate sounds natural and organic (unless you start clipping too hard, of course). Elevate utilizes 26 critical filter bands modeled from the human ear, although you can select as few as one band (and any number between, depending on your needs in sculpting the ideal master mix). You can draw curves or manipulate one band at a time, you can solo bands to pin-point very specific frequencies, and a lot more. And likely one of the most important features is that Elevate uses Adaptive Technology artificial intelligence algorithms to achieve both precise and natural sounding changes so that both tone and transients push forward while reducing audible artifacts. Combine the unique characteristics and editing capabilities of the Elevate bundle (Punctuate, EQuivocate and Saturate) and you have a huge amount of editing power at your fingertips. My demo compares only the original track with a preset (Toasted Speakers), and so to experience live changes and to hear what it can do for your mixes I suggest you request a free demo software trial. https://www.eventideaudio.com/products/third-party-plug-ins/mastering/elevate-bundle

  • « Beats By C-Los Review »

    Being and artists, husband, and a father of three, money can be tight at times. But I desire to make great music from the lyrics, to the production and mixing, and mastering. If you ask any music industry professional, most of them will probably tell you to get your music professionally mastered by a mastering engineer. This can become quite expensive for someone who does not know how to do any of this. But if you’re a go-getter like myself, you desire to be a jack of all trades and aren’t afraid of taking the time to correctly learn each process. Izotope’s Ozone 6 brings the every essential phase of the mastering process to one plug-in. UTILIZATION Ozone 6 is a mastering suite. I use it to give my music and clients, that final polish before publishing to digital stores. You can do all of your essential processing for the mastering phase of your music production right here within Ozone. Like all of Izotope’s products, Ozone is fully compatible with any DAW you have. On top of that, Ozone can also be used as a stand-alone application. GETTING STARTED Ozone features a sleek dark design that is geared towards helping you focus on what’s important. Each of the frequency bands are color-coded across the different modules so you will have a visual aid as to which band you are manipulating. Ozone has great modules for you to utilize. Within the software, there is an EQ, multiband compressor, post EQ, imager, exciter, and a limiter. The EQs, like Alloy 2, feature the frequency solo mode for finding problem frequencies. The EQ also features a digital mode and analog mode. Looking at the multiband compressor, there is a “Learn”. What this does is adjust the four bands according to the best frequencies for each individual song. Mid/Side is also available within the compressor (as well as the EQ module). This gives you a bit more control by allowing you to process just the sides or center a song versus just processing the stereo image. Mid/side processing is also available with the compressor and the exciter. On top of that, there are tons of mastering presets for global settings and within each individual module to help to get started. I do wish Ozone 6 would have kept the reverb module that was present in Ozone 5. Reverb is not a common effect you would apply during phase, but it can be used to fix problems that may occur with no other options available. If you prefer not to work within your DAW, you can use Ozone as a stand-alone plug-in. Should you choose to do so, you will find that as a host application, Ozone allows you to use other 3rd party plug-ins within Ozone. This will definitely be useful for those that have that extra special effect they would like to apply. Also you are only able to use six total plug-ins and modules within Ozone. I would like to see that increase to maybe eight in the future. At the price of $199, Ozone 6 is very competitive among all-in-one mastering plug-ins. There are many mastering tools out there, and Ozone 6 is one of them. PROS Sleek design Mastering suite Affordable CONS No Reverb Module

  • « In the zone »

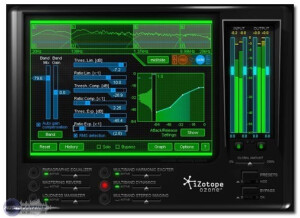
    Being previously familiar with Ozone 4, i knew roughly what to expect from Ozone 5 going in. The setup was much the same and easily done by inputting the serial number when prompted, followed by relaunching the DAW (which in my case is Logic Pro 9) which then enables the plugin for use. When first opening Ozone 5 you will be hit by a series of preset options, ranging from genre type settings such as 'Hip-hop master - dirty bass' and 'House master - enhance stereo image' to more individual track or bus settings like 'Piano - brighten and compress'. Whatever the duty, Ozone 5 likely has a preset to cover it. There are a lot of menus and submenus within Ozone 5 that it is easy to get lost or overwhelmed by everything, so the manual may be your new best friend to help you figure it all out, or even pop onto youtube and look at some of Izotope's own videos for Ozone 5, or else you could just dive right in head first and see what this beast of a plugin can do for yourself. SUITABILITY/PERFORMANCE There are 7 different plugins within the Ozone 5 suite, these are EQ, Reverb, Harmonic Exciter, Dynamics, Stereo Imaging, Post EQ and Maximizer. Each plugin can be turned off and on easily with the click of a button and not all of them have to be used, if you just want to use EQ, stereo imaging and Maximizer then the other plugins can be completely bypassed. There is a very useful 'Amount' bar which can be used to increase or decrease the effect of each plugin setting you have chosen, basically exaggerating your settings by up to double the amount or going the other way and reducing it back to nothing. This is a fantastic feature to have and if the amount bar has been dragged left or right from it's centre point it shows up as a yellow line in the GUI of each plugin screen. Now for the performance, because Ozone 5 is primarily a mastering suite, it is not the most efficient of plugins to be using for individual tracks - although this certainly can be done if you're computer can handle it. It is most effective for mastering and for bus use due to it's heavy hit on CPU power especially when all plugins are being used. If you want to use it on individual tracks, the best idea would be to set the plugin the way you want it on that track and once you are happy with it then bounce the file down thus eliminating the need to keep it on during a full mix and freeing up your CPU power. Having been using Ozone 5 for a solid 6 months, i have never encountered any trouble with the software and no crashes etc have happened in Logic Pro 9 on OSX 10.6.8 whilst using it. OVERALL OPINION The EQ section on Ozone 5 has the best of digital precision and analogue smoothness. Either option can be selected for your curves and i normally choose digital for tight notches and analogue for round, wide curves. Boosting high and low shelves is a silky experience on full mixes and when automating multiple tracks during a build up sweep in a pop dance track using the high pass filters, it keeps it's cool all the way from 150hz to 20khz. Reverb is not a feature you see a lot on a mastering suite, but Ozone 5's reverb unit is definitely handy for adding a bit of ambience to say an overly dry acoustic singer songwriter track that could benefit from it. There is also the option for using the Reverb feature on it's own on an auxiliary bus and sending other tracks to it during a mix, but whatever the use it can be very subtle or full on 'playing in a massive church' mode using the 6 different modes and dry/wet mix feature. Moving on to the Harmonic Exciter, which is one of the highlights of Ozone 5. This adds different harmonic content to your track depending on the mode you choose, there is 6 in total - warm, retro, tape, tube, triode and dual triode. Warm is good for adding a darker feel to a track, while tape is great for bringing out high mid range content in guitars and synths with it's odd harmonics. This section can be divided into 4 bands like a multiband compressor, with the crossovers being selected by the user. The Harmonic Exciter is great for adding some life to dull or even thin, cold sounding content but it is also very easy to overuse and before you know it your track sounds over-hyped and fatiguing to listen to after a while, so less is more when it comes down to it. The same can also be said about the Stereo imaging, which again is another highlight of Ozone 5. This is divided into 4 multiband sections and treated differently using the width control, which starts at 0% but can be dialled to 100% and -100%. For example this is ideal for making a too wide out-of-phase sounding stereo bass more mono by inputting a minus (-) percentage and setting the band 1 to crossover at say 80hz, and increasing the width of guitars or synths by setting band 3 to 700hz-2.5khz and inputting a positive percentage like 30%. To the right of this is a goniometer to check mono compatibility which is always important when adding stereo width to any track. Ozone 5's stereo imaging is one of the better stereo wideners out there and carries on from Ozone 4's as being very mono compatable, although the 'Stereoize' function can set a delay time up to make things super wide and phasey sounding if that's what you are looking for. The dynamics piece of the Ozone 5 puzzle is incredibly useful and packed with compression, limiter and gate features, as well as the option to make these all parallel using the mix feature in the 4 multiband sections again. Although those who are fairly new to using compressors might find this section quite daunting as it does look very complicated at first glance. My advice would be to try some of the presets first of all to see what's going on and again looking up some of Izotope's youtube videos on how to conquer this dynamics Goliath, a simple LA-2A style interface this is not! But once you do get your head round this part, you will have a powerful ally if loudness at all costs is what you are going for, just be sure not to flatten the mix to much. The Maximizer has been updated since Ozone 4 with new features including an IRC III setting for the limiter. This setting brings with it high latency and CPU usage but has a choice of character types which are very useful depending on the type of music you are working on. Intersample detection is a recommended option to have selected just before bouncing your mix as it stops true peaks clipping in Analogue devices. The transient recovery is a welcome addition and is worth experimenting with to try and give some life back to things like snare drums as heavy limiting can take away punch and impact, so dialling in the right amount of transient recovery can help keep punch and have the mix loud - like having your cake and eating it. Overall, Izotope's Ozone 5 is a must have for any mixing and mastering engineer in this day and age. It is not just a mastering suite of plugins, it can be extremely versatile as long as your computer can handle the Diva-esque amount of power it needs. At a price of $199 it is very fairly priced for the quality you are getting, and if you stretch the budget out to the advanced version then you should definitely go for that. Think of it this way - If Ozone 5 is good enough for the master bus on one of the biggest global hits of 2013 (Animals by Martin Garrix) then it's good enough for yours. Get it now!

  • JoeW1's review

    This product is compatible with Windows Xp , Vista , 7 and MAC. The manual is quite clear and it has plenty of valuable information that the reader must apply. The general setup is simpler than I expected , everything is very basic , amateur level. The typical functions are quite easy to catch , the presets browser is a huge helper and the design is also a factor to consider. SUITABILITY/PERFORMANCE The software works very good and stability is not a problem , the product is well produced. I'm getting good performances while using Izotope Ozone , my level of creativity improved a lot , my mixes sound better and more professional. I've been using this product for about 6 to 8 months. OVERALL OPINION What I like most about this effect pack is the up front design that helps the user to get a good understanding of the maximizer , reverb , equalizer , dither , exciter , stereo imagining and dynamics. The reverb has a plate , room and hall ambience , a very powerful control over the mid side and the decay time over the tale. The equalizer is probably the most important tool that this pack has , over 16 000 bands of freq , a very powerful spectrum included to assure the best results for the user. Another great feature of the eq is the left and right equalization which gives even a better control over the frequency range. The maximizer has an Intelligent Release Control which gives more of a natural feeling to the sound and its characteristics. My opinion about the value for the price is good , this product can be bought for 300 $ , but this will be your ultimate tool for mastering and mixing your projects. Precision and quality of the sound is 10/10 , no objections there. Knowing what I know , I would make the same choice and I would get this product.

  • « worth it »

    Getting Started with T Racks Mastering Software 2.0 was not difficult at all. I have been using it for 2 years now off and on. I really haven’t used it in a while due to other software that I now own that I feel are better than T Racks. But there is no doubt that T Racks is a great mastering software and you will tell a huge difference in your mastering just by using some of the built in presets. With some general understanding of mixing and mastering you will be able to put out a great complete song in no time. SUITABILITY/PERFORMANCE You will probably need a manual to use this if you are a beginner, I am no sure if there actually is a hard copy of a manual though because I have never seen one nor have I needed one. There really aren't too many special things that you can do with this T Racks plug in for mastering. That is one of the misconceptions that I had when I purchased this I was expecting it to be able to do a lot more. One thing that it does great is it runs great on my windows vista computer and hasn’t gave me any issues yet. I absolutely love how fluid it runs. OVERALL OPINION If you are trying to get a good master, you can just open this up and almost instantly get one with out any problems. I do suggest getting more in depth with it though so you can really use it to its full potential. Because if you are going to spend this amount of money on it, you don’t want to just rely on the preset to get you your master. Every song needs a different master on it, so no same preset will work with every song. So understand how to use it and you will love T Racks Mastering 2.0 software.

  • « Nice Plugin »

    This ozone 3 is a great mastering suit, it is outdated now by ozone 4 but it is still good and a little cheaper so if you can not afford the new ozone 4 then you could pick up this one very easily. Its a quick download and installation and works with all digital audio workstations such as fl studio and pro tools. Everything is pretty easy to understand but may take your time to fully grasp the plug in. Its easy to use and the presets are very helpful if you are just starting out mastering your work for the first time. The manual is pretty clear and I have learnt a lot from it. Very nice and un-stressful to install. SUITABILITY/PERFORMANCE With my laptop having 4gb ram and a 1.8GHz processor it runs pretty smoothly but it still eats the cpu quite a lot. I mean if you open it on a blank document and turn it on it will be using 40% of your cpu for just being on. Best way to stop your computer from lagging with this plug in is to export a wav file of your finished project and then go onto the mastering stage in a new project. This is my preferred method of mastering my tracks now as it is less stressful to do. I used this a lot until I finally got ozone 4 but I can not remember how long I have actually used it for... sorry. Everything on the plug in is stable and it has never crashed on me. OVERALL OPINION I dislike the amount of cpu that it uses, apart from that it is great but since there is ozone 4 out now I would recommend you just go for that instead. Quality of sound is great, presets are great. Everything is great on this program. I would still use ozone but not this one as I have ozone 4 and I like that a little more.