Log in
EN
FR

Mission Engineering Guitars

26 products found

Categories
Filter
Sort by
Mission Engineering
Evaluation
  • Reviewed or not
  • Editor’s award
  • Reviewed by Audiofanzine
Availability
  • Available or not
  • Sold new or used
  • Sold new
  • Sold used
Must-have products
  • All products
  • Flagship products
  • Best rated products
  • Hot products
  • Popular products
Price
  • Freeware
  • Low-cost (< $100)
  • Mid-range ($100 - $200)
  • Premium (> $200)
€
Clear
Sort by
  • Popularity
  • User ratings
  • Price - low to high
  • Price - high to low
  • Used price, increasing
  • Used price, decreasing
  • Name (from A to Z)
  • Name (from Z to A)
  • Added on
Choose a category
Selected category: Guitars
Sort results
  • Popularity
  • User ratings
  • Price - low to high
  • Price - high to low
  • Used price, increasing
  • Used price, decreasing
  • Name (from A to Z)
  • Name (from Z to A)
  • Added on
Filter results 26 results found
Brands
Evaluation
Availability
Must-have products
Price
  • Freeware
  • Low-cost (< $100)
  • Mid-range ($100 - $200)
  • Premium (> $200)
Show results

The best Mission Engineering Guitars reviews

The reviews Audiofanzine members found the most helpful.
  • « Compact and Powerful Pedalboard Supply »

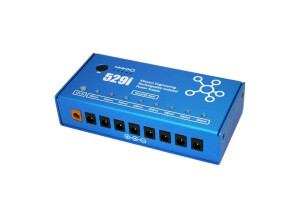
    The 529i is a 12v 2000mA power supply (power cable included) for pedalboard use with 6x300mA channels and 2x500mA channels; it can be used plugged in or independent. An independent power source means you can sit anywhere, e.g., park or under a tree, with a few pedals and headphones with the 529i and practice or compose. The 529i solves a few stage issues, such as being unable to find a power main/outlet for a pedal board and avoiding hum or noise/interference when having to run long power cables (particularly alongside audio cables). Includes various plug end attachments to accommodate power/wall outlets in North America, Europe, Australia and the UK. Includes a USB cable (to charge or operate pedals) for computer hookup, 8 power cables (2.1mm negative center and 24-inches long) to run from the unit to your pedals and a Y-cable (that doubles the voltage if operating an 18v pedal). Fully charges in about two-hours; also charges while operating pedals. If operating and/or charging and running pedals via the USB cable the pedals need to be of low mA draw (150mA or less). When fully loaded (all 300mA and 500mA channels taken to capacity), the 529i has a 2-hour life of the battery. With the 529i fully charged I could run eight pedals for 4-hours, with all eight drawing under 200mA. And when I operated a 200mA 18v pedal (cab IR) with a 3mA fuzz pedal (using up three channels), the charge lasted more than 6.5 hours. The 529i also has a USB out so that you can charge phones, tablets and other compatible USB devices (USB A type cable required) . https://www.youtube.com/watch?v=VkcT_ik7xWc Limitations The 529i offers a lot, and likely the biggest drawback could be if you require an unplugged independent power source, you have maxed out the 300mA and 500mA channels and you need more than 2 hours charge. However, most pedalboard are not filled with 300mA and 500mA pedals and you likely will have more than enough juice for a 3-4 hour gig. A second (minor) limitation is that although the 8 power cables are 2-feet long each (a good length to reach just about anywhere on a good sized pedalboard), the Y-cable is only 11-inches, which means getting an 18-v pedal close to the 529i to make connection.

  • « One Expression Pedal to Control Three Expressions »

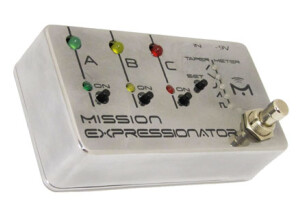
    SOUND: The Expressionator controls the nature of the sound of other pedals by way of an expression pedal into the Expressionator and then into three expression inputs (that could mean three different pedals, or a pedal with two expression inputs and a third pedal, for example). This is demonstrated in the YouTube video below: Being able to optimize some pedal’s capabilities, as well as increasing the complexity of music compositions, takes that extra leap forward via expression – and the Expressionator does this on a whole different level by implementing one expression pedal while controlling three expression inputs. Imagine combining a delay with a filter and a bit compressor and you can make some awesome ambient music. The Expressionator takes this even further by allowing you to set the span for each pedal or output, so that one pedal may be influenced by a big sweep, whereas the others may be influenced by a short or medium sweep (to understand this, think of a wah pedal that has a big or long sweep as opposed to a short quack-like wah). Moreover, the Expressionator allows you to inverse the sweep (to achieve a reverse effect with a pedal) or to apply a Saw or Square wave. OVERALL IMPRESSION: For $199 USD you can achieve some great diversity in your effects by implementing the Expressionator, and certainly manage a more restrictive pedal board by using only one expression pedal. To explain, using an expression pedal (with effects that allow as much) certainly takes your music composition and ‘expression’ to a different level. One problem is when you want to control more than one pedal, which means plugging the cable from one pedal to the next or having more than one expression pedal. Mission Engineering solved this problem by developing the Expressionator so that you can control up to three pedals (or parameters) in any combination, with customized span settings and while applying unique tapering applications (e.g., you can reverse the expression or apply a saw or square wave form). As well, each output on the Expressionator has its own ON button, to remain active or inactive within the mix, although each button is rather small and may be an issue on a dark stage. The only other constraint may be that you can control only three expression-based effects, but then again any additional sounds and the signal likely would become a bit too messy. Nonetheless, based on all the features in this tiny metal box, I believe Mission Engineering got everything spot on. EASE OF USE: There is enough tweaking with the Expressionator, although it’s relatively easy to navigate and get things working. I’ll address each aspect to explain its ease of use, but do refer to the demo video for clarification. First, there are three Channel LEDs (green, yellow and red), controlled by the main foot switch. You can scroll back and forth among channels, but one always is lit and that particular channel is linked to the Taper/Meter (the row of LEDs that light up and down as you rock the Expression pedal back and forth). You need to select a Channel in order to make custom changes to that Channel. Each Channel has an on-off switch, and so, even if a particular Channel’s LED is lit and selected (larger LED), you still can control whether the actual signal is on or off (smaller LED) and controlling to the pedal in question. For example, let’s suppose that Channel A is a delay pedal, whereas Channel B is a bit crusher and Channel C is a Flanger. You may want Channel A always to be on, but when you have the bit crusher on you may want the flanger off, or vice versa. In effect, understand there is a difference between what Channel is selected and whether that Channel is actually on or not. Next is the Taper/Meter, which does two things. One, it indicates how much Span any of the Channels have (and you can set these all differently). You may want a huge delay span of 20% mix (heel all the way down on the expression pedal) to 80% mix (toe all the way down)… or you can adjust the Span so that even if you have the toe all the way down on the expression pedal it may only increase the delay’s mix to 40%. The other thing you can do with the Taper/Meter is to change the nature of the taper (which affects all channels). You can have the usual ramping up effect or you can inverse the effect by flipping what information the expression treadle is sending (heel down now becomes toe down). You can mimic a Saw wave (ramps up the signal up to 8 times in a single span, although you can custom reduce the number of times) or a Square wave (deletes everything between full toe and full heel, thereby creating an on-off effect). There’s also an anti-log taper feature to use with volume pedals that have been modded with a TRS jack, thus evening out the steep ‘cliff’ in logarithmic pots. And if you want to return to factory settings, you can within five-seconds and a two-button push. The Expressionator is not a plug-n-play device (it takes about a half-hour to become familiar with the combinations and a bit longer if you want to custom the Span or the nature of the Taper/Meter), and some of this may seem confusing (the video makes it much easier to comprehend), but was designed to ‘express’ your needs relative to the abilities and confinements of the pedals that the Expressionator controls. In essence, what pedals do you want controlled and when, and to what degree do you want the effect? That is pretty cool and it brings using an expression pedal to a whole different level. RELIABILITY & DURABILITY: Made of steel, the Expressionator is relatively light at 4oz and with a fairly small footprint. All cable ‘ins’ and ‘outs’ are located in the back, which saves on pedal board space while preventing any strain on the Expressionator’s inputs. It is powered by a standard 9v power input. As to power output, there is an internal CV switch for each Channel that allows you to send +5 CV (constant voltage) to devices that call for such, e.g., Moogerfoogers, although setting this switch for a pedal that does not call for it can result in pedal damage. Consequently, avoid if uncertain and investigate your pedals’ literature carefully. The foot switch is a ‘soft’ switch (no hard click engagement). The other push buttons are small or micro-sized (the channel transmission ‘on’ and the ‘set’ buttons), both of which are low profile and would not be engaged or damaged while stomping on the larger foot switch.

  • « Likely the Best Sounding Wah with Biggest Sweep »

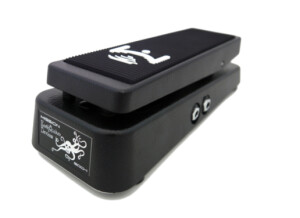
    SOUND: The Rewah Pro by Mission Engineering is such a great sounding wah and likely has one of the biggest sweeps I’ve heard in a wah pedal (although you can adjust its tone and range, as I’ll explain later). Below is a YouTube demo video of the Rewah Pro by Mission Engineering, which covers its ‘standard’ setting and its customization features via internal dip switches. A few things come to mind with this pedal. First is the broad sweep of the standard setting (it’s huge!). Second is the quality of the wah, based on a custom inductor (which I’ll elaborate upon later). Third is the ability to customize the tone by way of internal dip switches, including adding some gain, making the wah more nasally, making the wah more bass-heavy and even reducing the gain for a cleaner wah. And you’re able to use whatever combinations/dip switch settings you like to zero in on that ideal wah effect. OVERALL IMPRESSION: Because of the custom designed inductor (similar in characteristic to the vintage ‘halo’ inductors used in some early wah pedals), this is the best sounding wah I’ve ever heard. The quality of the tone is incredible, and is most obvious with a clean or slightly dirty amp. If you use a high-gain amp, the wah effect/signal remains very clear and obvious and definitely not noisy or muddy (or over saturated). The ‘standard’ setting also offers one of the biggest sweeps among wahs, which means more tonal variations and characteristics, particularly useful if you ‘park’ the Rewah Pro in one particular location. Many wahs do offer customization, but I find the internal dip switch customization in the Rewah Pro highly usable. In fact, each dip switch result adds a different flavor, making it ideal for different applications, whether you want a touch of gain, a cleaner wah sound (with less gain), a bit more bass, or a shorter and more nasal result. Consequently, the Rewah Pro could potentially be the best wah out there if it had external controls, rather than having to unscrew the bottom feet to make a change. However, I’m speaking more from a ‘home studio’ user’s point of view (who always is changing things up for fun) as opposed to someone who uses a wah live and who tends to maintain one particular setting for gigs. EASE OF USE: The Rewah Pro is as simple to use as any other wah… you can ‘park’ it for a particular fixed tone or rock the treadle back and forth for a more obvious and wide ranging wah effect. However, the Rewah Pro requires a bit more practice when it comes to obtaining the desired result while playing – particularly if using the ‘standard’ setting with its big wah sweep and without using the internal dip switches. To explain, the Rewah Pro offers a longer sweep and has an extended range due to its large inductor core (twice the size of a typical wah coil); as a result, there’s a bit more practice required to nail those deep growls or nasally honks just the way you want or like them. I should add that besides the extended range, you also get excellent bass response and little saturation (viz., improved clarity, which makes it ideal for dropped tuning and extended range guitars), although the Rewah Pro also produces vintage wah sounds – and that’s where the internal dip switches come in handy. There are four dip switches under the hood, which alters the characteristics of the Rewah Pro. The first increases gain slightly, which is very useful when playing clean or with a bit of crunch – it’s like adding a slight volume boost with some overdrive, but not too much. The second dip switch lowers the filter’s center frequency slightly (reduces the width of the wah band) to give you a more nasal sound. The third dip switch lowers the center of the filter band to produce a more bass-heavy wah (I really like this one for lead playing). The fourth dip switch reduces gain slightly for a cleaner wah sound, which is very useful for Funk and Reggae music, but can be very useful when playing with high-gain amps when you want a cleaner wah signal with less saturation. The other cool feature is that you can mix and match whatever dip switches you want to use. You may want some extra gain while producing a more nasal sound, or perhaps you want to clean up the signal along with a more bass-heavy response. As stated elsewhere in this review, each dip switch and the possible combinations all are very useful, but it will take some tweaking based on your equipment and music style (sound) to nail your ideal wah effect. RELIABILITY & DURABILITY: Mission engineering has a solid reputation when it comes to its wah, volume and expression pedals (I own one of each, in fact). Pots always wear eventually in a wah, but straight out of the box it is quiet sounding and very smooth when working the treadle back and forward (as with other wahs, you can adjust the tension of the foot treadle). The Rewah Pro has a good weight to it, made of metal both top and bottom, and with a heavy ribbed (for an enhanced non-slip grip) rubber topping. The Rewah Pro also boasts a high-quality custom designed inductor, the type found in high-end audio amplifiers. Mission Engineering claims that every inductor is assembled and tested by hand at a specialist facility in the USA to ensure consistent performance. That’s a plus! As with other (typical) wah pedals, the input and output are located on the sides. The power input also is located on the side (9 volt 1mA), although it also runs on a battery… which lasts a long time with only a 1mA draw (just remember to unplug the guitar input when not in use to preserve battery life).

  • « VM-PRO is Beyond typical Volume Pedals with Loaded Features »

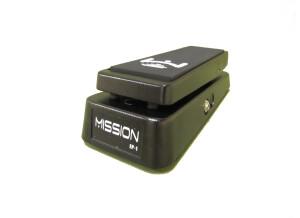
    SOUND: Volume pedals are fairly straight forward, although the quality of a volume pedal’s electronics will make a difference in what you hear when using it. The YouTube video below goes through various features of Mission Engineering’s VM-PRO, which is not like any other volume pedal out there, making it far more diverse and complete for a wider audience of gear heads: I’m covering all the features in the Overall Impressions of this review, but suffice to say that the ability to tweak the VM-PRO makes a considerable difference when comparing to typical volume pedals. As the video demonstrates, the BUFFER in the VM-PRO produces a higher quality and truer sound in your tone. As well, you can adjust the VM-PRO to work with Active pickups, which tend to push volume pedals too hard (and high-gain amps/pedals produce a rougher edge to the tone). As with other volume pedals, you can have the VM-PRO roll off the highs and get a little darker as volume fades – or you can add ‘SPARKLE’ (keep the highs in). Not all volume pedals work well with vintage-style fuzzes, but with the VM-PRO you can flip a switch so that it drives a little harder and with a higher impedance. Nor do you don’t have to have zero sound when rolling off the volume – there’s a set screw that allows you to adjust just how much comes through in the heel-down positions, to the point of having a lot come through to produce your regular volume, followed by a BOOST for lead in the toe down position. Finally, there’s an option of a separate Tuner out, to keep that pedal out of the chain and to prevent more tone sucking. OVERALL IMPRESSION: Beyond a typical and simple volume pedal, I’m impressed with Mission Engineering’s VM-PRO. It provides several options, which I’ll address here, that typically are not found on lesser volume pedals. This model is a bit pricier, but you get a lot more for your dollar – and likely a lot less frustration if working with active pickups, fuzz pedals or dislike how volume pedals typically roll off the highs when decreasing volume. The first bonus on this pedal is the built-in buffer, which stays on all the time. Anyone with a long line of true-bypass pedals or long cable runs knows the value of a Buffer, which controls the input and output of the signal for a truer tone. A simple buffer can cost $100 or more, and so now you have it in the VM-PRO (and it works well with other buffers). The three dip-switch options inside adds to your customization. The VM-PRO is set for passive pickups, but you can switch the pedal over to better accept active pickups, an important feature since active pickups can overdrive a volume pedal and produce unwanted distortion at full volume. Next, volume pedals always remove the ‘highs’ as you roll off on the volume, and sometimes that is a good thing if you want a darker sound or feel to the tone when doing so. However, the VM-PRO allows you to add in some ‘Sparkle’ by keeping the highs as you roll off on the volume (making it a truer volume controller by not altering the tone). Third, vintage and vintage-style fuzz pedals require a high impedance output from a guitar and most volume pedals will not accommodate this need (which means less of a ‘kick’ in your fuzz tone). Conversely, if you’re an avid fuzz user then all you have to do is flip on the third dip-switch to support the best fuzz tone possible. There still are more features. A cool one is the trim-pot adjustment screw (also under the hood of the VM-PRO). Usually a volume pedal will roll off the sound completely – going from 100% signal to no signal (with heel down). The VM-PRO allows you to adjust this, so that maybe a little bit of signal still is audible, or perhaps a moderate amount of signal is to your liking. In effect, what you can do is adjust the trim-pot so that 80% of your signal can be heard with heel down and then 100% with toe down, allowing you to use the VM-PRO as a boost. Finally, with the inclusion of an adapter (available through Mission Engineering) you can have a separate tuner out, which is useful if you want to keep your tuner out of the signal chain (since tuners can be tone suckers). EASE OF USE: A volume pedal works in a particular manner… as the heel goes down volume decreases, and as toe goes down volume increases. Pretty straight-forward. How you want to control volume output can vary depending if you have the VM-PRO in front of or at the end of the chain (just before the amp/cab). If you have it at the front you take advantage of the built-in Buffer for superior and truer sound; as well, when you roll off the volume the delay/echo and reverb still are heard, but will decrease according to their settings. Conversely, if the VM-PRO (or any volume pedal) is placed at the end of the chain you reduce any echo/delay and/or reverb as you roll off the volume. (NOTE: If you suddenly drop the heel to complete silence, any delay/reverb is cut off suddenly as well.) Next, the use of the special features of the VM-PRO is not so straight forward as selecting what you want. If you like to swap guitars in the middle of a set, going from passive pickups to active pickups you will need to choose what dip-switch setting you want since you would have to unscrew the rubber feet to gain access to the electronics. Do you get sufficient quality of tone if set on passive or active? The same is true whether you want the ‘Sparkle’ or if using a vintage-style fuzz pedal – you need to decide what works best on average. Adjusting the volume on the trim-pot poses similar issues. You can have no sound or just a bit of sound with the heel down, which is how most people use a volume pedal. Conversely, if you want to have the pedal act as a Boost, then you set the trim-pot accordingly. However, in doing so you cannot roll off the volume completely (although using the guitar’s volume knob would work as an adjunct). Perhaps if these options were available as switches on the side of the VM-PRO it would be best, but then again that may just complicate the design and likely spike production costs. Nonetheless, the fact that these options are available make the VM-PRO far more versatile than standard volume pedals (even a simple buffer will cost as much as half this pedal’s worth). RELIABILITY & DURABILITY: Mission Engineering’s VM-PRO is very study with a good weight to it. Both the base and foot pedal are steel, with my particular version having a carbon fiber finish (also available in solid black, vintage white and red). The top of the foot pedal is rubber, which increases grip and stability when in use, and is easy to clean (I also have a Mission Engineering expression pedal and was able to clean some dirt off it easily with some mild soap and a damp cloth). Movement of the foot pedal is smooth and solid, set up at the factory with just the right amount of tension (although you can adjust this with the Allen Key provided). The quality of the pedal’s moving parts indicates clearly that it was built to last, which it needs to because of regular up and down movement. Pots always wear, depending on how much you use them, and so it’s difficult to say how long the pot in this particular VM-PRO will last. Regardless, it is quiet without any crackling or other extraneous noises. The cable input, output and power input are located on the sides, which are typical of a rocker-type pedal (e.g., wah, volume, expression). Lastly, do note that the VM-PRO can operate on a 9v battery if you don’t want to use an electrical power source, and consumes only 1mA of power – and so a battery will last a very long time (but do unplug from the guitar input when not in use to avoid draining the battery). If using a power source, it will handle anything from 9v to 18v, making it versatile in that aspect as well.