In part 1 we looked at a backup strategy for preserving your active and recently active recording files. But what about archiving them when you’re finished? In part 2 of this 2-part series, we’ll talk about the best ways to archive your projects efficiently, and future proof them as much as possible.
Space and time

If you never have the need or urge to reopen old multitrack projects, than all you have to worry about with archiving is saving your mixes. This won’t take a lot of drive space and can be accomplished using the 3–2–1 strategy outlined in part 1. For additional safety, you could make copies onto a USB flash drive, which you’re much more likely to be readable on your computer in a few years than if you burned them to a data CD or DVD. (Even as newer, faster versions of USB arrive, it has remained backwards compatible, whereas CD/DVD drives have disappeared from many of the latest computers.)
However, if there’s a chance you’ll revisit your projects down the road, I would recommend archiving them using the 3–2–1 strategy, after you’ve slimmed down their size as much as possible. There’s no point taking up any more drive space than necessary for an inactive project.
Thinning the herd
There is definitely some fat to be trimmed from from your DAW session folder before you archive it. In a typical DAW session, a lot of audio files are created. Every time you hit record, make an edit or hit Save As, you create more files. If you look in the audio files folder of your DAW at the end of a long session, you’re likely to see a huge number of files, way more than the total amount of tracks in your session. Granted, many are quite small, and a lot are just pointing to segments of larger files, but cumulatively, the amount of data can increase quite a bit, even though many of the files probably won’t end up being used in your final version.
You may have a lot of earlier versions of your session (just the session data, not the audio files) that you accumulate as you go along in the project and make incremental saves. What’s more, if your DAW has an auto backup feature for its session files, you can end up with a lot of those as well. You only need to keep your most recent version of the session for your archive. If you think you may need to open up an earlier version of the file, than you’re not really finished with the project yet, and should keep the entire, active session folder intact, and hold off on the archiving.

You can also save space by cleaning out any stereo mix files that you’re sure you won’t be using. Remember to made all the alternate mixes you’ll need (see this article for more about alternate mixes) while the project is still active.
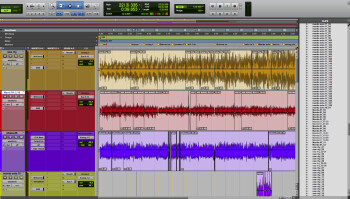
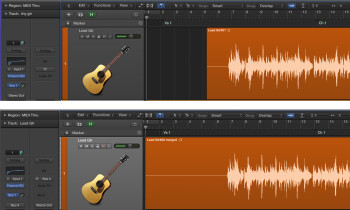
The largest amount of data in your session folder will be in its audio files folder. Since you’ve completed the final mix at this point, presumably, you only need the audio data that are in the tracks you mixed with. The first thing to do is make sure that all your active tracks consist of a single audio or MIDI file, rather than a lot of sections caused by edits, punch ins and so forth. Use your DAW’s consolidate feature (it might also be called join or merge regions) to combine those fragments into a single region. On each track, the region should start at the very first beat, because you may have to line them up in a different DAW someday (see image at left). In many tracks, the music won’t start at the first beat, so you’ll have to create empty space in the audio file so that it starts a the beginning.
After you’ve consolidated your tracks, get rid of the audio files you’re no longer using. Most DAWs provide you with a way to thin out the audio data via compacting (which typically removes all but the active sections of an audio file). You should also delete any unused tracks (and their audio files when you’re prompted) from the session. Before you start deleting anything, make sure you have at least a temporary backup of your session folder (including the audio files), in case you accidentally delete a file you need. File-management features in DAWs can be tricky to use, and it’s easy to accidentally delete something.
Stem the tide
Saving session files gives you the ability to reopen them down the road, but what if you no longer have access to your current DAW, for whatever reason, in a few years? Or what if the DAW manufacturer goes out of business and those session files are no longer supported anywhere? Now that you consolidated your audio files (as mentioned in the previous section) so that each track has one file, you’ll always have the option to import those audio files (WAV or AIFF) in a different DAW.

If you want to go a step further, and actually make it possible to recreate your finished mix in a different DAW, you could bounce out all the individual tracks, with all effects and panning on them. By doing so, you’re essentially making it possible to recreate your mix in another DAW by simply loading in the WAV files.
Although you’ll be committed to the EQ and effects decisions on those bounced tracks (aka “stems”) you’ll also still have the raw audio files for each track, the ones where you consolidated all the fractional audio files into a single file per track, so you will have options.
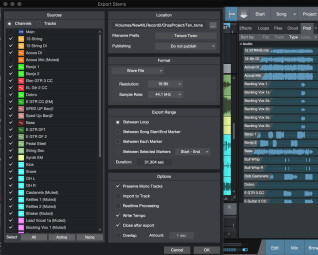
More and more DAWs are incorporating “bounce-to-stems” features, which greatly simplify the process of creating bounces that preserve all your effects, automation, panning, etc. If your DAW doesn’t have that feature, and your session isn’t too large, you could do it manually by soloing each track (and any aux effects and subgroups it’s routed to) and then bouncing. Load those bounced stems in any DAW and you’ll have a close approximation of your final mix, in audio-file form. It’s a good idea to bounce them to a separate folder in your session folder, clearly labeled stems. To avoid confusion, don’t bounce them into to your audio files folder, you want to keep them separate to avoid confusion.
It’s worth repeating: make sure you use the same starting point (first bar, first beat) when bouncing, if you want the tracks to play in sync after you import them to another DAW. It’s wise to note the tempo in the file names of the track or the folder their contained in, because if you recorded to a click, you’ll want to be able to get the bar lines to line up when you resurrect the song.
Wrap it up
Once you’ve consolidated your tracks, thinned out as much data as possible, and created any stems you want to keep and put them into the session folder, you’re ready to save the sessions to your archive folder. If your archived sessions are cumulatively taking up too much space to save on your primary recording drive (which you’re backing up both locally and to the cloud, right?), you might have to dedicate another drive or a partition on another drive to keep your archives. And, if at all possible, back them up both locally and to the cloud, as we discussed in part 1. You might even want to open the session one last time to make sure it’s playing correctly, before moving on. After that, you can trash your original session folders and regain all that space on your recording drive.
