Computer experts will tell you that it’s not a matter of if your hard drive will crash, it’s a matter of when. Even solid-state drives (SSDs), though more reliable than those with spinning disks, can still crash unexpectedly. And when your hard drive goes, your data is most likely gone forever, or only salvageable through expensive data recovery processes. In addition to drive crashes, you can also lose your data to fire, flood and theft. If you record music, a data loss is devastating — which is why you need to backup your files.
3–2–1 backup!
If you really want to protect your precious recording data, you need more than just a single backup to another drive. You need to implement a backup strategy that includes both onsite and offsite backups. A simple way to do this, sometimes referred to as the“3–2–1 strategy, ” entails having three copies of any given file at all times: the original file on your computer, a local backup on an external hard drive and a cloud-based backup.
I’m going to assume for this article that you record to a drive other than the internal drive with your system on it, which is the recommended procedure when recording with a DAW. That said, the same principles apply to backups of your system drive, but for those, you generally want to create a “bootable” backup (you need specific backup software to do so, which I’ll discuss in the next section), so that you can start up if the original goes down.

You don’t need a super fast drive for your home backup, and any drive format compatible with your computer will do — USB, Thunderbolt, FireWire, even a network drive. The backup drive should be equal or preferably greater to the size of the drive it’s backing up.
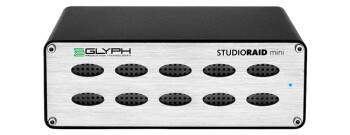
For ultimate data safety, use a RAID (redundant array of independent disks) drive. While there are seven different RAID types. The relatively inexpensive RAID 1 format drives work well for backup or recording drives, because they’re essentially two drives in one, with the data written simultaneously to both. RAID arrays are more expensive than standard hard drives, but provide an extra layer of protection. Using a RAID drive for your local backup makes a 3–2–1 system into a 4–3–1 system. That is, four total copies of each file: three local and one cloud-based.
It’s automatic
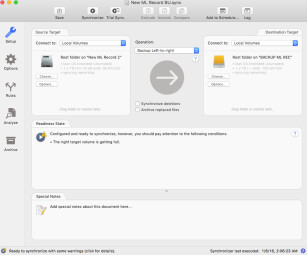
So how do you actually back up your data? You could manually drag folders from your recording drive to your backup drive after each session, but it’s a lot easier to use backup software, which can be set to automatically back up a specific drive or folder on a schedule you set. For Mac users, the Time Machine backup utility is built into the operating system, and is a good option. There are many different backup software titles available for Mac and Windows, with a wide range of functionality and prices.

Most let you sync your source drive (original) with the target drive (backup) meaning that, once you’ve done the initial backup of all the data on the source drive or in the source folder, subsequent backups will only change files on the target that have been changed on the source. This is good because it greatly speeds up the process.
Some backup software compresses your data on the target drive. While this is a space saver, it means that backups have to be decompressed by the same software to be readable. This not only slows down the process, but means that older backups might be unreadable down the road, if the software developer goes out of business and there’s no longer support for the applicatin. What’s more, some compressed backups will require that you decompress the entire target drive, even if you’re only trying to access a single file. This can be time-consuming and annoying. Personally, I don’t think compressed backups are worth the potential hassle and risk.
Although most backup software allows you to set up an automated backup schedule, I’ve learned from experience is that it’s smart to check periodically that it’s actually doing what you’ve programmed it to do. Check the software’s log every week or so to make sure the backups are happening and are successful. I’ve had more than one occasion where I checked, only to discover that the backups had inexplicably stopped for days or weeks, or that there was some sort of error in the writing of the backup. Better safe than sorry.
Up in the cloud
It used to be that offsite backup was done via “sneaker net, ” that is, backing up the data (whether to a CD, DVD or a hard drive), and then physically bringing it to another location. I remember a time when I kept backup DVDs of my music projects in my garage. Nowadays backing up to an offsite location is a lot more elegant, and a lot more automatic, as you can essentially mirror your recording files on a cloud-based drive.
You have a number of options for doing this. You can use a general purpose storage service such as Dropbox, Google Drive, Amazon Cloud Drive or one of the many others out there; or a music-specific one such as Gobbler or Splice (the former is in beta for version 2.0 and the latter only supports files from a few DAWs).

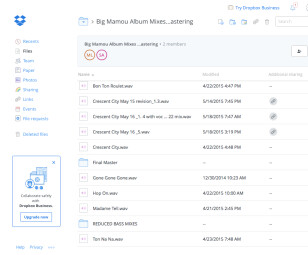
Both Dropbox and Google Drive allow you to set up folders that will sync any file placed within them to the cloud, where a matching folder is located. Whenever you change something in your local folder, the cloud version syncs to it automatically. Although the default with Dropbox and Google Drive is for that folder to be on your system drive, you can move it to your recording drive. By doing so, everything you recorded would get backed up automatically.
Dropbox and Google Drive both offer free storage accounts with a limited amount of space, but if you do a lot of recording, you’ll probably need to buy space. Both services offer 1TB of storage for $9.99/month, as well as other pricing plans. They also each provide excellent file-sharing features for collaborative projects.
One consideration of cloud services is their longevity. I would recommend using the larger, established sites, because newly launched ones might not last too long.
In action
Let’s quickly go over the workflow for the backup strategy discussed here. The list below assumes that you have already done your initial backup of your entire recording drive to the backup drive and to your cloud-based drive.
- You make a change to a file on your recording drive (via recording, editing or whatever).
- Your cloud-based drive starts syncing the change as soon as you make it.
- Your backup software syncs your local backup drive to reflect the change on its next scheduled run. (You can also manually initiate a sync if you don’t want to wait for the scheduled one).
Now you have three identical drives (or folders): your local recording drive, your local backup drive and your cloud-based backup drive.
Fighting corruption
While I’ve focused on external backup solutions, there’s another aspect to backing up that’s important to understand. You can have your 3–2–1 system in place and still get burned if a file becomes corrupt on your main drive and then the corrupted file gets synced to your backup drives, replacing the working versions that were there previously. Then you could have three copies of a bad file and no good ones.
Fortunately, most DAWs have options for automatic backup of session files within the song folder. However, that only applies to the session file itself, not the accompanying audio files. For important sessions save a copy of your active projects, including the audio files, to another folder on your recording drive (or another drive) every few days or once a week, as a fail safe against the corrupt-file scenario.
Even if you did lose data to file corruption, some cloud-based storage services keep older copies of files (as does Apple’s Time Machine), so you could theoretically go back to a version of the file in question from before it stopped working. Dropbox, for example, lets you go back 30 days on anything you store, or longer if you’re paying for storage space.
In part 2 of this article, I’ll look at the issue of archiving recording data after you’ve finished a project. It’s an important activity, and not quite as straightforward as it might seem.
