The musical instrument industry has chosen the best method for the internal cabling of electric instruments, namely soldering. But, as we will see in a moment, this way of connecting two conductors requires a little know-how.
Let’s take, for instance, a very simple and often faulty piece: The jack.
Mark my words
Start by gathering all the necessary materials on the cloth covering the surface where you will be working. Then, pre-heat the soldering iron (at around 360 degrees, in case it has a built-in thermostat) while you unscrew the jack.
In order not to lose the screws, get a small container with lid to store them while you work, like a Kinder Surprise egg, for example. Now, protect your instrument around the jack slot (using Scotch tape in case the cloth slips away with the slightest movement).
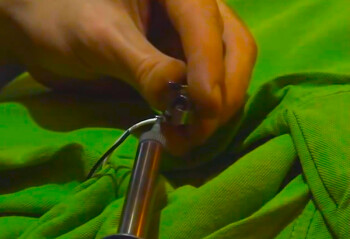
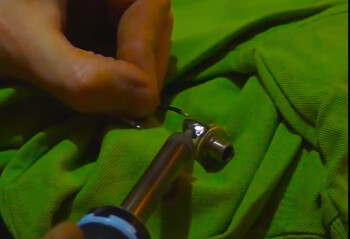
After having checked the color of the cables, so you don’t end up having to do everything twice (incorrectly connecting the wires poses no danger, but the sound will be seriously affected), the time has come to get into the heart of the matter and disconnect the jack from the wires. To achieve that, you only need to put the tip of the iron on the joint a moment so that the tin melts down and allows you to free the jack. You may have to clear the remaining tin on the jack with a pump, but if you change the jack itself, there’s no need to worry about that.
Pay special attention to the wires, since they need to be properly stripped to provide a satisfying contact, while at the same time exposing the conductors as little as possible. So, even if the wire seems correctly stripped, it is better to strip the part previously soldered.
Tin man
Now is the time to apply some tin (solder). The idea is to cover the stripped part of the wires and the soldering tabs of the jack with a thin layer of tin. And it’s only then that you should solder the two parts together by heating up the tinned tab and drawing closer the stripped part of the wire until they seem bound together.
Leave some time for it to cool down and then pull the wire and the jack to check the firmness of the joint. If they come apart, it obviously wasn’t good enough. That said, don’t be to harsh on yourself. Chances are that your soldering job is better than the original, even if it’s a very expensive guitar.
Now you only need to secure the jack with the screws to enjoy playing your guitar once again.
Success!
Now that everything is ready, you can reward yourself by putting your efforts to the test playing an appropriate riff for the occasion.


