You can kill yourself playing badass bass lines, but if you're not in tune with the rest of the band then none of it'll matter. Here are some methods for tuning your bass if you're a beginner.
What do you need?
Nowadays, most people use an electronic tuner, which is still the most convenient way for electric instruments and allows you to tune during a song while other band members keep on playing as loud as they can. But you’ll rarely have to tune your instrument during a song, unless you haven’t done that before starting to play. Or maybe you play with open tunings, which is quite rare among bass players, especially among beginners. You can also use a tuning fork (the mechanical ancestor of the tuner) or ask another band member who plays an instrument that doesn’t need to be tuned (digital or acoustic piano) to give you an A. Here is the workflow for each method.
You have a tuner
Electronic tuners, regardless of whether diatonic (only the seven notes in a scale) or chromatic (adds half-tone sharp and flat notes), will help you tune your instrument easily. This tutorial only applies to standard bass tuning with a fourth between strings. The open notes of a 4-string bass (from thickest to thinest) are: E, A, D, G. 5-string bass guitars add a low B and 6-string bass guitars a high C.
There are different options to choose from in the tuner market:
- Desktop tuner: usually the best choice when you buy your first bass guitar because it’s very useful for rehearsals after practicing at home. It generally has a 1/4" input and output to connect the bass and amp in series, and sometimes even an integrated mic to capture the sound from your amp. This allows you to tune your instrument without connecting it to the tuner (however, do note that the source should be clear and not polluted by other signals). Some tuners also generate a signal equivalent to an A.
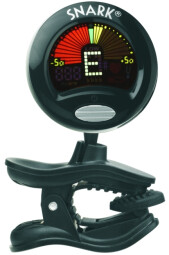
- Clip-on tuner: this very trendy tuner model is as convenient as unsightly. It must be clipped on the headstock and requires no connections. It’s practical on stage, quite reliable and affordable.
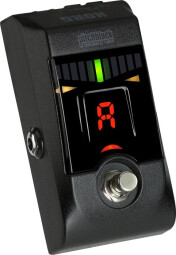
- Tuner stompbox: the best tool on stage because it’s hands-free and you can switch it with your feet. Moreover, it also offers better readability on stages where lighting is an issue. But it needs to be connected to your bass and is slightly more expensive.
Power on your tuner, connect it to your instrument (if needed), and play each string independently while tuning it carefully. Tuners generally offer an LED display (with a red/green color code to help you out) or a pointer indicating the pitch; sometimes they feature both (LEDs are better on stage). Some electronic tuners offer an auto-tune function or are calibrated for open strings. I recommend this option to beginners to avoid looking for the right tone across three octaves…
Did you forget your tuner?
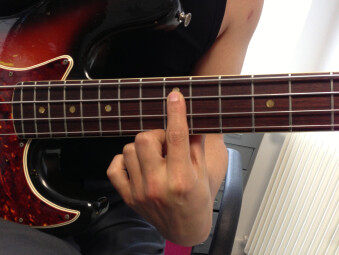
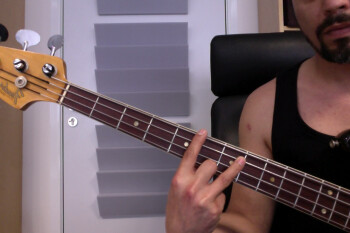
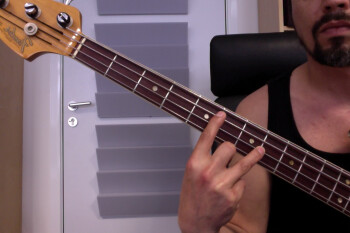
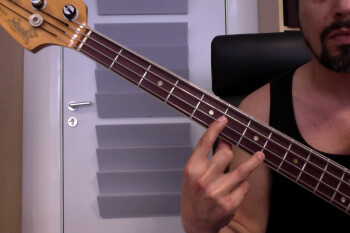
Don’t panic! You can do without it under certain conditions… You just need a reference tone to tune a single string. Tuning the other strings will then be a breeze. If you’re at home and need an A, just grab the closet phone you have. This tip is worth gold because the dial tone gives you a reference A at 440Hz, which corresponds to your A string fretted at the 12th fret (fig. 1). You can also find this note by gently placing you finger on the A string right at the 12th fret. While at it, be careful not to press the string down to the fretboard; in fact, you should play the string as if it was an open string while lightly touching the string along the fret with your finger when you hit it (fig. 2). The tone generated is called a natural harmonic. It is very practical because it resonates like an open string and you still have your hands free to turn the machine heads. Once it’s done, carry on the exact same way going to the 5th fret and playing a chord.
| Figure 1 | Figure 2 |
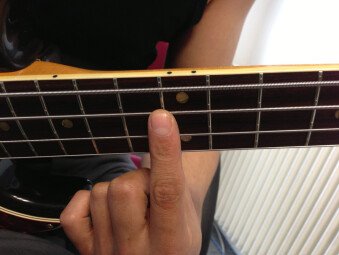
Start with the E string. Play a natural harmonic on the 7th fret of the A string and, at the same time, play the natural harmonic on the 5th fret of the E string. Both notes should sound the same (forming a unison) and they ought to be an A. If the two notes are not in unison you will hear a beating (oscillation). When this beating starts to disappear, it means that you are close to the perfect tuning. The E string will be perfectly tuned when the beating disappears completely and both notes are in unison (fig. 3). Now, it’s the turn of the D string: play a natural harmonic at the 5th fret of the A string and at the 7th fret on the D string. They should produce a D in unison (fig. 4). Now, make the same with the G string (fig. 5) using the same fingering. Here you have an example of all these pretty notes: first the A at 440Hz, then the same tone as a natural harmonic and, finally, all steps described above.

| Figure 3 | Figure 4 | Figure 5 |
This technique takes some time to master but is ideal to tune your instrument very quickly. And it allows you to tune your instrument when you only have a reference A. Personally, the name of my tuner is Mary, since I tune my instrument on the piano of my lovely band mate Mary and it only takes me 20 seconds. I really recommend you to learn this method because it will also train your ears, which are as crucial as your fingers if you want to become a good musician!

