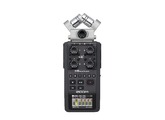
Tech. sheet
- Manufacturer: Zoom
- Model: H6
- Series: H
- Category: Pocket Recorders/Multitracks
- Package weight:771 g
- Other names:h 6, handy recorder h6, h6 handy recorder, h6black, h6 black, h6bk, h6 bk
• Interchangeable input capsules that can be swapped out as easily as the lens of a camera
• Six-track simultaneous recording
• Four mic/line inputs with XLR/TRS combo connectors
• Gain controls (real knobs!) and -20dB pads for each input
• Phantom power for all main inputs: +12/+24/+48V
• Large full-color LCD display, angled so it's easy to read in all environments
• Records directly to SD, SDHC and SDXC cards up to 128GB
• Up to 24-bit/96kHz audio in BWF-compliant WAV or a variety of MP3 formats
• Auto-record, Pre-record and Backup-record functions mean that you'll never miss that perfect take
• Multitrack to stereo internal mixdown
• Independent monitor and playback mixes
• Virtual VU meters
• Voice memo and up to 99 marks per recording
• Overdubbing, up to 99 takes
• Built-in effects, including low-cut filtering, compression and limiting
• Onboard MS decoding
• Normalize, Divide and Trim editing
• Chromatic tuner and metronome
• Loop Playback with user-defined start and stop points
• Variable playback speed, from 50% to 150%
• Variable pitch per track without affecting playback speed
• USB port for data exchange to and from computer
• Multichannel and stereo USB audio interface for PC/Mac/iPad
• Camera strap mounts
• Mounts directly to DSLR or camcorder with optional HS-01 Hot Shoe Mount adapter
• Accepts standard AA alkaline or NiMH rechargeable batteries
• Over 20 hours of operation with 4 AA alkaline batteries
INPUTS
The H6 offers four main inputs (1-4), plus two additional inputs (L, R) that are derived from whichever capsule (X/Y, MS, Shotgun, or Dual XLR/TRS Combo) is plugged into the unit. The supplied XYH-6 X/Y capsule also provides a secondary input for connecting an external mic- or line-level signal via a stereo 1/8" Mic/Line In mini phone jack. When a connection is made to that jack, signal from the X/Y microphones is muted.
All four main H6 inputs (inputs 1-4) are combo connectors that can accept either XLR or 1/4" balanced or unbalanced phone cables. They can handle both micand line-level signals, which means that you can connect either external microphones or line-level devices like mixers, portable music players, electronic keyboards, or electric guitars or basses with active electronics (passive electric guitars or basses can also be connected with the use of a mixer or effects device). Internal switching contacts automatically detect the circuit of choice.
On the H6, all connectors use the industry standard Pin 2 hot on XLR connectors and Tip hot on TRS connectors, as shown here:

Each of the six inputs (that is, 1-4 as well a L, R) has a dedicated gain control knob. In addition, the four main inputs and the EXH-6 capsule feature a -20dB pad, allowing you to prevent distortion even when high-level signals are introduced. In fact, with the use of the Pad switch, the H6 can input a signal 30dB louder and 14dB softer than any other Handy Recorder model. In addition, all capsules utilize higher voltage preamps (5 volts instead of the more commonly used 3 volts) for distortion free recording, even at high volumes. A built-in instrumentation amp allows signals to be transmitted with minimal noise even when long cables are used.
If you're using high-quality condenser (powered) microphones with the H6, no problem—a simple menu option allows the unit to provide Phantom Power (either +12, +24, or +48 volts) to any or all of the main inputs (inputs 1-4). Inexpensive condenser microphones requiring Plug-In Power (2.5 volts) can be connected to the X/Y capsule's stereo 1/8" Line In jack.
OUTPUTS
 The H6 Line Out is an unbalanced stereo 1/8" phone jack, located on the bottom of the H6, beneath the LCD display. It carries the analog stereo output signal, as determined by the H6's internal mixer.
 The H6 USB port, located on the side panel to the right of the LCD display, provides a digital output of either a stereo mix or the six individual input signals, depending upon the setting of the "Audio Interface" function in the USB menu.
In addition, the H6 provides a headphone output with a dedicated volume control, located on the side panel to the left of the LCD display. Connect your headphones to the stereo 1/8" mini phone jack for private monitoring of the stereo output signal.
The H6 even has a built-in speaker, located on the underside of the unit, for fast monophonic monitoring of the recorded signal without the need to make any connections whatsoever. This speaker is automatically disconnected when connection is made to either the Line Out or Headphone output.
a whole lotta stereo.

The X/Y miking technique is optimal when you want to cover a wide area and still capture sound sources in the center with clarity and definition, making it great for all types of live stereo recording.
The supplied XYH-6 X/Y capsule adds two matched high-quality unidirectional microphones to your H6. This kind of microphone is most sensitive to signal coming from directly in front, and less sensitive to signal coming from behind or from the sides; in technical terms, they are said to utilize a cardioid polar pattern. These mics have the largest diaphragm size (0.579" = 14.6mm) of any ever available on a portable recorder.

As shown in this illustration, the angle of the two mics can easily be changed from 90 degrees to 120 degrees for a wider stereo image (US Patent 8184815).
Playing back stereo X/Y tracks in mono results in a fuller sound than you would get with one microphone, but if mono compatibility is critical (for example, in television production), the Mid-Side (MS) mic technique can be a better choice.

Enter MS ("Mid-Side") recording: an incredible technique that allows you to actually adjust the width of the stereo image after it has been recorded, making it especially useful for film, video and television projects. Sound like magic? Read on.
Although the H6's supplied MSH-6 MS capsule appears to be just one microphone, it actually contains two mic elements, positioned directly on top of one another. One of the microphones inside the MSH-6 is unidirectional (that is, it is mostly sensitive to signal coming from directly in front, and less sensitive to signal coming from behind or from the sides) while the other is bi-directional (that is, it is mostly sensitive to signals coming from directly in front and directly behind, and less sensitive to signal coming from the sides).
Inside the H6 MS capsule, the directional ("Mid") mic faces forwards while the bi-directional ("Side") mic is set perpendicular to it, like this:

The basic concept behind MS recording is that the Mid microphone picks up signal coming from the center, while the Side microphone creates ambience and directionality by adding or subtracting information from either side.
The Mid-Side technique works well whenever you need a variable amount of room sound. It can also be used for studio recording, and its convenience and flexibility make it a good option for rehearsal and live concert recording as well.
 Our optional SGH-6 shotgun capsule adds a professional-quality hyper-directional (that is, highly directional) microphone to the H6, making it the perfect audio recorder for anyone working in film, video or live theater, or for ENG (electronic news gathering) applications.
 Thanks to the three internal mics with digital signal processing ability, the SGH-6 achieves a frequencyindependent super-cardioid polar pattern. Compared to ordinary shotgun microphones using an acoustic tube method, the SGH-6 maintains a highly directional pickup at about half the length.
Shotgun microphones are often used when you cannot position a microphone directly in front of a sound source. For example, if someone is speaking in front of a video camera and you don't want them to hold an interview microphone up to their mouth, the solution is to use an off-screen shotgun mic.
However, shotgun mics are not the audio equivalent of a photographic telephoto lens. Even though they do an above-average job of picking up sounds that originate from a short distance away, they always sound better when they're physically close to the sound source. If the capsule is more than three feet away, the audio will start to sound distant. The farther away it is, the more distant and reverberant the audio will become.
Note: The SGH-6 is a monaural microphone.

If you need more inputs, simply plug in the optional EXH-6 Dual XLR/TRS Combo capsule. It allows you to connect up to six discrete signals from external microphones, instruments, mixers or portable music players, making the H6 the smallest six-track recorder on the planet!
Note: The EXH-6 does not support phantom power.
as an external microphone.
The H6 is perfect for use on a video or DSLR camera. The remarkable depth and clarity of sound achieved by the stereo mic design brings additional realism and depth to HD video. By attaching the H6 to a DSLR video camera with an optional hot shoe mount (HS-1), you can create a professional video system with high-quality sound.

HS-1 Hot Shoe Mount (option)
We now also offer a special accessory package for H6 Handy Recorder. The APH-6 package includes a windscreen that provides a professional level of wind noise prevention, a remote controller with REC, PLAY, STOP and other functions and an USB-type AC power adapter.

The H6 can record audio in two different basic file types: WAV and MP3. The main difference between the two is that WAV files are uncompressed; that is, they contain all the recorded data without any "bits" (digital words) being removed. Thus, they provide full fidelity without compromise. The H6 can record up to six monophonic WAV files (or up to three stereo files) in any of the following formats:
44.1kHz / 16-bit
44.1kHz / 24-bit
48kHz / 16-bit
48kHz / 24-bit
96kHz / 16-bit
96kHz / 24-bit
All WAV files recorded by the H6 are automatically time-stamped, making them fully compatible with the Broadcast Wave Format (BWF); in other words, they are "BWF-compliant." This is especially important when recording audio for video, because it allows the audio to be precisely synchronized with the onscreen action in postproduction.
MP3 recordings are compressed, which means that some unnecessary data is removed prior to storage, making them much smaller than WAV files, and thus much easier to upload and download. Some MP3 files exhibit a slight loss of audio fidelity as compared with the original signal; however, this is not noticeable in all circumstances.
NOTE that when the MP3 file type is selected, the H6 only records in stereo; if you want to record in multitrack, you must select a WAV file type. The H6's internal mixdown function allows multitrack WAV projects to be easily reduced down to stereo MP3 or WAV, with independent control over each track's level, panning and pitch.
Pre-record, Backup-record, and Auto-record.
PRE-RECORD
The interview started a splitsecond before you were ready. The conductor lifted his baton just as you were checking a cable. The talent went back on-air a moment too soon.
No problem… as long as you're using the H6. Its Pre-record function automatically keeps the H6 silently but continuously recording in the background, all the time. Then, when you hit the RECORD button, it keeps the previous two seconds and appends it to the beginning of the file. It's as if the H6 had started recording two seconds before you actually got to hit the button.
BACKUP-RECORD
Backup-record—the ultimate safety net. When turned on during the recording of WAV files, the H6 automatically records a duplicate set of L/R tracks, but with 12dB less input gain. Even if the original L/R track is distorted, chances are the Backup version is fine.
You can listen to either set of tracks simply by going to the Backup File option in the PROJECT menu. When turned OFF, you'll hear the original L/R tracks; when turned ON, you'll hear the lower-level Backup tracks instead. Pick the one you prefer and use it as your L/R master. Bacon saved.
AUTO-RECORD
The Auto-record function allows the H6 to automatically start recording when a certain level of sound is detected. When turned ON and the RECORD button is pressed, the H6 doesn't immediately start recording; instead, it goes into a standby mode; as soon as an incoming signal exceeds the Start Level you've set, recording begins.
There's an equivalent Autorecord Stop function, too. When turned ON, as soon as incoming signal drops below the Stop Level you've set, recording ends.
The H6 provides an arsenal of effects that allows you to add polish to your recordings and compensate for any problems or limitations in the acoustics of the recording environment.
A low-cut filter allows you to remove signal below a certain user-designated frequency (called a cutoff frequency). This is useful for eliminating pops, wind noise, blowing, transmitted resonance from an onstage mic stand and other kinds of low frequency rumble.
Compression and limiting compensate for fluctuations in level; in essence, they act like an automatic volume control, reducing the level of louder sounds (that is, the sounds below a threshold point). The main difference between the two is that a limiter reduces louder sounds more severely.

The H6 allows you to choose from three compressor settings and three limiter settings. The two "General" settings (Comp1 and Limiter1) are all-purpose settings that will work well on most kinds of program material. The Comp2 and Comp3 presets are optimized for use with vocals and drums, respectively, while the Limiter2 and Limiter3 presets are optimized for use in live concert recording and small room "studio" recording, respectively.
In addition, there's an onboard metronome and chromatic / guitar / bass tuner—both handy tools when recording musical content.
and recording times.
The H6 requires just 4 AA batteries—either alkaline or rechargeable NiMH—for power. Battery life (when using alkaline batteries) is more than 20 hours, even during continuous recording. An optional AD-17 AC adapter (included in the APH-6 Accessory Pack) allows you to power the H6 from any standard wall socket.
The H6 records directly to SD cards. It supports standard SD cards as well as the newer SDHC and SDXC cards, up to 128 gigabytes, making it capable of accessing massive data storage.
as an audio interface.
The H6's USB port allows it to send and receive digital data. Connect the H6 to your laptop or desktop computer via USB, launch your favorite DAW or use the included Cubase LE , and start laying down your tracks. You can even connect the H6 to an iPad (camera connection kit required).
When the H6 is set to "Stereo Mix" in the USB menu, it acts as a 2-input / 2-output interface; when set to "Multi Track," it acts as a 6-input / 2-output interface. The H6's onboard INPUT&OUTPUT mixer allows you to create a custom stereo or six-track mix for output via USB, with independent control over the level and panning of each track, as well as access to effects like low-cut filtering, compression and limiting. In addition, signal that is input to the H6 can be monitored directly before it passes through the connected computer or iPad, enabling monitoring with zero latency (that is, without any delay). There's also a handy Loop Back mode that allows you to blend stereo signal coming from the computer or iPad with signal coming into the H6 inputs, useful for live streaming via the Internet or for adding narration to a musical backing track.
The illustration shows how you might typically use the H6 for live concert recording. Here, the XYH-6 X/Y capsule is being used to capture the onstage performance in stereo. In addition, a stereo feed from the mixer is being sent to inputs 1 and 2 in order to record the board sound, and a pair of external mics is connected to inputs 3 and 4 to capture the audience sound.

In the example shown in the illustration , the MSH-6 MS capsule is being used to capture the main sound source in stereo, with external boom and lavalier mics (connected to Inputs 1 and 2) focused on the talent providing narration. Another pair of external mics is connected to inputs 3 and 4 and are being used to record a second stereo image, this one of the other performers in the scene. By using the MS capsule, you can then use the H6's onboard MS decoder to adjust the width of the main stereo image in post-production.

The H6 is the perfect audio companion for anyone doing ENG work, especially when it is used with the optional SGH-6 Shotgun mic capsule, as shown in this example. Here, the SGH-6 is being used to capture the news event itself, recorded on the L/R track. Because shotgun mics have a narrower focus (sometimes referred to as more "reach") than an average microphone, the SGH-6 is the perfect choice when covering late-breaking news at a distance. In addition, the SGH-6 does a great job of picking up the frequencies produced by the human voice.
Two external handheld mics for the interviewer and interview subject are plugged into Inputs 1 and 3, with backup external lavaliers plugged into Inputs 2 and 4. The H6's onboard effects and powerful mixing functions make it the ideal field mixer; the low-cut filter can be used to reduce wind noise, and the compressor/limiter can be used to condense the dynamic range and thus make the audio more television-friendly. The six recorded tracks can then be mixed down internally to a stereo MP3 file for microwave or satellite transmission to the broadcast facility.

Want to record your band as they rehearse? No problem, especially if you plug in the optional EXH-6 Dual XLR/TRS capsule, which allows six discrete mic- or line-level connections to be made to your H6.
In this example, a stereo submix of the mics covering the drum kit is being fed from the PA mixer to the L/R inputs of the H6 via the EXH-6. The four main inputs are used as follows: the lead singer's mic is connected to Input 1; a microphone positioned in front of the guitar amp is connected to Input 2; a direct signal from the bass player's active electric bass is connected to Input 3; and an electronic keyboard is connected to Input 4. Thus, each instrument and vocal is receiving a track of its own (or, in the case of the drums, two tracks).
Being able to spread your instruments and vocals over six tracks instead of four gives you an extra degree of flexibility that other handy recorders cannot provide. As you listen back to your song, new musical ideas may spring to mind, and that's where the H6's powerful overdubbing function comes into play, because it allows any of the tracks to be redone—up to 99 different takes—meaning that you can reshape your song after the fact.

Source: Zoom
News
Videos
User reviews
You Can Overdub the LR Channel on a Zoom H6
Published on 04/23/20 at 13:47This was definitely true when that review was written and it's true in theory still but there is a workaround which is quite easy since the firmware was updated. I'm using version 2.30. The instructions below assume you have learned to operate the H6 and understand the file structure, which is explained in the manual.
1. Record the first track in the LR Stereo channel as normal. That's Project A created (probably called ZOOM0001 if you are using a clean SD card)
2. Record a...…
This was definitely true when that review was written and it's true in theory still but there is a workaround which is quite easy since the firmware was updated. I'm using version 2.30. The instructions below assume you have learned to operate the H6 and understand the file structure, which is explained in the manual.
1. Record the first track in the LR Stereo channel as normal. That's Project A created (probably called ZOOM0001 if you are using a clean SD card)
2. Record a short empty track in the 1/2 stereo channel (you don't need a mic) - just set tracks 1 and 2 to stereo, select them and press record for a few seconds. That's the Overdub project created (Might be called ZOOM0002).
3. Insert the SD Card in a computer and open the file browser.
4. Copy the LR WAV file from Project A to the Overdub project. Change its name to the same as the empty 1/2 WAV file already there so your original recording is now located in stereo channel 1/2 of the Overdub project.
5. Put it back in the H6, go to Menu>Project Menu>Rebuild. Select rebuild and agree to its demands. Rebuild recreates the project file based on the new file you have placed there. That's the new feature that makes this process possible.
6. You are set to go, follow the Overdub instructions in the manual to add another track using the LR channel.
You can use a similar process to import a new WAV file into the H6 from another recording source.
Limited Use for Everything but Live Recording
Published on 04/19/19 at 22:03An obvious use for the H6 would be as a portable, free-standing recorder. My expectation was that I could add a sync/scratch track to a folder and add other instruments remotely to the recording for later extraction and adding to a session in Pro Tools or Logic, etc. Zoom engineers have decided that "overdubbing" is only for adding...…
An obvious use for the H6 would be as a portable, free-standing recorder. My expectation was that I could add a sync/scratch track to a folder and add other instruments remotely to the recording for later extraction and adding to a session in Pro Tools or Logic, etc. Zoom engineers have decided that "overdubbing" is only for adding one track at a time. Oddly, Zoom has taken 50 years to not quite provide the function of a 1970s Teac 2340 reel-to-reel. Someone needed to learn something about multitrack recording before being allowed to play with product development.
The sound quality of the H6 preamps is fine. The preamp controls are clearly marked and easy to use. The XY, M-S, and extra non-phantom-capable extra pair of pres are decent. If what you want to do is record 6 tracks simultaneously and as a free-standing remote recording deck, the H6 will be fine.
I discovered that the engineers didn't think much about typical remote applications, though. Connecting the Zoom pres to a splitter that allows a preamp's phantom power to the Zoom will wreak the H6's phantom power. It's hard to imagine not being able to protect a current limited phantom supply circuit from something as common as linked phantom power, but Zoom failed that test. Be super careful with splitter use. If they aren't fully isolated, the H6 will probably self-destruct.
Obviously a work-around to the overdubbing flaw is to use the H6 as an interface and do the sync signal with a computer. As an interface, the H6 has a lot of better priced and featured competition. The whole point of the H6 should have been to be a free-standing, multitrack recording system.
H6 is perfect EXCEPT it doesn't allow overdub with onboard mic/capsule
Published on 08/16/15 at 07:34The interface is really sleek, easy to get to, easy to adjust, and easy to see recording volumes. The volume knobs on the front are a very welcome improvement over the H4n. I liked the H4n but, always hated having to mess with the menus before recording. Never a good option at band practice as it took so long to go through the menu system and you could never be certain what kind of volumes you were recording.
I recorded with the H6 as a stand alone using the onboard MS microphone, as well as two DI outputs from my Fishman Artist amp,...…
The interface is really sleek, easy to get to, easy to adjust, and easy to see recording volumes. The volume knobs on the front are a very welcome improvement over the H4n. I liked the H4n but, always hated having to mess with the menus before recording. Never a good option at band practice as it took so long to go through the menu system and you could never be certain what kind of volumes you were recording.
I recorded with the H6 as a stand alone using the onboard MS microphone, as well as two DI outputs from my Fishman Artist amp, into the 1/4″ inputs of the H6. The MS mic for the Zoom H6 is very clean, full, and smooth on both vocals and guitar. I even experimented recording with an iPad, using the iPad as an instrument into one of the Zoom H6 tracks that sounded amazing. I use a little app called ThumbJam. Love the Cello on ThumbJam and I can’t believe how well it recorded. Used the headphone jack from the iPad into channel 2 of the H6, with a 1/4″ plugin. The H6 onboard M/S mic recordings of the guitar finger picking and vocals came out better than the plug in from the Fishman DI output. I was able to hear every note, clearly, ringing vibrantly with the onboard M/S Mic Capsule. The recorded tracks from the Fishman DI outputs weren't as clean but gave a nice mix to the finished Mp4.
Also used the zoom H6 interface with Logic Pro. It worked well as an interface but, got a bit muddy after several tracks. It was all usable though not the same sound quality of the direct MS mic.
Now for the bad.
With the H4n it was nice to be able to select which input to use for each track. With the H6 that isn't an option. When you record with the onboard mic capsules, you get a stereo L/R track that can't be overdubbed. Nor can you record with the onboard mic capsuled to another track/channel other than the L/R tracks, making overdubs using the onboard mic capsules impossible.
I did call Zoom about this and was told the mic capsules are "hardwired" into the unit which doesn't allow the overdub or re-assignment of tracks.
I've posted the email, with the suggested work around, from Zoom on my website https://www.deberney.com/zoom-h6-overdub-work-around/
Here are two recordings using the H6.
https://www.deberney.com/home-page/deb-erney-2/deb-cover-songs/
One version has the H6 recordings along with tracks using the H6 as an audio interface with Logic Pro X.
The second version is the clean version with just the H6 inputs, no effects, no processing.
An audiophile's travel buddy!
Published on 10/07/14 at 08:26As I dove into using it right away, I found all of the features that sold me on it were easily accessible and equally useful. My primary use for the H6 will be for on-site sound recording for film. For my approach to sound design, having 4...…
As I dove into using it right away, I found all of the features that sold me on it were easily accessible and equally useful. My primary use for the H6 will be for on-site sound recording for film. For my approach to sound design, having 4 independent, low-noise preamps with individual gain knobs on the outside of the device was a key feature. I like to set up the X/Y microphone as a general stereo distance mic centred on my subject. Then I can use preamps 1 and 2 to drive two shotgun mics forming a closer x/y field to my subject. Then I like to use mic preamps 3 and 4 to power two condenser mics further and to the sides of my subject, to capture the performance space. Being able to do all of this simultaneously while monitoring all of my levels on simple display screen without any thumbing through menus is a huge advantage to the H6.
As a musician, I was most excited to dive into the M/S microphone for recording acoustic demos. I travel often with my Martin LXK2 acoustic and have found the Zoom H6 to be a competent companion for recording demos on the go. The M/S mic is perfect for capturing a raw sound that I can upload into Pro Tools later and adjust the stereo image to taste. Below I walk through an acoustic demo with the H6.
Placing the M/S mic aligned between the direction of my voice and the guitar's 12th fret, I found I could vary the amount of vocal sound versus ambient guitar sound by adjust the side microphone's volume. This was really nice when monitoring my performance, because with the sides turned up I better heard my foot tapping to stay in time and also got the added resonance of the room to help my singing. What I discovered when I exported this file to my computer, was that I got a .wav file with the 'Mid' information on the left and the 'side' information on the right. This seemed pretty intuitive, so I loaded up a Pro Tools session with 2 mono tracks. On track one I put the left channel and track 2 I put the right channel. However, I left them both panned center, meaning my 'mid' and 'side' mics were now overlapping and by lowering the volume of one or the other I could adjust the stereo image and how prominent my vocal was in the mix. It's almost like multi-tracking but with one mic! See how it works in these examples
Mono (the side channel is muted and we hear only the 'Mid' mic): https://en.audiofanzine.com/pocket-recorder-multitrack/zoom/h6/medias/audio/a.play,m.473957.html
Mid 0 / Side -15 (I've brought up the sides just a bit to add some 'room' back into my take):https://en.audiofanzine.com/pocket-recorder-multitrack/zoom/h6/medias/audio/a.play,m.473958.html
Mid/Side at Unity (both with faders up): https://en.audiofanzine.com/pocket-recorder-multitrack/zoom/h6/medias/audio/a.play,m.473959.html
Mid -6/Side 0 (Here I've brought the Mid channel down just a hair so the vocal sits a little further back in the mix: https://en.audiofanzine.com/pocket-recorder-multitrack/zoom/h6/medias/audio/a.play,m.473960.html
PT Mix (I found I could play with the levels of each track and then add plugins and effects to achieve a fun, unique low-fi demo sound): https://en.audiofanzine.com/pocket-recorder-multitrack/zoom/h6/medias/audio/a.play,m.473961.html
There's many reviews and technical tutorials that go in depth with the professional applications for the H6 and I suggest checking them out! But if you're also a musician looking for a good multi-track recorder, then thrown the rule book out the window and play with the variety of different mic inserts and features. All in all, the H6 is an incredibly powerful, yet intuitive recording tool that after a little initial learning curve can be an audiophiles perfect travel buddy!
Audio excerpts
-
00:0000:54

-
00:0002:08

-
00:0004:55

Manuals and other files
Other Zoom pocket Recorders/Multitracks
-
H1
Pocket Recorder/Multitrack
-
H5
Pocket Recorder/Multitrack
$259 new (6 offers) -
H4
Pocket Recorder/Multitrack
-
H2n
Pocket Recorder/Multitrack
$41 new (2 offers) -

PS-04
Pocket Recorder/Multitrack
-
R8
Pocket Recorder/Multitrack
-
H2
Pocket Recorder/Multitrack
-
H4nSP
Pocket Recorder/Multitrack
$46 new (1 offer) -
F1 Field Recorder + Shotgun Mic
Pocket Recorder/Multitrack
$10 new (6 offers) -

PS-02
Pocket Recorder/Multitrack


![[Musikmesse][VIDEO] Zoom H6](https://img.audiofanzine.com/img/product/normal/1/8/180222.jpg?fm=pjpg&w=80&s=b384a8d91bd29985265f81c08b6c6dd5)


