The time has finally come for the new Logic Pro version. It was almost four years without a major update, many were doubtful that it might ever see the light of day and even ventured it would disappear. The software has arrived. Should we be happy or not? Here are some answers.
An opening remark: sometimes it is impossible to imagine what we have to go through to test a software. When we heard of the release of Logic Pro X, everybody at Audiofanzine got really motivated about doing one of those lengthy tests we are used to when such important announcements are made. We immediately contacted the PR department to get a test version, as usual. And then: surprise, surprise! There was no way we could get a code to download the software from the App Stroe (the only way to get Apple’s DAW). So, to bypass Apple’s impositions — fly to London, all expenses paid, and return with an iMac (ahem, and what do we do with the PCI cards?) and an iPad, both of which we could have at our disposal “as long as we want, ” have a nice chat with the specialists over there (with whom? No way of knowing…) before we could get a code — we decided to buy the software to test it, without having to endure the official presentation and the indispensable features…
Without the need to go into some of the reasons for our refusal — which ought to be obvious — we can mention the compatibility and installation problems that may arise (on studio computers there are soundbanks, virtual instruments, plug-ins with their corresponding authorization, TB of video and already finished projects since version 4.5, drivers, extension cards, etc.) and our somewhat complicated agendas. So, two minutes after having accessed the App Store, Logic Pro X was on its way to being installed on our Mac Pro and MacBook Pro.
|
DAWs are currently very active, as the release of Ableton’s Live 9, MOTU’S Dgital Performer 8, AVID’s Pro Tools 11, Cakewalk’s Sonar X2, Presonus’ Studio One 2, Steinberg’s Cubase 7 and even Propellerhead’s Reason 7 can confirm. They are all going through phases, probably not revolutionary, but important ones, with architecture or compatibility changes that entail major practical and financial decisions. And like Mr. Yann Coppier said in his recent Pro Tools review, most DAWs copy each others features and they all allow us to work professionally. Restrictions have more to do with compatibilities (the possibility to add instruments or plug-ins in that or that format, to work with images, etc.) and, especially, workflow continuity (usability, procedure habits, etc.), as well as backward compatibility.
Let’s see what Logic Pro X has in store for us.
Introducing Apple Logic Pro X
It’s the 10th version of the software created by Emagic, which would be bought by Apple in 2002, and as usual ever since that happened, Logic Pro X isn’t available for computers running Windows (since version 5.5.1). The new version is sold alone, no Logic Studio 3 pack in sight. You will have to buy Mainstage and Compressor separately. The former has been updated to version 3, while the latter remains in version 4.0.7 (from March 28, 2013). Regarding WaveBurner and Soundtrack Pro, they got lost in the binary limbo (not to mention Logic Node)… Owners of Soundtrack will nevertheless be thrilled (?) to learn that we can still select it as an external editor (just like any other audio editor), via a shortcut on the Edit menu.
For an Apple newcomer, the price is interesting, to say the least: 179.99 euros, which makes it almost the least expensive DAW on the market, considering its features and sound (we will come to this later). For those of us who have payed all versions, updates, plug-ins, and virtual instruments after the software first came out, it feels like having to pay the full price once again.
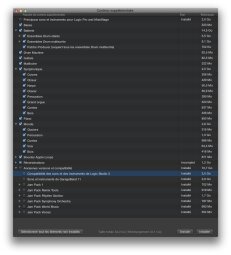
This DAW has no protection via a key or serial number, so there is the possibility to install it on several computers (the download is automatic, or not, depending on your user settings for the App Store). After having installed the software itself we can download a pack of sample, loops and virtual instruments (Logic Pro X menu > Download Additional Content). This will install almost 50 GB of contents with automatic loop tag recognition, guaranteed compatibility with the sounds and instruments of Logic Studio 2 (the one that came with Logic Pro 9), and the update of existing libraries, as well as new content.
A first good point: the installer detects, if necessary, the precedent version and how it is organized (banks on external drives, alias and symbolic links, Template files, instrument presets and programs, including those of the exs24, etc.) and places it all inside a folder under User > Library > Audio Music Apps, everything while mixing its own files with those of version 9 (for example) on HD > Library > Application Support > Logic. If it’s an installation from scratch, everything is done automatically, and you will have to browse around the folders if you want to place content in different hard drives, as usual. We can only regret that, unlike many other developers and in an obvious effort to keep it simple, Apple doesn’t offer the option to select the installation folder for the different contents.
Let’s start with what’s new.
New with old goodies or old with new goodies?
Logic has been patched throughout the years. Features were added on top of an old engine creating bugs and instability, so we can only hope that they were and will be fixed with this and future update (although updates are very rare since Apple took over). And don’t go putting words in my mouth: Logic is a very usable software, at a professional level, with some very clearly pinpointed flaws, just like any other competing product. If I am still using it after 15 years, it’s not because I like to suffer, but rather that it has helped me accomplish all my professional tasks without a problem. And now, to mock me, Apple has brought out two updates, one right after the other, with a very adequate number of corrections: versions 10.0.1 and 10.0.2. Thus, the bugs we found in our test that have been fixed by these two updates will (almost) not be mentioned within this article.
The first notable change is the GUI, which kill-joys dismiss as GarageBandesque and optimists say it’s Final-Cutesque. Or the other way around.
First of all there’s the colors, which revolve around different, very nice shades of dark gray, while the indicators, buttons and similar unfortunately no longer use bright colors (nor black nor white), but rather the same colors but covered in a brown-grayish veil and without any possibility of customizing them, even if the manual says otherwise… In order to do that you will have to open the contents of the Logic package, go to Frameworks and modify one of the .plist files.
More striking is the change in position of the Library, which is now on the left side (clever, since it’s now closer to the Inspector tracks) and the Transport Bar that moves up taking the place of the toolbar, which appears now via an icon (or a shortcut you can define). This new transport bar groups together screens and transport buttons, as well as different shortcuts, in the form of icons. The problem is Apple reviewed the names and buttons at the same time, the result being that everything is bigger now. This poses serious problems on a laptop screen ─ and even with the tower (using a 24" with the MacPro) ─ by returning the functions to menus, defeating the whole purpose of the bar (look at the screenshot depicting the transport bars of both Logic Pro 9 and Logic Pro X).
And the same applies to the toolbar, with an added inconvenience: the impossibility to change the position of icons at will. In short, a good idea very poorly implemented, which only handicaps the user instead of benefiting him (not everybody has a 30", you know…).
One of the biggest fears of some users was the disappearance of the Environment ─ a superb MIDI Lego that allows us to do extraordinary things (like the Environment created by George Whitty for Michael Brecker that you can see in this article on Virtual Instruments magazine) which is the exact opposite of Apple’s philosophy that presupposes that the user needn’t get his hands dirty. It is still there. Yes! However, it doesn’t seem to have changed a bit (except for its name: MIDI Environment), up to the point that tracks and objects still have the same look and colors as on Logic Pro 9, which is awkward. And the different objects are the same ever since, oh… well, you get the point. So all known bugs ought to be as present as ever. But there is something even more annoying: the impossibility of erasing a cable by selecting it and pressing the Del key. We are forced to use the eraser tool or to rewind the cable upon itself.
Importing old environments is not without difficulties: names, colors, fader positions, and other tools may disappear or even leave their place to more or less esoteric symbols. Plus, the fonts overlap each other systematically, due to their XXL size, and thing don’t always work.
Simplification
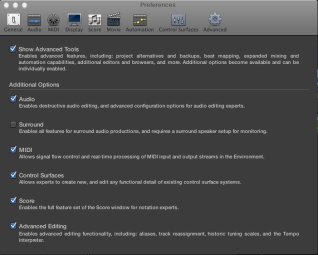
We already know Apple likes simple interfaces, coupled with the most logical and effective usability, in order to offer the best experience both to new and professional/seasoned users. So it goes without saying that Logic doesn’t really comply with the house standards. Many feared that the DAW would gradually lose everything that made it so powerful with updates. The X leaves the beast intact, but the developer did add a significant feature in this regard: by ticking or unticking Show Advanced Tools under Preferences, we can have access to all the most complex options the software has to offer, or not, which allows us to switch from the tool we all know, including all new features, to a sort of big Garage Band.
Graphically yours
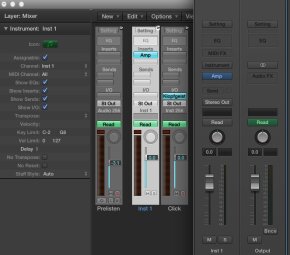
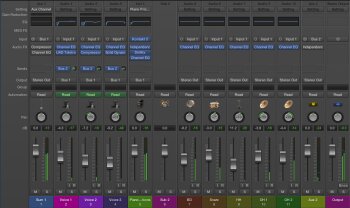
The new way of presenting and organizing things is also beneficial thanks to several tricks and aids. Once the track architecture has been accepted (the inputs are now above the Sends and a MIDI FX for the instruments has come into scene), the visualization of that which is happening is very clear: complementing the graphic representation on the EQ window, a horizontal screen shows the current compression level, under the obvious condition that we have previously inserted Logic’s compressor or limiter. And the assignment of inputs to the output seems more logical. Moving and copying inserts is much faster now, the Alt button is not necessary anymore to activate the bypass, and the level indicators are separated: on the one hand we have the channel’s fader level and on the other the volume reached. We are not so sure about the color used to alert us of distortion on the channels (orange), given that red is reserved to the Master channel, even if it makes perfect sense in a way (what happens on the channels is not really distortion, unlike what happens on the summing bus). It’s a pity that we still cannot move the channels on the Mixer (aargh!).
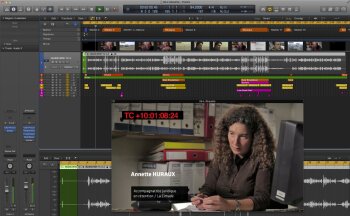
And since we are talking about channels, we can confirm that all Global Tracks are still there, except the Chord track (why?). The different buttons have disappeared so all options are now available via the drop-down menus. A big concern: does the Video track (renamed Movie) work properly, considering that it had several bugs under Logic 9 running at 64 bits? Is the progression bar present? Affirmative. Correct detection of Scene Cuts? Affirmative. The Export Audio To Movie feature works correctly? Affirmative. Have the small arrows on the film window returned to allow us to move image by image? No, ouch! There is still no way to move the film along the timeline together with the markers created during the detection of Scene Cuts. So, in short, some good things and some others to improve.
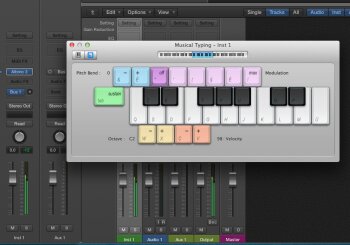
We can also confirm that certain shortcuts and options have been modified after having been implemented a long time ago: so Caps Lock Keyboard has disappeared only to be reborn as Musical Typing Keyboard, but the Caps Lock shortcut is not available anymore and it is non-assignable on the shortcuts window. We do however dispose of a pitch bend, modulation, a sustain, a speed adjustment, etc. We also disapprove of the disappearance of the Alt-click function that allowed us to reset to default the settings modified on the Inspector. The Set Optimal Regions Size options still don’t work correctly…
Just as problematic is the change applied to the zoom option where you could click and pull up and down the playback head on the timeline: you now have to press Alt at the same time. What a preposterous idea! The feature, which used to be really useful when doing intensive editing, is now slower. And the graphical bug when zooming in very close (the waveform turns very rough) hasn’t been corrected. We nevertheless like the three zoom levels per window and the possibility to do vertical zooming on the whole screen or via the track pad.
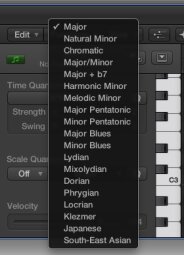
The Piano Roll also underwent some welcome changes. We now have a space for additional settings, including Time Quantize (with rhythmic value selection, an action button, and Strength and Swing faders), Scale Quantize (a means to force notes to align according to something like twenty different modes) and a Velocity fader, which avoids us having to change tools. Everything is well thought out and effective, so it’s a pity that there’s three rather annoying bugs: the Pencil tool doesn’t change into the Resize Tool to allow us to resize a note when we put the mouse on the note’s lower right corner (but it works perfectly fine on the lower left corner…). Secondly, the field indicating the number of notes selected does not show the correct number unless we refresh the screen. And third, when we hide the Piano Roll’s Inspector, there’s a display bug: the background grid transforms into a light gray background, which disappears after scrolling right or left.
The different changes, both graphical and functional (many of which we didn’t mention here, like Groups management, for instance), reveal themselves very practical after a couple of weeks of use. They provide an astonishing speed and logical way of doing things in comparison to previous versions (we are happy to see the return of Auto Save, for example, even if introducing it as a new feature is too far-fetched…).
Adios 32 bits?
The talk of the town is definitely the dropping of 32 bits support and the Audio Unit Bridge. People who own plug-ins that still haven’t being ported to 64 bits (even if it was announced it would happen years ago) or own cards and racks that aren’t supported by the manufacturers anymore have many different and sometimes justified reasons to be upset. It will be hard for me to do without the TC Electronic MD5 and VSS3 bonded to the PowerCore which will never be 64 bits.
This full transition to 64 bits (even if there might be some bugs to be discovered as certain aspects of the Environment let us infer) guarantee a better stability. Users of large sample libraries (save for exs24, which can handle its own 4 GB RAM even if Logic is in 32-bit mode) cannot but rejoice.
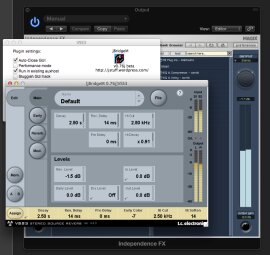
INevertheless, there are several options to continue using 32-bit plug-ins within the new 64-bit Logic. One of them consists in converting the desired VST plug-ins via jBridgerM and placing them in the VST folder of Independence Pro (owned by Magix now). The latency is almost insignificant, but its stability can still be fragile, depending on the type of plug-in employed. And there is no guarantee that they will still work after future Logic or OS updates.
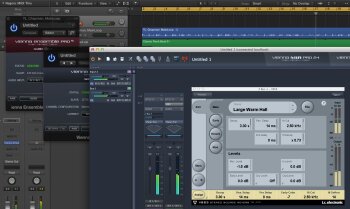
Owners of the Vienna Ensemble Pro will be the best of since the communication between 32-bit servers and the 64-bit program represents no problem. Plus the stability is bullet-proof this time and with full latency compensation. Undeniably one of the solutions to take into consideration.
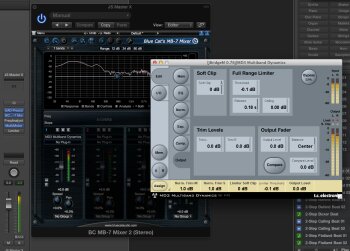
Finally, another very stable solution is the one proposed by the forthcoming Blue Cat Audio MB-7 version 2. The developer has actually included effect slots which can be switched from VST 32 bits to ported 64 bits versions via jBridge, all within Logic X. It works perfectly and is a light and totally transparent solution for the user. Sweet!
Audio, Midi and everything else
The Track Stacks are also new. They offer two working modes: Folder and Summing. The first allows us to combine several tracks and control them as one single track, without modifying the routing. The channel in question has only volume, mute, solo, automation and group controls. It could be considered as an evolution of the Folders (otherwise still available), given that we now have the controls mentioned above. The Summing option allows us to route several tracks to an Aux or Bus with just one click (before or after creating regions, the feature can be accessed with a keyboard shortcut), instead of doing it manually and slower like we used to. In both cases there is the possibility of only having the “master” track displayed in the Main Window (formerly Arrange) and on the Mixer, which we can open via a small triangle: the Follow Track Stacks options allows us to hide/show the sub-tracks on the Mixer. We have total freedom when it comes to the type of tracks, their organization, names and colors, etc. On the Main Window, the background will take a color similar to the one of the “master” track and the name of the latter will be displayed on that same background. Even if not revolutionary, the principle behind Track Stacks reveals itself very useful in terms of workflow and speed once in use.
Another very nice addition are the Smart Controls, which are similar to the macros we can find in other software programs (and even in Logic, in the es2, for example, even if they are not assignable). The possibility to create several fast access controls per track by selecting an effect or a virtual instrument (or several, limited to 12 apparently), with a Learn option for parameters that can be assigned to a button or knob very quickly (which could be taken as a simplification of the Controller Assignments window, that opens when we double-click on an assignation field). Choosing the interface and controller type from a wide selection (the Mainstage inheritance maybe…), management via external controllers, a settings offset (lower and upper limits of the editing range), the possibility to reorganize the parameters, knowing that several of them can be assigned to one single knob, each with its own editing range, invert, etc. Well done. Once again a gain in speed, and a new opportunity to use Logic on stage.
MIDI plug-ins are also great news, finally, for those of you who didn’t like to mess around with the Environment… (I can see all Cubase users grinning). They include: Arpeggiator, Chord Trigger, Modifier, Modulator, Note Repeater, Randomizer, Scripter, Transposer, Velocity Processor. Plug-ins can be inserted before any MIDI instrument in order to apply to it, via very clear and intuitive interfaces (somewhat big, but they can be reduced), different processes that they might lacks, as well as all the parameters that we usually find in such tools, no more, no less. Like we already mentioned, those familiar with the Environement, Transformers (now accessible via a floating window called Midi Transform) and other objects won’t find anything new (except for a Scripter module), but, just like the newbies, they will be happy to avoid cablings and setting parameters to use simple modules which nonetheless have some fine presets.
The Scripter allows us to create our own scripts by using the JavaScript API. To get you started, the manual includes several examples and descriptions dedicated to effects. And we can surely expect NI Kontakt scripting gurus to jump at the opportunity, considering that the exs24mkII is still the best-fitted virtual sampler available for Logic (and for good reason, knowing that it is far from offering the same prowess than competing products). And by the way, it’s a pity that the sampler didn’t change much, especially when it comes to editing, even if the developer of Redmatica — who created some amazing tools for it — is now working for Apple. Also note that Logic’s Mixer does not display the eighth Midi and Send slots (while the Inspector does), which can be considered a serious bug…
We also salute the introduction of Groove Track — an improvement on the one that can be found in GarageBand —, which serves to designate a track as the rhythm reference of the song (indicated by a star on the left side of the Track Header, visible only if we activate Groove Track in Configure Track Header; a good thing to know to avoid spending hours clicking on it and asking ourselves why nothing happens…). When we tick the boxes that appear on the other tracks we will force them to align rhythmically to the reference track. The quality of the result is surprising, regardless of whether it’s a MIDI or an audio track, both align perfectly without necessarily losing their basic groove. The end result is similar to using stretch with markers/slices or MIDI quantize; and we can always fine tune it afterwards. Regulars surely recognized that it’s an improvement/simplification of processes that combines the Inspector’s Audio To Midi Groove Template and Make Groove Template quantize features. We must admit that it has been greatly simplified (in the sense that it is easier to use), and very, very effective. A real gold mine when we work with material from different sources, or to experiment with odd mixes.
Since we mentioned stretch and slices, also note that if Slice At Transients Markers is still limited to 32 bars, it seems to be less accurate than on the previous version. It’s not systematic, but the same files provide different results in Logic 9 and Logic X sometimes. A mystery.
Old projects, Logic Pro X and OS 10.8.4
It is wise to make sure that old Logic projects are saved with at least Logic version 7.2.1. Considering that it is impossible to open files older than that version since Logic 9.
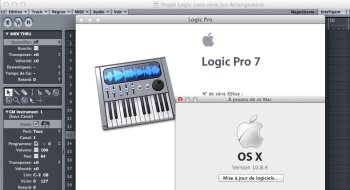
Logic 7 owners will be happy to know that it can be installed on OS 10.8.4 (with the help of Pacifist, depending on the type of installer that we have) and that it works very well (certain third-party Audio Units aren’t usable, but not too many; during this review it only happened with the Sonnox for PowerCore) under the condition that the interface drivers are supported (we had no problems with the TC Electronic SK48).
That way, we will be able to import old projects (all the way to version 4, with no guarantees since we didn’t have projects of later versions) and save them in a format that can be read by Logic Pro X. However, the question rises of whether Logic Pro X has changed that much, apart from the obvious additions.
But as long as it works…
Of groove and accuracy
An article like this cannot deal with all new options and features. But before concluding our review of this new version we will address two of them: Drummer and Flex Pitch. The first can be found when creating a track in the appropriate window, along with Software Instrument, External Midi and Audio (notice as well the new Guitar and Bass options, which open a new pre-set monitoring track with Noise Gate, Pedal Board, Amp, etc.). A Drum Kit Designer plug-in and Drummer regions will be automatically opened. If the project has an Arrange structure (markers specifying the Chorus, Verse, Bridge, Intro sections, etc.), the Drummer regions will follow it. If the project doesn’t have any, Logic will load only two 8-bar ones.
These regions have a weird status because they evidently use MIDI programming (which is confirmed by the availability of the Score Editor), but are not directly accessible via the Piano Roll. You first have to convert them into MIDI regions to be able to edit them. The conversion into a Drummer region is also possible, but at the cost of losing MIDI changes and, unfortunately, converting it to a MIDI track will prevent you from being able to modify the drummer’s playing. Even a MIDI file independently programmed and afterwards passed through the Drummer track will be modified to adopt the playing style of the selected drummer. It’s a pity because it restricts customization (in terms of the groove created by the user).
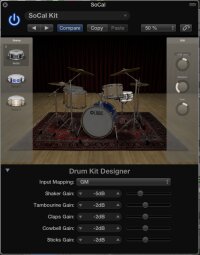
The creation of a Drummer track opens up a Drummer Editor, a specific window that coexists with the Drum Kit Designer to create and control a kit as well as to adapt its behavior according to the needs of the user. There are four different styles we can choose from (Alternative, Rock, Songwriter and R&B), each of which offers several drummers, every one with its own kit and playing style. Besides their specific kit, each drummer offers different presets with important variations on the basic pattern (the Drummer region changes at the same time). An X-Y pad allows us to complicate/simplify, make louder/softer the current pattern. Plus, there’s a Fills knob that determines the number of breaks in the pattern, and another one called Swing to make the drummer swing more or less. Right at the center, a main screen allows us to activate/deactivate the different kit elements, offering more or less variations for each thanks to the different sliders available. The Details button gives us access to a controls window, including Feel (to play behind or ahead of the beat; very effective), Ghost Notes (to adjust their overall volume) and Hi-Hat, which allows us to choose between closed and open hi-hat, with several degrees of “openness” (or we can even let the plug-in control it automatically). We can freeze these settings in order to change drummers (and thus also the kit) or the kit (but not necessarily the drummer).
All of this together with the Drum Kit Designer plug-in that offers the possibility to choose among different instruments within a kit (for example, different snares, bass drums, etc.), and adjust their settings (tuning, damping and volume) when loading the basic version of a kit. Further, we can choose different operating modes: GM, GM plus wheel (to control how open the hi-hat is) and V-Drums.
More interesting is the option to open a Producer Kit (the name remains the same, except for the addition of a “+”). Because it gives us access to a whole collection of instruments (sampled, obviously) that proves very generous. But even more importantly, it gives us full access to track mixing, because the Drummer track becomes a Summing Track Stack where we can see that Drum Kit Designer offers up to 13 separate stereo outputs (not accessible from the plug-in’s interface, so they are pre-assigned by the developer — a real pity)… And we thus have access to additional controls, like Leak (to activate or not mic bleed), Overheads and Room to place the selected element in the overhead mics and to capture the natural reverberation of the room. It is obvious that the developer did an excellent work in terms of sound design. Producer Kits often provide effect busses within Track Stacks (parallel compression, distortion, special treatment of a kit element, etc.). Nice!
Even if we don’t plan to use Drummer regions (we would like future updates to offer more flexibility regarding MIDI and Drummer format conversions), we have at our disposal a very high quality virtual drums option — one of the greatest achievements of Logic X.
We will finish our tour by addressing an eagerly awaited addition: Flex Pitch. Apple ventures into a terrain tyrannized by Melodyne and iZotope’s Radius, the latter of which can be sadly considered lost for the Logic cause. Flex Pitch is only mono, but reading several patents that Apple has filed for its products make us believe that polyphonic detection and correction might make its way into Logic any day now…
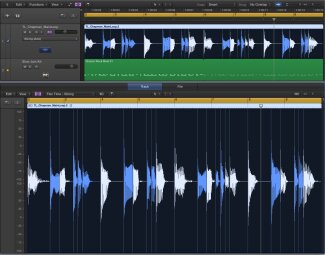
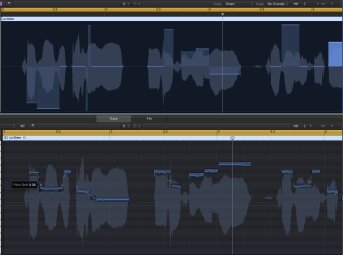
But let’s focus on what we have now: we import a mono or stereo file, activate the Flex mode and choose Flex Pitch. Logic will first analyze the file and then display in the Main Window a first visualization regarding the notes’ pitch drift. The recognition is quite effective. We can start making corrections by dragging up or down the lines (with a pop-up that indicates the note and its drift). But it is more interesting to go directly to the Audio Editor, which besides the usual File mode, also has a Track mode that we will use in this case. There we can see the waveform and, more importantly, horizontal bars very similar to those in Melodyne (to indicate the pitch) and vertical bars that indicate the pitch drift or the portamento between notes. Very similar to Celemony’s editor…
Anyway. When we pass the mouse over a bar/note, six points are displayed: three above that represent the pitch drift (to the left, the attack; to the right, the release; and in the center, the fine tuning) and three below (gain, vibrato and formant adjusting). We only need to click and drag the points to correct imprecisions instantly with a quite stunning quality on vocals (and other mono instruments), in the sense that the sibilants, breathing noises and consonants are much less affected than with the great rival. No doubt about it, for a first attempt, it’s a real masterpiece! Especially considering that a tool of this quality would be more expensive than Logic X itself. But here is where the old debate starts because with Logic we need a “dongle” that is more expensive, namely a Mac which hosts the DAW…
Vintage sound
Among all innovations, Apple has devised a small but very well accomplished Retro Synth. It gives us access to several types of synthesis having two oscillators as starting point: Analog, Analog with Sync, Table (PPG-like) and FM (think DX2, 33, a hypothetical DX7 with two operators…). Two oscillators with multiple waveforms, waveform modulation via LFO or envelope, vibrato, oscillator mix, fine and coarse tuning, multi-mode and multi-slope resonant filter with modulation (LFO, Env) and key follow, configurable Glide or Autobend, configurable Chorus or Flanger, filter and amplitude envelopes, Sync, a great emulation of FM modulator/carrier, plus a good array of well-conceived presets. A synth that knows its trade perfectly.
It will hardly put the es2, or other third-party synths exclusively dedicated to the creation of sounds, in the shade, but its quality definitely enriches Logic’s already generous sound palette. Plus, its simplicity ─ the keyword for this Logic version ─ will allow people who aren’t synthesis experts to put their hands on a relatively versatile and pedagogical tool.
Conclusion
After a month working with the beast, the time has come to make a final appraisal. Our first impressions, as soon as we got a grip of the software, weren’t very good. Both the workflow changes for longtime users and the annoying bugs, both new or unfixed since, oh, well… are very obvious. Apart from what we already mentioned, also note the permanent non-display of the padlock symbol in the regions locked to SMPTE, the impossibility to save a Template with a customized tempo (120 BPM by default), the signature changes in the List Editor for the less imaginative, the Increase/Decrease Last Clicked Parameter by 1 or by 10 option that doesn’t work anymore, as well as the selection of the Automation parameter via the track’s contextual menu, or moving along the Event List and Event Float with the arrows (that display the region), or even the impossibility to access value 127 in a graphical way when in Hyper Draw (renamed Midi Draw in LPX), etc.
Gradually, the superb simplification work (which resulted in the Smarts Controls, the MIDI plug-ins and Groove Track, for example), the time savings they yield, the shortcut tricks, the presence of up-to-now hard-to-access features in the menus, the Track Stacks, Flex Pitch, the quality of Drummer, and the different fixes to old bugs (as well as the speed of the updates, a somewhat good sign), plus an exemplary stability, and a CPU usage clearly inferior to that of Logic 9 with projects of the same complexity… well, it all makes it harder to go back.
Certainly nothing pushes longtime users to do the update if the previous version still works for them and if 32 bits is still important to them (the solutions are nevertheless there). For new users, the sometimes complex approach has been simplified and the number of features, the richness of the sound material provided and the possibility of working solely with the included tools are almost unique for this money.
We thought that moving on to X would be scary for many reasons. But far from losing its qualities (impressive power, adaptability and richness of features) Logic X gains in suppleness, autonomy and usability, which is no small feat. So, does the case against X stand? No.


