The most direct ways to improve your studio are by upgrading the gear and adding professional acoustic treatment, but doing so requires a significant investment. If you're not ready or able to drop a chunk of change into your setup right now, there are lots of inexpensive ways to improve your studio both in terms of efficiency and sound quality.
Site your listening position correctly
If you have the luxury of being able to rearrange your setup, putting your listening position in the optimal place based on the dimensions of your room can help you avoid acoustical problems that could otherwise make it very difficult to accurately perceive frequencies.
Without getting too technical, there are a couple of rules of thumb to follow. First, if you’re in a rectangular room, it’s best to setup your monitor position so that you’re sitting facing one of the short walls, with the long walls being on either side. In other words, the speakers will face down the long part of the room.
A general rule stated by acousticians is that you should place your monitor position (that is, where you’re sitting when monitoring) 38 percent of the length of the room from the wall that you’re facing. That gives you the best chance of avoiding acoustic anomalies, based on the reflections from the walls and corners. In other words, your monitoring position should be a little more than a third of the length of the room away from the wall you’re facing.
Another oft-stated rule is: Don’t locate your listening position in the middle of the room, as that’s the most likely place to have trouble with bass response. If your room is square, you’re likely to have more problems acoustically, especially in the bass response. Generally speaking, uneven dimensions are better than symmetrical ones, when it comes to room acoustics.
Correctly place your monitors
As you’ve probably surmised, not only is the placement of your listening position in the room important, but so is the positioning of the monitors themselves. Ideally, when you’re sitting in your listening position, the back of your head should be at one point of an equilateral triangle with your monitors at the other two points. Angle the monitors in at about 30 degrees. The tweeters should be at about ear height for the best imaging. For more information on this subject, check out this Audiofanzine article.
Decouple your monitors
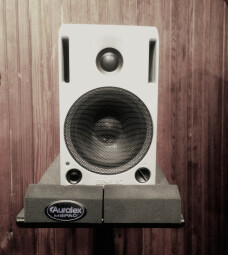
Whether your monitors are placed on a shelf, table or stands, they’re subject to a phenomenon called “acoustic coupling.” This occurs when the bass frequencies vibrate the speaker against what it’s sitting on, causing resonance that can inaccurately color what you’re hearing.
This is one of the tips in this story that requires that you spend some money. You’ll need to purchase a monitor isolation product such as Primacoustic’s Recoil Stabilizers, Auralex MoPads, or one of the various models of IsoAcoustics sound-isolating monitor stands. These products are designed to isolate a monitors from the surface it’s placed on, thus reducing acoustic coupling.
Use a pop screen for vocal recordings
Ever notice all the popped “Ps” and “Bs” and other consonant sounds that get into your vocal recordings. These are called “plosives, ” and while you can’t eliminate them entirely, you can reduce them a lot by placing a pop filter between the singer’s mouth and the mic. You can spend as little as $20 or as much as $300 on a pop filter, but most are under $50, and well worth it.
Label your cables
Ah, cables, the bane of every home-recording musician’s existence. You try to set them up neatly, but before you know it, they’re everywhere, creating a curly mess of dark spaghetti behind your gear. In addition to trying to keep them neat, it’s useful to label each one, so that you know what it’s plugged into. Believe me, when you have a huge number of cables connected to your audio interface and external mic pres and any other hardware in your studio, it’s really helpful to know where that cable is going, and where to plug it back in if it gets detached.
There are numerous ways to label your cables. The cheapest way is by making a loop of masking tape (use the painter’s kind that isn’t super sticky) and pressing the sides together to make a label that attaches to, but hangs off the cable near the jack on either end. You can then clearly label it with a Sharpie or other marker.
For a few bucks, you can get cable labels that are ready to be written on and attached to your cable. Or, if you have a label gun, make printed labels and attach them around the sleeve of the jacks.
Organize your loose cables, adapters etc.
If you’re like me, you probably have a bunch of adapters, extension cables, and various studio doodads that you have no place for, and perhaps are just in a heap all together on a single box, or possibly strewn around your studio.
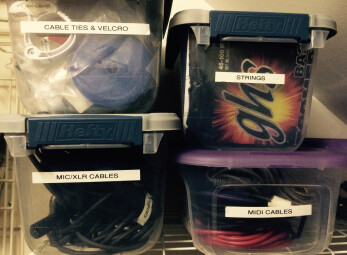
If that’s the case, get some inexpensive plastic storage containers, and dedicate each one to a particular type of studio part. I have separate boxes for 1/4”, XLR, 1/8” cables, guitar string sets, cable ties and related items, and so forth. Of course, the boxes have labels on them.
Not only does doing this make things a lot neater, but it also makes it really easy to find stuff. If you don’t want to buy containers, shoeboxes are serviceable, albeit less elegant solution.
Create a database of music software serial numbers and info
Unless you get a piece of software through the Apple store, where knowing the serial number isn’t necessary for activation, it’s critical to save your serial numbers, activation keys, download URLs, login info, and other pertinent information in a searchable document or database of some sort. Some password manager applications, such as 1Password, let you also store software info.
You don’t have to buy any software to create such a database, however, as long as you have Excel or another spreadsheet program. Create a spreadsheet with all youf software info entered in. It will be tedious to enter in your existing data, but once you’ve done so, you’ll be glad you did. Subsequently, whenever you install a new application or plug-in, make a new entry with that data. If your hard drive crashes or you get a new computer, you’ll be really glad to have this info at your fingertips.
Create custom DAW templates
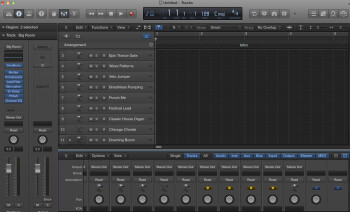
When you have some downtime, one of the more productive things you can do is to create templates for the various types of sessions you do, so that you don’t have to start from square 1 every time you create a new project. Include track types (mono audio, stereo audio, virtual instrument, auxiliary), and add any plug-ins and custom routings that you like to use.
If you work on sessions in a variety of sampling rates, create one template set for 44.1 kHz sessions, one for 48 kHz sessions, and so forth. Overall, you can make your studio a much more efficient place that way.
Create a backup system for your recording data
If you don’t have a regular way in which you backup your data, it’s time to get one, now! Hard drives (other than SSD models) are failures waiting to happen, it’s only a matter of time. If you’ve spent months recording your masterpiece album, all your work could be lost if you have a hard drive crash and no backups. Again, you may have to spend a little here, to get an external drive and some backup software that will automatically backup your recording drive to another drive on a daily basis. If you’re on the Mac, use Apple’s Time Machine software, which is included with OS X. For $10 a month, you can open a Dropbox account and get 1TB of Cloud storage, which lets you back your data up offsite, so that so that something catastrophic like a fire, floor, or electrical surge won’t fry both your internal and backup drives. What’s more it’s great for sharing large audio files with your friends.


