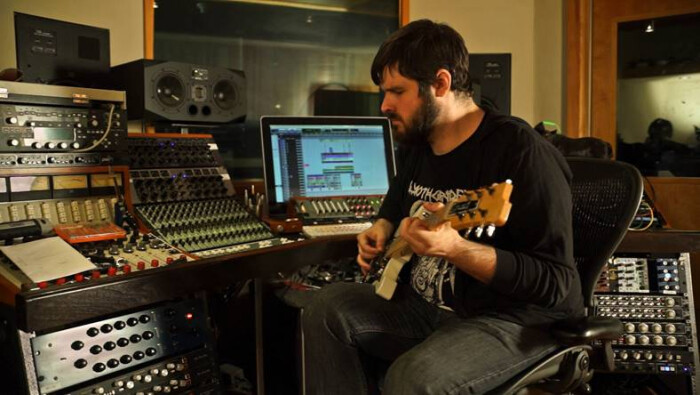
Kurt Ballou is a busy guy. In addition to being the guitarist in the popular metal band Converge, he’s a producer and engineer, and the owner of Godcity Studio in Massachusetts. In addition to recording his own band’s projects, Ballou has produced and recorded such groups as High on Fire, Nails, Young Widows, Torche and Old Wounds.
Ballou will be teaching a Creative Live seminar called “Fix it in the Mix” in which he’ll be demonstrating a variety of techniques for salvaging and enhancing badly recorded tracks, without resorting to re-amping guitars and replacing drum sounds with samples.
The seminar is free if you tune in during the live webcast, which goes from 9:00AM to 4:00 PM PST, on Monday, November 24. You can get more details at the Creative Live site.
We had a chance to speak with Ballou recently, and he gave us a preview of some of the techniques and tools he’ll be using in the class, and also talked about the gear and software he uses at Godcity Studio.
Talk about what you’re going to cover in the seminar.
Mostly what I hope to do is to help people develop some instincts for using what they have in new and creative ways, so that they can find their own ways to recover poorly recorded tracks that they wouldn’t otherwise be able to use. But it’s more detailed than that. A lot of the things that I do will involve splitting tracks into different components. In some cases that will include using multiband techniques with multiband expanders, envelope followers and multiband compressors. It’s the kind of thing where we process something within different sections of the frequency spectrum in different ways. In other cases it may mean duplicating tracks and processing the duplicates independently of one another.
Can you give me an example?
One of the songs I’ll be working on featured a drum kit with two bass drums, each with a mic on it, and a single mono overhead mic. And the drummer had a snare drum and five toms. I needed to get all my overhead information and all my snare and tom information out of just that one mono microphone. I’ll be using multiband processing for that, but also creating duplicates of that overhead track and doing a bunch of funny business on the duplicates, in order to have a summed single track that represents what the toms would be and what the snare sound like a traditional recording environment.
Are you making that in to a stereo signal of some sort?
Yeah, that’s part of it. That’s the kind of stuff that will all be revealed in the class. Yes, there’s stereoizing that happens. I’m trying to widen out that overhead track to just not feel so focused in the center. And with the toms, I had to manually edit out sections that were just toms from the overhead track. And I’m automating panning on that as the drummer goes around the toms, so it feels like it’s moving the way the toms would. And that’s just one example.
What are some of the other processes you’ll be demonstrating?
In a lot of cases, problems come from tracks recorded using cheap equipment. Maybe an inexpensive microphone or inexpensive mic preamp or converter. There are different saturation plug-in techniques you can use in order to restore some of the depth and dimensionality that a more classy microphone might have. So we’re going to look into that stuff. One of the things I said in one of the advertisements for the class is that I will not be doing any reamping. And what I meant by that was that I was not going to take like a DI guitar signal and run it through an amp simulator or run it out through a guitar amp and re-record it. However, I am going to be doing some drum reamping, where I take the snare drum signal, whether it’s recorded with the mic on the snare, or in the case I was telling you earlier where the snare had to be extracted from the overhead track. I’ll be taking that signal and then running it out through a speaker placed on top of an actual snare drum and recording the sound that the speaker exciting that snare drum creates, which isn’t exactly quite the same as like a real snare drum being struck with a drum stick, but it definitely adds some tone and some “snary-ness.” And also, in the case where I only had a snare drum from an overhead track to work with, it gives me a bit of isolation to the snare drum that I wouldn’t have otherwise.
Interesting.
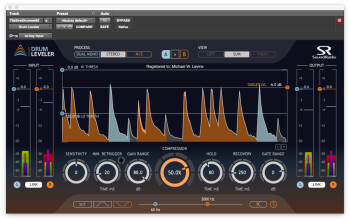
One thing that I am doing with regards to sort of evening out drum tones — there’s two newer tools that I’ve found very useful with regards to doing the same sort of thing that drum sampling tends to do which is to even out the volume and the tonal inconsistencies with organic drum sounds. So what I’m using for that — first is a plug-in from a company called Sound Radix called Drum Leveler.
I’m familiar with that.
 |
So I’ll be using that as a way to sort of help even out the volume of the drum tones, as well as doing some manual editing — clip gaining and what not of drum levels that helps with leveling out the drum volume. But when a drummer hits a drum quietly the tone is different than when the drummer hits the drum loudly. So to help even out the drum tones, I’m going to be using a lot of a plug-in called JST [Joey Sturgis Tones] Transify. It’s a multiband envelope follower. It’s like Transient Designer, which is an envelope follower. In the case of, say, double bass drumming — when the drummer is playing slow or single-bass stuff, they’re resting the beater against the head. Whereas when they’re playing fast double-bass stuff, the beater is bouncing off the head. Also, a lot of times during double bass sections, the drum will have more resonance than it would during single bass sections. We can use the sustain control in the low band of Transify in order to reduce the amount of resonance during double-bass sections. Say the drummer is doing a fast section, they’re not going to be hitting their drum as hard as they are during a slower section, so the snare might have extra resonance and not have a whole lot of attack. So we can use Transify to boost the mid and the high-mid frequencies, and lower the low-mid and low resonant frequencies in order to make the drum sound more similar to a drum that’s been struck harder.
Will this seminar be pretty focused on metal, since that’s what you’re involved with, or will it be more broadly applicable?
I would like to do some things that are more broad. I think the techniques are applicable to a lot of types of music, however, most people tuning into this class are going to be people who know my work, and therefore are enthusiastic about the type of band I would typically record. So I’ve chosen to work with kind of chaotic, metallic type music for the examples in this class.
That makes sense, but other people could still get something from it?
If they can tolerate the racket [laughs], these techniques can definitely be imported to other types of music.
Are you going to talk about fixing vocal tracks?
Yes, we’re going to talk about vocals. There are some interesting things, like in the case of live recordings. You have to look at whether the singer is hand held or not. How you treat the space between lines is a lot different based on if it’s a hand-held mic or a stand-mounted mic. Both mics are going to have a bunch of bleed from the rest of the band in there, but if the singer has a handheld mic, and they’re sort of running around the stage or whatever, you end up with a bunch of modulating phase stuff happening, between the vocal mic and everything else. So you will generally chop that stuff out of a handheld mic. In one of the songs that I’m doing in the seminar, the lead vocalist is handheld, so I chopped out everything in between the lines of that, but the backing vocalist is on a stand. I’m actually using the backing vocalist’s mic as a room mic of sorts. That’s on all the time, and that’s actually giving a little bit of a stereo feel from that overhead that used to be mono. At least get a little bit of width from the cymbals and the stage sound by slightly panning out the vocalist’s mic and limiting it so that the signal coming into it is fairly stable.
Talk about some of the other plug-ins you’ll be using in the class.
There’s a German company called HOFA.
Yes, they make some cool plugins. I recently got a free metering plug-in of theirs which was very useful.
|
|
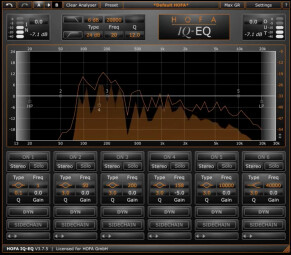
I’m actually going to be using their EQ [iQ-EQ] in the class to show another multiband technique. Although I don’t like the GUI, the plug-in is kind of nice because you can switch each band in and out of dynamic mode. And on the room mic track in this particular song, the vocals are quite sibilant, and the bass drum is extremely clicky/stabby. So I’m doing some basic EQ scultping with the HOFA. But also I have two bands of it engaged in dynamic EQ mode, which are helping to reduce the sibilance and that kick click that are coming through in the room mic. That mic is so “attack-y" that it’s kind of incompatible with the close mics, and it’s not talking nicely with the kicks on the room mic track, so getting that out of there helps. With the dynamic EQ mode, or actually any of the modes on the HOFA, you can solo each band independently, so you can find where the kick’s most annoying. Then you can unsolo it and engage the dynamic EQ mode, so that when that frequency hits hard, it ducks out of the way a bit.
You mentioned earlier that you have some techniques for making a crappy recording sound better, like in the case where a cheap mic or cheap components were used. Let’s say hypothetically you get tracks to mix and the vocal was recorded on a cheap mic, what would you do to make it sound better?
One of the problems I’ve had with cheap mics or bad mic technique might be a lack of a pop filter when the track was recorded. There might be excessive plosives [popped P, B, and other consonant sounds]. You could use a multiband compressor or dynamic EQ and some high-pass filtering in order to remove them. With a lot of the cheaper mics, the top end is not particularly nice. They might be bright but they’re overly sibilant. But traditional techniques for removing sibilance can just end up making it dull.
Like a de-esser?
Yeah. Some de-essers just sort of compress everything, some compress with a shelving-type control, and others compress with a bandpass-type control. I’m a big fan of FabFilter Pro MB [multiband compressor], which we’re going to be using in the seminar a lot, I would probably use that for most sibilance situations. And this is also true for excessively sizzly, harsh-sounding guitars. You can use that multiband compressor to compress those harsh, cheap-sounding high-mid frequencies, but then you can boost those same frequencies to compensate for the compression. At face value, it’s not that intuitive. It sounds just like, “Oh well you’re just turning up the frequencies that you’re turning down.” But in practice, I’ve found that it helps to smooth out those frequencies and make them not feel so cheap. And then, I could also notch certain resonant frequencies that are common with cheap condenser mics.
Any other ways to help get rid of the “cheap” sound?
I love using subtle saturation effects, whether it be a tape simulator or a console simulator, or like Soundtoys Decapitator or Radiator. I like Decapitator because I really like the sound of the high-pass and low-pass filters that are built into it. So it has those plus saturation all in one plug-in, so I’m using that a lot, just so I don’t need to have as many plugs running. But yeah, I find that those filters, as well as the saturation effects within that can help a mic feel a little more classy and just sort of organic. It kind of fills in the low mids and adds a robustness and a three-dimensionality that are lacking in a lot of the cheaper equipment.
Let’s talk about your studio and your mixing console.
I wanted to design a new sort of centerpiece for the studio that would enable me to do most of my work while sitting in the sweet spot between the speakers. So I worked with a builder friend of mine, and we created this console that’s sort of a wrap around, that sort of hugs me as I’m sitting in the sweet spot. We didn’t do it electrically, it’s just furniture that holds components that other people make.
What did you fill it with?
I chose to put a Tonelux console in there as the primary console. It’s a 16-channel console. Tonelux is a company started by a man named Paul Wolff who was the owner of API. So if you’re familiar with API consoles, it’s of the same lineage, although the EQs are quite a bit more versatile than the API EQs. That console is the center piece, so all of the sort of control room volume and monitor switching and aux modules and what not are going through that console. But feeding into that console is also a 12-channel Thermionic Culture Fat Bustard, which is a little summing mixer that actually has some rotary faders. And that gets me sort of a modern tube sound when I need it. And there’s also this vintage Opamp Labs console, which is something that was apparently designed by the Quad Eight [console] engineers. And that also feeds into the Tonelux master bus, if I want to go with that flavor. However, most of the mixing I do is with the Tonelux. And if I had it to do again [laughs] I’d probably simplify it a bit. I’d just have more channels of the same thing. But it’s nice to have all the key outboard gear that I need right there in the sweet spot.
So you feel like the sonic improvement you get by having an analog workflow, is more of an advantage in the long run, even though you can’t do an instant recall like with an in-the-box mix?
Yeah, there are some people out there that are great at mixing in the box, and could probably kick my ass with their in-the-box mixes, but that’s not me. I’m from the last generation of engineers that were raised working entirely in analog, even with tape, because we had to, we didn’t have the option. So that’s how I learned, and I’m accustomed to it.
Since you’re such an analog guy, it makes me wonder which plug-ins are up to your standards. You mentioned FabFilter before. They make amazing stuff. Do you have particular plug-ins that you really like a lot, that you feel can kind of hold their own with hardware?
Yeah. I like modeling plug-ins sometimes. But I really like now that a lot of plug-in companies are not really trying to compete with hardware. They’re saying, “Let’s use digital for what digital’s good at.” And that’s the kind of stuff that I really appreciate. Like there are so many things that FabFilter does that you couldn’t or wouldn’t want to do, or that would be really cumbersome to do in the analog world. Aside from it sounding great, it’s one of the reasons that I love that plug-in, and the user interface is fantastic. All the FabFilter stuff is great.
You mentioned Soundtoys Decapitator and Radiator. Any other Soundtoys plug-ins besides those that you use a lot?
I use EchoBoy constantly, and MicroShift.
How about the UAD stuff?
I have UAD, and I use it. I use the [Ampex] ATR-102 tape simulator pretty regularly on the mix. And then, I really like the 1176AE, because it has the 2:1 mode. Because on all the other 1176s, the lowest ratio is 4:1. I tend to use two compressors on vocals, a lot. I have one at a very low ratio, set super fast, followed by more of a normal one. So like on vocals I’ll use the 1176AE at 2:1 set as fast as it will go — just kind of containing the dynamic range a little bit. And then I’ll follow that up with one of the UAD LA-2As. I’ll pick the one that sounds the best for that project. But with the LA-2A if the dynamic range coming into it is too extreme, it misbehaves and gets kind of squashed sounding. So I’ll use the 1176AE at 2:1 mode to sort of contain that range before it gets to the LA-2, and I find that it makes the LA-2A sound better.
What else?
I use convolution reverbs quite a bit. I use Space as my convolution reverb engine. Some of the impulses I use I made from my own studio. That HOFA EQ because it has a dynamic mode, is used pretty regularly. I really like a bunch of the stuff that JST is doing. I’ve been using JST Transify, as I mentioned earlier. Also DF-XCITE, which is from a sister company to JST. DF-XCITE is a multiband saturator/exciter that I’ve been using quite a bit, and I’ve found that it adds a bit of dimensionality and depth and attack and power to drums. I’ve been using that quite a bit, and I’ll be using that in the course. I’m also going to be using a bit of Drumatom. I don’t know if you’ve messed with it yet. When it works it’s great, but a lot of times it doesn’t work at all.
Isn’t that Accusonus? They just put out a noise reduction plug-in, ERA-D.
Yeah, and I think that the reverb reduction part of that is cool. And I’ve tried to find a way to use that in this course, but it didn’t have a place.
Explain how Drumatom works.
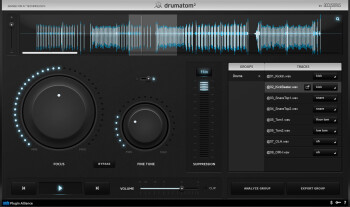
Drumatom is crazy. When it works it’s incredible, but it doesn’t always work. There’s like a live plug-in version of it that I haven’t used, but it’s also a standalone application. You load your drum tracks and you tell it, “This is a tom track, ” “This is a snare track, ” and so forth and so on. And then it analyzes all of your drum tracks as a whole, and then finds ways to remove bleed from each track. So you can remove bottom snare from the inside kick mic. And you can remove cymbals from snare mics and cymbals from tom mics. When it doesn’t work, it sounds dull and sort of modulating underwater. When it does work, it’s really great. They’re a few months away from launching Drumatom 3, which they tell me is going to be a huge improvement over Drumatom 2, so I’m hoping it will be more effective.


