Panning seems like a simple enough task. You turn the panning knobs to the positions you want your tracks to be situated in the stereo image and you’re done, right? Well there’s more to it…
The left and right of it
Your goal when panning is to give each element a distinctive place in the left-to-right spectrum, so that it’s not obscured by another element panned to the same place. Think of it like a band onstage. You wouldn’t want one musician standing in front of another. Instead, you’d arrange them side-by-side, so that they could all be seen.
There are other factors that will have bearing on your panning decisions: the volume of each track, which gives it a front-to-back movement in the soundscape — the louder an element, the further forward it seems — and frequency. If you have two elements panned together, and one is centered in the low and lower mid frequency range, and the other in the upper mid and high-frequency range, they won’t get in each other’s way as much as they would if they both had similar frequency content. (EQ and filtering can help more clearly define a track’s frequency range.)
Mind your panners
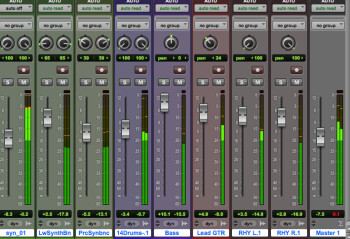
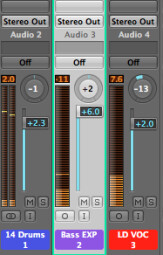
There are some basic rules of thumb regarding panning, which can help you get started if you’re new to mixing. These are guidelines not strict rules, but they’re based on the experience of mix engineers over many years, and have proven to be extremely successful. The first rule is that the kick drum, snare drum, bass, and lead vocals should be panned to the center. These are strong elements that all need to be “center stage, ” as it were, or the mix will feel unbalanced.
While some people always pan them dead center, others like to set them a bit to ether side to give each a little bit more of its own space in the sound field. Depending on how your DAW expresses panning increments numerically (most panners have 64 steps in each direction, some 100), move them about 3 to 8 steps in either direction from the center.
Doubled rhythm guitars on separate mono tracks are typically panned somewhere between full left and 10 o’clock on one side and full right and 2 o’clock on the other. Again, you’ll have to fit them in with the other elements that inhabit the outer edges of the mix, and find a distinctive spot for them (almost always symmetrical in relation to the center).
Sidewinders
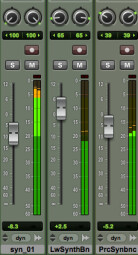
Stereo tracks present their own set of issues for panning. You want to carefully listen to them first to see how wide they sound. Depending on how the track was recorded, there could be a lot more energy towards the center or towards the outsides. Keep this in mind when you’re panning. With a conventional pan knob, you can move a stereo track towards one side or the other, which is going to not only move its energy towards one side, but make it less wide.
In some DAWs, such as Pro Tools and Cubase, the mixer offers dual panners (it’s an optional setting in Cubase), which are separate left and right panners for a stereo track. These are handy, because they let you keep a stereo track centered, but pan its edges in towards the middle. This makes it possible to vary how far your stereo tracks are panned, so you can give them each their own space.
Where to sit the kit?
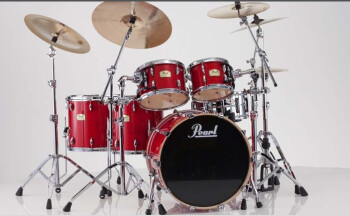
When you’re panning individual drum tracks, and you want to maximize the authenticity of the way they sound, make sure that your panning of the tracks from the various drum mics reflects the actual setup of the kit. So you want the high hat on the other side from the floor tom, with the higher rack tom a bit off center but on the side of the high hat, and the lower rack tom on the side of the floor tom. Look at a picture of a drum kit for a guideline of how to arrange it, if you need to.
You also have to decide if you’re going to pan the drums as if the drummer was facing the listener, or if it’s from the drummer’s perspective, facing the audience. In the former case, the hi-hat would be on the right, and in the latter on the left. To me, as long as the intra-kit panning is consistent, the direction the drum kit is facing in the mix isn’t a critical point.
Pan handling
Using the guidelines mentioned here as a starting point, tweak your panning until it’s sounding right to you, and everything is distinct and balanced. Check your panning periodically with headphones on, where you can judge the positioning of the elements more clearly.


