The art of mixing requires technical competency as well as a good dose of creativity. However, often times such characteristics don't get along well inside our brain...
Have you ever had a super idea come to your mind while, at the same, you notice that a snare hit was wrong? And when you rush to put the troublemaker in line, the idea of the century slips away like water between your fingers. To avoid such waste, today we’ll give you a couple of advices to help you start a mixing session under the best conditions.
Organization
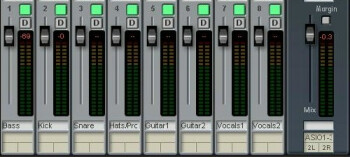
The first thing you ought to do is name all your tracks briefly and explicitly. You then have to order them logically, which means putting all the drum tracks together, then the guitars, the vocals, etc. Consider the practicality of having the bass next to the drum tracks instead of the vocals when you are mixing.
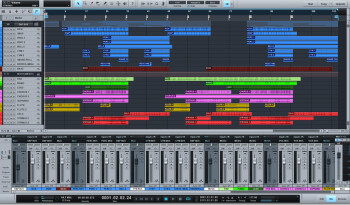
If you assign a color code to each family of instruments it will be easier for you to recognize and locate them. Personally, I use violet for guitars and green for vocals. If your DAW provides the feature, you can even go a step further and use different shadings. For example, you could assign a dark brown to the bass drum while you assign softer shades of brown to other, higher-pitched elements of the kit. Browsing your tracks will be a real child’s play!
Finally, don’t forget to create your subgroups (drum bus, etc.) and place similar tracks together (rhythmic, vocals, etc.). This will make your mixing session run smoother and will also save you some space on your display.
Editing & Co
It is now necessary to shape the sound material itself. First of all, choose the best takes (if you haven’t done that already). If needed, use the tools at your disposal to correct any notes that are out of tune (combine several takes or use Melodyne and the like). It’s also the right time to correct any rhythmic mistakes, either using quantification or by hand.
Now take some time to clean your tracks with great care. Your goal is to reduce any mouth and breathing noises from the vocals, remove any buzz from the guitars, cut the drummer’s count-off, clicks, hum, and anything else, otherwise you might lose some precious minutes looking for that little thing buzzing in your ears during mixdown.
Don’t forget to check that there are no phase problems with instruments recorded with several microphones!
If you don’t need to correct anything else, do some audio rendering of your virtual instruments in order to free up some CPU power. Having some spare CPU resources could prove live-saving… you never know!
Tagging
The last step is to tag your song. Start playback and set the markers for each important part as you go along. Once you’re done, we recommend you to name the markers clearly (intro, verse 1, chorus 2, break, etc.) This will make it easier to find your way along the track.
Finally, it is wise to do a rough mix by simply adjusting the levels and pans in order to be able to listen comfortably to the song. Make a bounce of the whole rough mix and import it in a muted track of your project. That way you can always play it back while you’re mixing to know where you are coming from.
Going further…
There are some other boring tasks that you can do before starting to mix. For example, you can create a certain number of auxiliary buses. I am used to working with at least two reverbs, a delay, a parallel compression, and a modulation effect, so why wait until I need them to have them ready?
The same applies to certain insert effect chains. If you always use the same for a specific type of track, preload them. Remember to put them on bypass so you only have to activate them whenever you need them.
Some of these tips might seem obvious for some of you, but do you honestly take some time to do this before fiddling with the faders? If your answer was negative, we encourage you to do so. Your creativity will be really grateful!


