This time, I will give you an overview of the mixing method we will follow in the coming weeks. I don't intend it to be "The Method," since there are lots of other ones that are just as valid. However, I think this way of doing things will give you a solid foundation for you to develop your own method.
Step by step
First of all, I recommend you to make a rendering (bounce to disk) of the song in its current state, namely after the “Gain Staging” phase, and import into an empty track of the project you will be working on. This will allow you to compare your mix with this raw version as you go along, in order to be aware of how things have developed.
From there, we’ll enter into a loop. Each of the following stages will require you to go back to the start of the loop to make readjustments as a consequence of the last modifications you made.
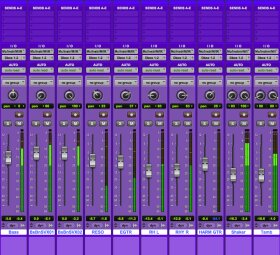
To begin with, you need to make a rough mix of the song. What I mean by rough mix is basically a quick mix using only the volume faders and the pan knobs of the tracks, without any automation. Once that’s done, render the mix again, and place the file on a muted track of your project. Having it for comparison will be helpful later in the process.
Next, we’ll tackle equalization, a very delicate stage if there ever was one. It combines a first pass to clean up the frequency spectrum, a second one to level out and articulate the different elements and, eventually, a third one to embellish, emphasize and color sound. Everything should be done in mono and in context 99% of the time! This means you shouldn’t solo the tracks you are working on, but rather listen to them together with all the other tracks at the same time.
We’ll deal with dynamics in the following stage. You’ll see the whys and hows of compression and, especially, that using a compressor is like using antibiotics, it’s not something you should take for granted!
After that, we’ll take on spatialization with reverberation and delay and only that! All the work you did before with volume, pan, EQ, and dynamics is of great importance at this stage. That’s why it’s so important to always go back to the start of the loop to make eventual readjustments.
The last stage of the loop consists in a cosmetic retouch here and there in order to reinforce the overall sonic cohesion ─ the “glue” effect.
Once you are done with the looping, you’ll have a static mix, which, once again, you should bounce out and import into a muted track of the project as a reference before moving on to the last stage: Automation.
And then what? Well, once that’s done, your mix ought to be ready for mastering. Although the truth is, you still need to listen and relisten to your mix with as many different audio systems in as many different places as you can, in order to fine-tune the result. We’ll obviously talk about this stage in detail later on. On the other hand, and to retake the culinary metaphor we started with, it’s unusual to get a new recipe right the first time around. You need to cook the same dish several times before you get the expected result. Given that, it might be a good idea to make one or several different mixes, always starting from scratch.
Better safe than sorry…
To finish, a brief note to guarantee the safety of your ears and the preservation of “objectivity” throughout the entire mixing process. While it may seem obvious, I remind you that it’s important to take pauses from time to time. Personally, I take a 10-minute pause every 45 minutes. This is enough to reset my ears and it also gives me some time to reflect upon the things I’m working on with a “fresh” mind.
Further, I always have one ─ or even two ─ reference songs at hand whose spirit is similar to what I want to achieve. This allows me to stay on track and not get lost that easily. Do note, however, that the reference song(s) have to be at the same volume as the song you are mixing, to avoid the famous “louder is better” syndrome.
More on this in the next episode, where we’ll talk in detail about rough mixing!


