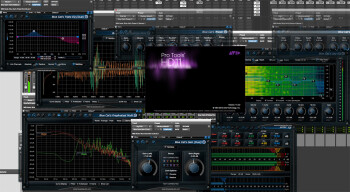
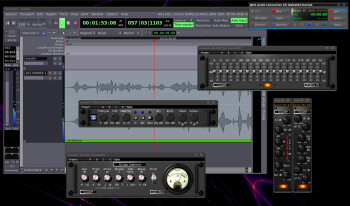
On Audiofanzine everyone talks about plug-ins all day long. Most of you know exactly what that's all about and know how to install a plug-in. However, there was a time when we were all just starting out, and an article like this would've been very helpful. So, to all computer music beginners: we hope these lines will spare you a few sleepless nights…
Whatchamacallit?
When talking about computers, a plug-in is a small extension module that adds functionalities to a host software. In the audio world, there are all sorts of plug-ins, like compressors, EQs, reverbs, etc. By definition, they cannot work as stand-alone programs and need a host software, which most of the time will be a DAW (Digital Audio Workstation) like Cubase, Pro Tools, Ableton Live, Reaper, etc.
If you follow Audiofanzine news, you have probably noticed that every time we talk about a plug-in we mention in which formats it is available. The format of a plug-in will make it compatible with this or that DAW. Here you have a non-exhaustive correspondence list between formats and DAW:
- RTAS (Real Time AudioSuite): Pro Tools up to version 10
- AAX (Avid Audio eXtension) : Pro Tools from version 11
- AU (Audio Units): format only available on Mac, compatible with Logic Pro, GarageBand, Ableton Live, Studio One, Digital Performer
- MAS (Motu Audio System): Digital Performer
- DX (DirectX): format only available on PC, compatible with Sonar
- VST (Virtual Studio Technology): Cubase, Ableton Live, Reaper, Studio One, Sonar, Digital Performer, etc.
Installation
Before using a plug-in, you have to install it on your computer. In order to do that you first have to check if it is compatible with your configuration. Be careful not to buy a plug-in in AU format if you have a PC, for example. If the plug-in is available for your platform, you can get it at the publisher’s website. Select the appropriate download version for you operating system (Mac OS or Microsoft Windows) and a format compatible with your DAW. You also need to pay attention to whether you need a 64-bit version, in case your DAW supports it, or a 32-bit version.
Once the plug-in is on your computer, you might face different situations: it might include a classic installer and you will only need to run it for the installer to do all the work for you. If it’s a paid plug-in, it might include some sort of copy protection system that activates during the installation process. There are so many different variants that we recommend you to visit the publisher’s website in order to find out how the one they have implemented works.
The second case involves a ZIP or some other type of file. That’s usually the case with plug-ins you can get for free (usually called freeware). If that’s the case, you will have to install the plug-in “by hand.” But don’t panic, the procedure isn’t as complicated as it sounds. First of all, you have to uncompress the file by double-clicking on it. Inside the uncompressed folder you will find several files. You will have to move the file corresponding to the format you are interested in to a specific folder on your computer.
On a Mac computer, you have to go to Library/Audio/Plug-Ins. Files whose extension is “.vst” go inside the VST folder, those whose extension is “.component” correspond to the AU format and go inside the Components folder, “.bundle” corresponds to the MAS format and go inside the adequate folder. AAX plug-ins have the “.aaxplugin” extension and they go inside Library/Application Support/Avid/Audio/Plug-Ins. Finally, RTAS plug-ins have the “.dpm” extension and they go inside Library/Application Support/Digidesign/Plug-Ins.
On a PC it’s a bit harder to describe because it all depends on how you installed your software. As a rule of thumb, you would have to go to the Program Files folder on your main hard drive. Locate the folder corresponding to your DAW. Inside the latter you will most commonly find a folder named Plug-ins inside which you should copy the plug-in in the desired format. The extensions above are also valid in this case, except for VST plug-ins, which have the “.dll” extension on PC.
Once you are done with the installation you can toy with your new plug-in from within your favorite DAW! If you have any questions regarding the procedures described here don’t hesitate to post them in the comments to this article.


