Many of the features in our DAWs come from the analog world, and automation is no exception. In order to understand what it is all about, let's go back to the time when the only digital gear in a recording studio was an LCD clock...
Back to the future…
In the early 70's, eight-track tape recorders were the market leaders. Sound engineers needed both hands to control the eight level faders of the desk during mixdown.
However, in the late 70's, projects with several 24-track synced recorders were becoming the standard and mixing was becoming a headache. To achieve their goal, sound engineers needed the help of studio assistants, the producer and sometimes even the band members! Everyone stood in front of the mixer and had a precise role: someone was responsible for the vocal tracks, someone else for the drum tracks, etc. So, mixing sessions came down to a painstaking hands choreography. A single mistake and you had to restart the mixdown from scratch…
In order to solve this problem, mixer manufacturers developed desks equipped with an automation system that allowed the sound engineer to record and play back his fader ridings. This way, a single person was able to manage a multitrack session and mix the song in several steps while everyone else could relax and smoke as much as they wanted.
Nowadays, automation systems are not limited to track levels only. In fact, the versatility of the digital world allows us to fine-tune almost any available parameter during mixdown, from level to pan, aux sends, and even many plug-in settings.
Discourse on the method…
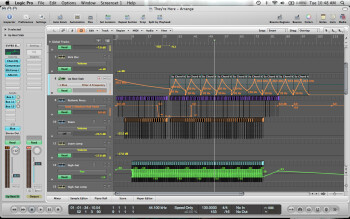
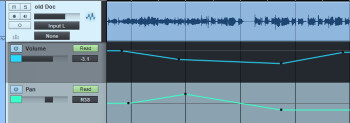
There are several options to work with automation. First of all, the old-school way consisting in “writing” the changes of one or several parameters in real time while the song is being played back. You can make the adjustments with a computer mouse or a control surface. The result is an automation curve that will be read when you play back the song, faithfully reproducing all fader and control changes you made. And you can write new automation data each time you play back the song.
Moreover, you can combine both workflows: first writing automation data in real time and then fine tuning the recorded data using your computer mouse. Don’t forget that you can also consider copying a full automation curve, or part of it, and apply it to another parameter or track, which allows you to save valuable time. The second automation method is a special feature of our audio sequencers and has no equivalent in the analog world. Sequencers allow us to draw automation curves for each parameter with a computer mouse, which results in greater precision.
Modes
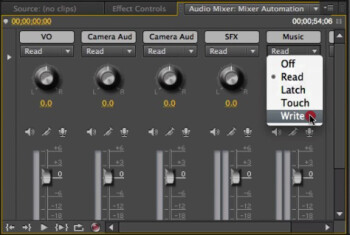
Let’s round off this introduction to automation with the different automation modes you can find in your DAW:
- Write: main writing mode that starts and ends with the song playback. Overrides any automation curves already present.
- Read : all automation data already written is reproduced as is.
- Off : all automation is ignored.
- Touch : new automation data overrides the existing one only if you edit a setting; former automation data resumes as soon as you stop editing.
- Latch : new automation data is written as soon as you edit a parameter; all former data is overwritten from that point onwards until you stop playback.
- Trim : this special mode allows relative editing of the automation curve. For instance, imagine that you are already satisfied with your level automation data, but at some point, you decide that the automation curve should be 3dB louder for the whole song. Instead of writing all the data again, switch to Trim mode and just add 3dB. The automation curve will keep its shape with a 3dB offset.
Now it’s your turn: put this into practice to get used to this powerful tool. With so many possibilities, the only limit is your imagination!


