Producing a singer for a vocal overdub session sounds like a pretty straightforward task, but to get good results, you not only need good engineering chops, but the ability to coax the best performance out of the vocalist. In part 1 of this 2-part article, we’ll focus on the technical aspects, and we’ll delve into the producing considerations in part 2.
Mics, preamps, and more
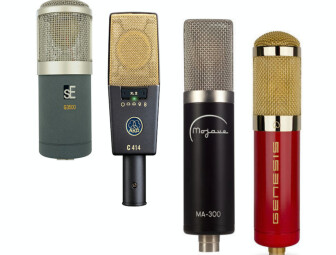
Setup the best quality vocal mic you have, preferably a large-diaphragm condenser, and connect the mic through your highest quality mic preamp.
|
The most commonly used mic type for vocal recordings is a large-diaphragm condenser
|
Make sure you have a pop filter setup close to the mic (no more than an inch or so from the capsule), to help prevent plosives like “p” and “b” sounds from getting recorded. You’ll also want the singer to stand within a few inches of the pop screen, in most cases. Keeping the singer close gives you a more present sound (more direct sound, less reflected room tone), and lets you take advantage of the proximity effect, which, on a cardioid-pattern mic (found on most vocal mics except ribbon mics) boosts the low end of a source that’s close to the capsule, giving your vocalist a “bigger sound.”
If you have more than one quality vocal mic, choose the one you think will flatter the singer’s voice more. If need be, compare the sound of both on the singer’s voice. However, keep the testing brief, to avoid taxing the vocalist before you even start recording.
Levels and monitor mix
When you’re setting levels, have the vocalist stand in the correct place and sing as loud as he or she will be doing during the song. Assuming you’re recording in a DAW or other 24-bit digital recorder, set the gain so you have around 10 or 15 dB of headroom — the space between the loudest peak and 0 dB — so you’ll never have to worry about distortion ruining a good take. With that much headroom, you won’t need to put any compression on the input to keep levels in check, and that means you’ll get a more natural-sounding recording.
|
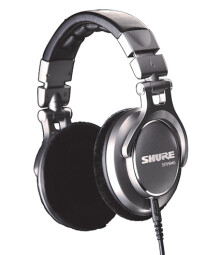
For best results, make sure the singer is as comfortable as possible with the headphone mix
|
One of the keys to a successful session is to make the singer as relaxed as possible, and probably the best way to do that is to provide a headphone mix that offers a comfortable blend of vocal and track. Set up a rough balance in advance of the session, and then let the singer try it, and then make whatever adjustments he or she asks for. Remember, your goal is for the vocalist to be as comfortable as possible while singing. You’ll find that singers typically want to hear their voice extremely loud in relation to the track.
Keep your record buffer set as low as you can, or use your audio interface’s no-latency hardware-monitoring feature, if it has one. Any noticeable latency will throw the singer’s timing off.
If your gear allows it, put a hall or plate reverb on the vocal track in the monitor mix (don’t record the reverb), to help things sound smooth and “finished, ” thus building the singer’s confidence, assuming he or she likes having it on there.
In part 2, we’ll look at how to get the best possible performance from the singer.


