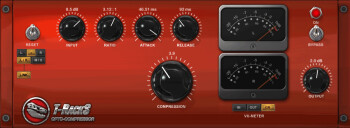
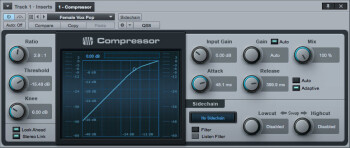
Today we will focus on compression, another important aspect of the mastering process that's often misunderstood.
Why compress?
Contrary to popular belief, the main task of a compressor is not to increase the perceived volume but rather to gain consistency in terms of dynamics. To be clear, the goal is to to reduce the difference between the loudest and softest parts of a song. In mastering, it increases the comfort of the listener, who will not need to constantly adjust the listening volume, not only during a song, but also for the different songs of an album — once again, sonic coherence is key.
There is no need to compress drastically to get the expected result. A subtle processing is the most appropriate, as we will see.
Methodology
To learn more about the different parameters of a compressor, please refer to a previous article on that subject. Let’s go to the heart of the matter at hand!
First of all, set a goal: 2 dB to 3 dB of gain reduction, at the most, ought to be more than enough in most cases. You can obviously adjust that depending on the musical style, upward if you aim at the dance floor and downward if you’re working on more “classic” stuff, but always with caution. Keeping that in mind, your compression will “breathe” naturally and should go unnoticed.
The aim of the game being clear now, let’s move on to the ratio. Once again, there’s no need to overdo it! A 2:1 ratio is a limit that shouldn’t be exceeded, at the risk of deteriorating the vitality that you patiently imbued into your mix. Consider an attack time between 20 to 30 milliseconds and a release time of 250 milliseconds as a starting point. Then, lower the threshold of your compressor until you reach the famous 2 dB to 3 dB of gain reduction in the loudest sections. If needed, use the Makeup Gain to recover the loss in perceived volume and listen closely to the result by toggling between the mix with and without compression…If nothing shocks you, you are on the right path!
But now you still have to adjust the attack and release times. Start by gently lowering the attack time. If you start hearing “crackles” it means that you have gone too far. A very fast attack time results in distortion. While that may be interesting during mixdown, it isn’t during mastering, so go back a couple of milliseconds. Setting the release time is just as delicate. A slow release time will result in a pumping effect, while if it’s too fast it will not allow the compressor to come back to its resting position between two peaks. You will have to find the best balance that allows the compression to do its job without being heard. A good means to achieve that consists in checking on the gain reduction. It should “dance” to your music without forcing the rhythm. Do note that working with the time constants of a compressor will inevitably affect the gain reduction, so you will need to readjust the threshold to achieve 2 dB to 3 dB of reduction, and the Makeup Gain to end up with a coherent listening level between the compressed and unprocessed sound.
And we still haven’t said anything about the knee action: Should it be soft or hard? Most times, we recommend you to use a soft knee to have a progressive and, thus, more transparent behavior. That said, personally, I’ve always preferred a hard-knee action, because it sounds more musical to my ears when dealing with so-called “modern” music.
Once you have set all the above, you should end up with a more balanced sound in terms of dynamics, without having sacrificed the vitality of your music. The different instruments ought to hang together in a more natural way, as a whole. That’s what is usually called the “glue” effect in many forums. It might seem a pretty vague concept right now, but you’ll know when you get it right!
In the next part we will tackle the thorny subject of multi-band compression.
*Click here to view all installments of this multi-part series*


