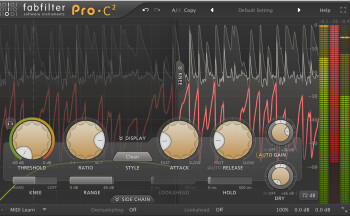
Today we'll continue exploring the use of reverb and dynamics processing by looking at post-reverb compression.

Post-reverb compression
Placing a compressor right after the reverb on the corresponding aux bus can have diametrically opposite results. I’ll begin with the least discreet among them, which will thrill fans of Led Zeppelin-like drum sounds.
There’s no doubt that John Bonham was an extraordinary drummer with an amazing punch, but the production techniques used on his drums played a very important role in achieving his sound. And, to be honest, you don’t need to be a rocket scientist to achieve the same effect. A simple compressor driven to the limits at the output of a room reverb will do the trick. To be more precise regarding the settings, try a ratio around 8:1 with a super fast attack (1ms to 2ms), an average release time, following the groove of the kick/snare, or a very short one to get a more obvious pumping effect, and a low threshold to make the limiter work to its maximum capacity. Now turn up the make-up gain until you get a smile on your face and that’s it! Granted, this trick won’t work with all music styles, but the effect is interesting nonetheless. And by the way, the larger-than-life effect achieved with this effect can also be interesting with other instruments, so don’t hesitate to give it a go!
The second method I would like to discuss here with you is much more subtle. Sometimes it might happen that you’re really happy with the reverb sound but you just can’t stop it from messing up the precision/definition of an instrument, despite the use of an EQ to get rid of eventual frequency masking. What to do then? Well, a compressor with a sidechain can come in really handy in such cases.
Let’s take a vocal track as example. If the reverb affects its intelligibility, place a compressor on the corresponding aux bus, post-reverb. Now, feed the sidechain of the compressor with the dry vocal signal and dial in the compressor like this: moderate ratio (2:1 to 4:1), low enough threshold so the compression kicks in as soon as the singer starts singing; fast attack time, for the same reason (but not too fast, so that it remains discreet); and make-up gain set to 0. Why not use any make-up gain, you ask? Well, quite simply because the goal is to lower the level of the reverb whenever the vocalist is singing. Experiment with the release time until you hear the reverb level increase naturally at the end of a phrase. This way, the reverb will be automatically reduced when the singer is doing his thing, without messing with the intelligibility and, when he or she stops singing, the reverb will come up again as if by magic, nicely complementing the melodic line.
This trick can obviously be used on all sorts of sources and works especially good on solo instruments. Besides giving a nice definition to the elements concerned, this method has the added advantage of emphasizing the sense of relief within the overall sonic puzzle. But be careful not to apply this to every track of your mix or you risk ending up with a chaotic 3D sound space that won’t be too appealing to the listener.
