In the previous article we looked at some technical solutions that can ease the life of lone home studio owners. Mobile apps, MIDI pedalboards and wireless keyboards can prove very useful, as long as you know what functionalities you actually need when recording on your own. Something that depends on your personal working habits, which I would very much like to hear about... So don't be shy and leave your comments below. In the meantime, I'll let you in on the shortcuts that I deem indispensable when working on my own. You never know, it might give you some ideas...

Prerequisites
For seven years now I have been using mainly Reaper, the celebrated Cockos DAW – my faithful companion both for personal projects and my professional day-to-day life, in the studio and at home. Thanks to the precious help of my virtual friend Reno Mellow, whom I salute, I became a “power user” making the best of macros, “cycle actions, ” and other nifty tricks that the software conceals and which have made my everyday life much easier. However, certainly not all DAWs offer the same flexibility. Consequently, what I describe here might seem impossible to put into practice at first glance. But there are some utilities that allow you to bypass the limitations of your DAW in this regard. Like MIDI Translator Pro by Bome Software, which allows you to combine MIDI and keystrokes to create your own macros relatively simply. There are surely similar software tools available, but MIDI Translator Pro is the only one I’ve tested and it convinced me right away.
Let’s start digging deeper into today’s topic.
Very Hotkeys
When I’m recording, two scenarios are possible: either my hands are free or they are not. This conditions the tool I use to transmit the shortcuts to my DAW, but regardless of the tool, the shortcuts are always the same:
- Playback
- Record
- A button that binds the Stop function with a backup when I’m satisfied
- Another button that halts recording and discards the current take due to false starts and similar mistakes
- Fast forward
- Rewind
- Loop mode on/off to be able to daisy chain several takes of a single part
- A switch to define the loop points during playback
- Metronome on/off
- A button to switch on/off recording during playback, as a sort of punch-in/punch-out
- Volume controls for my instrument’s return, pre-production, click and overall volume
- A last switch to disarm the current track and move to the next one, arm it and start recording — very practical to do different guitar parts, double vocals, choirs, etc. one after the other.
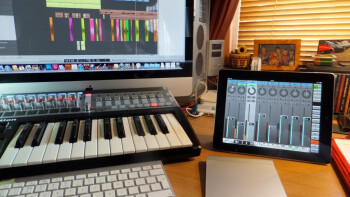
With all this I am, most of the times, perfectly capable of handling an entire recording session of an instrument from A to Z without having to go back to my workstation. When it comes to the main vocals, the choirs or a synth I resort to these shortcuts using a tablet placed on a stand with a template created by me using TouchOSC. And if my hands are busy with a guitar, bass or anything similar, a MIDI pedalboard with two expression pedals for the volumes allows me to do exactly the same without having to take my hands off my instrument. What else could you ask for?
The Invaders…
"David Vincent has seen them, for him it began one lost night on a lonely country road, looking for a short cut that he never found."
The main risk with this sort of approach is not knowing what is meant to do what, especially when you still haven’t gotten your feet wet. But when you use a customizable mobile device/software combination, you don’t have that issue because you only need to identify the functions of each button using a color code and/or a label. Although it’s a bit more complicated with a wireless keyboard or a MIDI pedalboard. Personally, I decided to go for a “classic” solution: multicolor stickers to identify clearly every single switch of my pedalboard. For the hard-liners among you, there is a more complicated way to achieve this, which is just as effective! Indeed, a geek friend of mine, has taken it to the extremes of coupling a mobile device for visual return and a MIDI pedalboard to send messages. Hence, when he activates a function with the pedalboard a corresponding button lights up on the tablet. That way he always knows what he is doing. It’s awesome! Don’t ask me how he did it because I have no idea, but my guess is that it entails lots of sleepless nights…
I’ll be waiting for your comments to see how you deal with this!

