After guitar and bass, the time has come to focus on how to get a big drum sound. A subject matter so vast that we will need at least three articles to cover the basics.
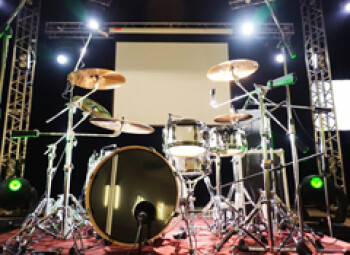
There are two ways of approaching drums recording and mixing that are perfectly complementary. You can either consider the whole drum set as one single instrument or as a group of instruments (snare, bass drum, toms, cymbals, etc.). In fact, the way drums are usually recorded nowadays reflects this dual approach: we combine mics whose role is to record one single element of the kit (the snare, the kick, a tom, etc.) and other mics whose role is to capture the sound of the drums in a more general way. Most commonly the latter are stereo or paired mics placed at a greater distance of the drums.
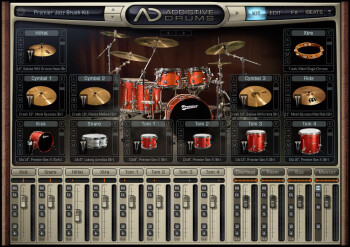
Obviously, while this makes the recording more complex (you have to pay special attention to phase problems), you will have more mics at your disposal and, thus, more tracks to record your drums, which results in more freedom and possibilities to shape your sound. The good news for beginners, and for those who don’t have the opportunity to do such recordings, is that there are ready-to-use virtual drums that have been put into a dozen of tracks, processed, reprocessed and mixed on the altar of the god of big sound. Even if it will never replace a recording made with love, you’ll have to agree that progress is beautiful!
All that just to say that the methods that we will address in this series of articles work fine regardless of where the recordings come from: a virtual or a real drum set. A series of articles? Yes, three at the least, because there is more than one way to fatten the sound of drums, and the idea of “big drums” is not always the same and depends on whether we are talking of a rock, electronic music or hip-hop/RnB production.
In this first part we will pay our respects to the eldest and start off with rock, which is also applicable to lots of metal genres.
A big rock/metal drum sound
Even if there were precursors in the matter (the drum sound at the beginning of the verse in The Beatles’ Paperback Writer for example, the solo in Iron Butterfly’s In a gadda da vida and even The Who), the big rock drum sound was born with John Bonham of Led Zeppelin. His drum sound was huge from the very first album, but it is definitely on When the levee breaks from Led Zeppelin IV that it is most impressive.
Where does that sound come from? From Bonham’s heavy hitting, of course: never forget that the musician is the first responsible for the personality of a sound, but not only. According to Andy Johns, the audio engineer in charge of the recording, the secret behind that huge sound resides firstly in two Beyerdynamic M160 microphones placed at the top of the stairwell of Headley Grange, where the sessions took place, while Bonham played at the bottom of the stairwell (he was very impatient to try his new drum set that had just arrived). What do we learn from that? That we need to get our drums delivered at the bottom of a stairwell? That’s an idea, indeed, but most of all, we might deduct from this anecdote that a big rock drum sound is closely linked to the acoustics and reverberations of the room where the recording takes place, which is something we usually record with a couple of condenser mics placed a couple of feet away from the kit.
They are microphones used to capture the ambiance of a room and are usually called "Room" mics. You want to fatten a drum sound? Start using some Room mics and see what happens.

Interesting, isn’t it? But we can do even better by taking another listen to When the levee breaks.
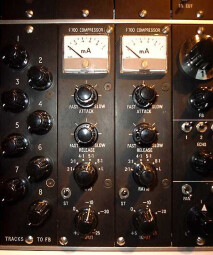
Andy Johns wasn’t satisfied with just placing some Room mics to benefit from the room acoustics: he then generously compressed the recordings from these mics with a Helios F700 compressor and put them through a Binson Echorec tape delay that also compressed the sound. Don’t focus your attention on the delay, which obviously makes the rhythm pattern more sophisticated, but it doesn’t have such a determinant influence on the sound; the keyword here is “compression” ─ without a doubt the tool that has been most widely used to pump up the sound of drums for decades.
Compress it!
Remember: a compressor serves basically to reduce signal dynamics, that is to say the difference between the loudest and quietest drum hits. While it is obviously interesting to give more foundation to the drums (in detriment of playing nuances we should add), it also allows us to bring forward the room sound: that famous reverberation responsible for a big sound.
Following Andy Johns’ example, let’s hear what happens when we generously compress the Room mics:

Not bad, right? True, you would say, but that means we need to have Room mic tracks, which isn’t always the case. How can we make bigger the sound of a drum kit recorded with only one or two mics, or a ready-to-use stereo loop like the ones we find in sample CDs?
Let’s see what we can make out of a stereo drum loop downloaded from the Sony Media Software website:

Let’s put this loop through a compressor applying not very subtle settings (an attack that passes the transients combined with a very fast release):

Hear how the sound beefs up: the resonance of the snare increases significantly and, overall, we can feel the room much more. But we can definitely do better. Let’s go a bit extreme now by lowering the threshold of the compressor and increasing the ratio in such a way as to really crush the signal. (Warning! I meant it when I said extreme…)

From the point of view of our research to pump up the room ambiance, the result is not uninteresting, but we also have to admit that our drums become nothing but an amorphous blob (pay special attention to what’s left of the hi-hat…). That’s certainly not our goal.
So, how can we intensify the ambiance of a recording without affecting the integrity of the drums? Compressing in an intelligent way… duh! Meaning we need to take the best of both worlds using…
Parallel compression!
|
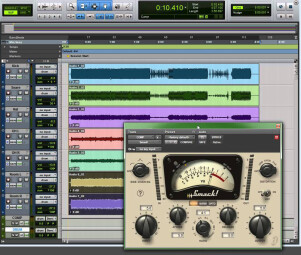
Parallel compression was born in the Big Apple, that’s why it’s frequently called “new York compression.” Inspired by the Exciter Compression formerly used in Motown recordings (see text box), the latter consist in mixing two copies of the same track, the second one being unreasonably compressed. Very commonly used on drums, this technique is much easier to achieve today that many compressors, both hardware and software, feature a parameter to control the processing. So now you only need to insert a compressor in the track you need to fatten and play with the Dry/Wet controls to get a more or less pronounced effect. As a consequence of this is we lose the advantage of having a track exclusively for the effect in order to tweak it with other effects or processors.
Let’s see what we can get out of our loop by mixing the sound of the dry track with that of the overcompressed one:

Not bad at all. This way we benefit from the advantages of overcompression while the attacks are preserved thanks to the dry track.
Obviously, nothing stops you from using parallel compression on your room tracks only, which broadens your scope… Let’s see what we achieve applying it to the first examples:
Or to only deal with the snare. You get the idea, and you might also find it interesting applied beyond compression and drums…
Listen to this example where we apply parallel distortion to the same drums. First the distorted loop and then a parallel distortion that allows us to dirty up the loop without destroying it completely:


As always, you can try out lots of things, always keeping in mind that the effect’s personality and settings will have a great impact on the end result (if you need a compressor that is almost at the limit of distortion, don’t hesitate to give a try to Soundtoys’ excellent Devil-Loc Deluxe).
Despite what we said before, do note that the Dry/Wet controls we can find on many compressors offers the advantage of quickness, but it is far from providing all the options that parallel compression does by using two tracks of your console. In fact, by sending your drums to another track you broaden your scope in terms of routing and processing options: do you want to cut the lows of your uber compressed track? No problem! Want to send the latter to a reverb or delay? No problem either! These are things that are not possible with the Dry/Wet knob of a compressor used as an insert…
OK, so your drums sound bigger now, but you want to make them fatter? For that, we turn again to When the levee breaks, because Andy and co. used yet another trick right at the end to beef up the drums: they slowed down the tape used for recording during mixdown.
Hey man, slow down!
When we slow down the playback speed of a tape we get the same effect as when we slow down the rotation speed of a vinyl disc: the tempo slows down, obviously, but also the pitch of the recording, which goes down. This results in a deeper sound that also feels heavier because the attacks, also slowed down, are fatter. And that’s the final touch that gives that massive sound to Bonham’s drums.
You can use any audio editor to reproduce this effect without the need of a tape machine. You only need to reduce the tempo of the song 10 BPM, making sure that the software does not keep the initial pitch making use of a Time Stretching feature. While this trick is very simple, it is also very effective, as you can hear in this example where our loop is played back at 0.86 of its normal speed with Izotope RX's excellent algorithm:

The trick yields undeniable results with the drum hits, but it nevertheless shows a tendency to create problems with the cymbals. You will have to be careful not to over do it or you risk generating artifacts.
The other problem is that you have to plan ahead: this means that you have to record the drums 10 BPM slower than the actual tempo of the project for it to play back correctly afterwards. But that’s not too complicated.
Finally, on a side note, many great Trip Hop grooves have been achieved by slowing down a great deal of acoustic drum beats, while the opposite applies to Drum’n’Bass, where the drum loops are usually played two or three times faster…
Obviously, nothing stops you from combing any or all of these techniques like Andy Johns did. Listen to what we can achieve with the drum beat we had in the beginning: first without any processing, then with room mics generously compressed and everything slowed down a bit:

We will leave it here for now, knowing that we still have lots of things to consider in our future articles. So please don’t start discussing layering, gated reverbs or transient designers in your comments to this article or you will be flogged with fresh nettle.


