Today we'll see how to record a transverse flute.
A wind instrument from the woodwind family, the flute is particularly difficult to record, specially so in a home studio, due to several reasons. The first one has to do with the musician and the flute itself. The playing position and lightness of the instrument certainly invite the musician to move, which will only get you into trouble when trying to record a flute, since the varying gap between the instrument and the flute will inevitably result in timbre variations. Asking the musician to remain static is not a solution, however, because that will impact the quality of his performance. On the other hand, these timbre variations can add some life into the recording, as long as they are reasonable. So, in short, the musician ought to be able to move but not too much! Although this is something we’ll discuss later on…
Second problem: The sound doesn’t come from one single and easily identifiable place, like in the case of the trombone we saw a couple of weeks ago. In fact, the sound is produced not only from the embouchure hole (or mouth hole), but also from all other holes along the body of the flute. From this it’s easy to see that placing the mic will not be a walk in the park…
Enough taking, let’s start doing something more fun!
On track
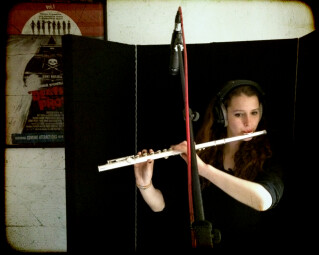
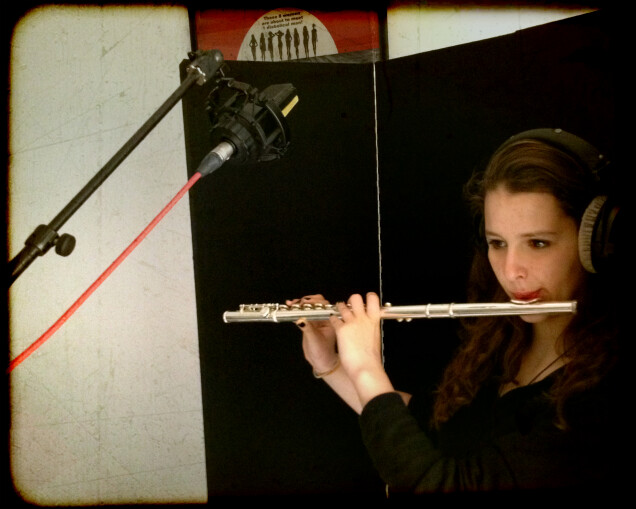
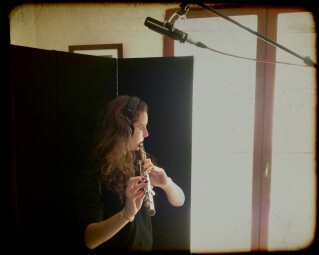
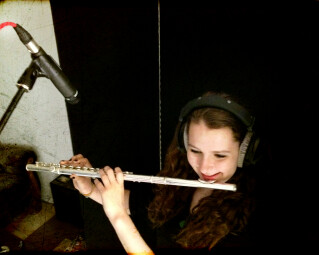
We’ll see four practical cases. The placement won’t change much from one case to the other: the mic is placed on top of the flute, at a distance of 8 to 15 inches (20 to 40 cm), and just slightly in front of it. The body of the microphone ought to be somewhere around the middle of the flute’s body (see picture).
The most important detail has to do with the angle between the mic and the instrument. When you point towards the head joint (mouth) you’ll get more of the musician’s breathing, but also more noise from the mouth, as well as a more brilliant/aggressive sound. If you point towards the foot joint (the end of the flute) you’ll get more noise from the keys and a smoother/softer sound. So it’s up to you to find the right spot depending on what you want to achieve. The larger the distance between the microphone and the instrument, the more airy the sound will be and the less noise you’ll capture, but that comes at the cost of a thinner body and more of the room’s sound being recorded.
In the first example I use a C414 condenser mic in omni mode.

This method can be really gratifying when you record in a studio with carefully planned acoustics, but the result here is obviously far from satisfying, since the sound of my home studio is clearly polluting the take.
For the second clip I put the C414 in cardioid mode, activating the built-in low-cut at 75 Hz, because there’s not much going on in the low end.

The result is much more interesting, with a lot more body and an acceptable share of room sound. This is just perfect for jazz. Nevertheless, for something a bit more “classical, ” the high end seems a bit too “harsh, ” for a lack of other word.
Let’s see what gives now with a ribbon mic (the Sontronics Sigma).

The more muffled sound might eventually work better for a more classical arrangement. Unfortunately, the bidirectional nature of this type of microphone complicates things a bit here, because there’s a lot of room, in my opinion. And the acoustic panels I have aren’t much help in this case, because the position of the mic makes one of the sides of the Sigma irremediably point towards my ceiling, which isn’t acoustically treated. A solution would be to try to place the mic right in front of the musician, but I have never liked the results I get with this setting on a flute.
To finish, I tried using a good old SM57 cardioid dynamic mc, which is often underrated for this type of recordings, if you ask me.

The result is certainly not the most precise, but the character of the high mids will make it easier to place it within the mix. Furthermore, the lack of sensitivity and/or precision often ascribed to this classic Shure mic could be considered a great advantage in this case, especially regarding room ambience. This mic will work great for pop, rock, funk, or R&B!
To wrap up this article, I remind you that the sole purpose of the methods described here is for them to be used as a guidance. It’s always up to you to determine what suits better the material you are working on!
Acknowledgments
I first met Garance when she was three years old. Who would’ve thought that 13 years later, she would help me out with one of my articles? She, of all people, who literally wrapped herself around my leg when I met her and wouldn’t let go the entire evening. It’s one of those things you can’t really explain… but there’s no need to, anyway.
Thank you my sweetie, it’s a real pleasure to make music with you and I’m sure we’ll keep on doing it for many years to come!


