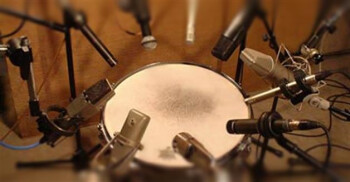
In today's episode, we are going to make an assessment of the drum tracks we have exploring different rough mix possibilities. You will see that alone by playing with the volume faders of the tracks we've recorded you can get a wide array of sonic landscapes, without the need of any processing.

Rat-a-tat, bum bum
I’ll begin with some variations of the verse:

- 01 Dry Verse 00:14
- 02 Monoish Verse 00:14
- 03 Snary Verse 00:14
- 04 Thick Verse 00:14
For the first clip, I used the overheads, kick in & kick out, snare top, and finally the RE-20 mics to get back a bit of the timbre of the snare. As surprising at it may seem, the second example is made up only of the mono room, stereo room, snare top, snare bottom, and hi-hat mics. For its part, the third clip features the stereo room, hi-hat, snare top, snare bottom, and RE-20. Finally, the last clip includes the overheads, snare top, snare bottom, and mono room.
Now let’s take a look at three different versions of the chorus:

- 05 Soft Chorus 00:28
- 06 Snappy Chorus 00:28
- 07 Trashy Chorus 00:28
The first clip is limited to the kick in, kick out, RE-20, toms, stereo room, and mono room mics. For its part, the second one uses the overheads, kick in, kick out, RE-20, stereo room, and mono room. Finally, the last example uses the same setup as the previous one, but the balance between tracks is somewhat different, and it also features the snare top and snare bottom mics.
It’s easy to realize that all these rough mixes have a very different sonic personality. And yet, considering the number of tracks used for each of them in relation to the tracks we’ve recorded in this chapter dedicated to drums, you can easily realize that this is just the tip of the iceberg! With that in mind, I invite you to get all the raw tracks from the previous articles and explore by yourself the huge possibilities available.
Faced with all these options, it’s only logical that you are still asking yourself: how you I record the drums? Gear limitations apart, the only answer I can give you is, unfortunately, “it depends…”. On what, you ask? Well, as I’ve mentioned several times before, it all boils down to the sound you want to get for the song you are currently recording. If it requires a “vintage” sound, there’s no need to close mic each of the toms or to use a Sub Kick. On the other hand, if the track is more “Dub, ” then the Kick Sub is a must. In short, every well-defined musical goal will call for a specific recording setup.
My advice when it comes to recording drums could be briefly summarized as follows: use all the means you consider necessary to get the sound you want, no more and no less. As you gain more experience you will find it easier to make this sort of decision. But whatever you do, don’t multiply the mics during tracking with the argument that it will give you more freedom during mixdown, because that’s utter nonsense. Too many choices is no choice at all! If you end up with too many possibilities during mixdown, you will still have the same dilemma as before: now what? Sometimes you need to take a step back to move forward, besides nothing good ever comes easy. The sooner the decisions are made, the easier it is to get to the desired result. And even if you make a misjudgment, not only will nobody die, but you will actually learn something from it because you will never make the same mistake again.
Oh, and don’t worry about my mental health, I know I’ve made this point several times before in this series. But I’m just getting warmed up, because I’m a firm believer that repetition is a basic element of learning.
Join me next week for the last chapter dedicated to the recording of drums!

