As we saw in the previous article, the comfort of the musician is crucial to getting a good performance, and hence a precondition for every good recording. And this comfort depends largely on the subject that we will tackle today: the headphone mix.
Give them what they want!
I’ll suggest here a relatively simple method that will give you enough flexibility to give the musicians the ideal headphone mix, according to their own criteria, while at the same time giving you, the audio engineer, the possibility to listen to what you need to during the recording.
First, start by setting the tempo of the session in your DAW, according to the song you will be recording. Even if some musicians don’t really like to play to a click, it will nevertheless be helpful later on (during editing, mixdown, etc.). Next, import the music you’ll use as reference. If you followed the recommendations I gave you in the article dedicated to pre-production, you should be able to import the different stems into different tracks named according to their content, obviously. Group these tracks in a track folder so you can hide and reveal them at will during the recording session. As useful as they are, you don’t really need to see them wile you are actually recording.
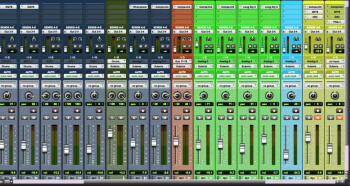
Now, create an aux bus for every musician recording simultaneously and send all the stems to each of these buses. But be careful! Be sure to set them pre-fader so they are not affected whenever you manipulate the faders of the stem tracks. For the sake of clarity, I recommend you to name each of these aux buses after the corresponding musician.
Let’s move on now to the routing. The monitoring buses you just created are meant to be listened to only by the corresponding musicians. Consequently, you need to configure each of them so the audio signal feeds only the appropriate outputs on your soundcard. This means you need to take them out of the main bus, which is the one you’ll be using to monitor the signals. If you are lucky enough to have a soundcard that features several headphone outputs, it’s obvious that you should use them. However, if that’s not the case, you will need to use some line outputs other than the main outs, and a headphone preamp to bring the signal to an audible level. For the least fortunate among you, if you happen to have a pair of multimedia speakers with a headphone output, they could do the trick, even though it’s far from ideal.
Last but not least, don’t forget to send the musician’s signal directly towards the physical output assigned to his/her headphone mix, so that he/she can hear him/herself adequately. Most recording soundcards allow that via a proprietary management software, like the fabulous RME Total Mix. Otherwise, your DAW most certainly includes this type of option which you only need to activate in the track you’ll use to record the musician. However, do consider using a small buffer size to minimize the delay induced by the latency of your interface.
Once you’ve done all this, you will only need to use the aux sends on the stem tracks to create a mix for each musician according to their own needs, while at the same time being able to listen to whatever you want or need to hear on your own headphones, using the faders, solos and mutes of each track.
One last advice before moving on: this setup can be more or less tedious and time-consuming depending on the sequencer you use. That’s why I recommend you to start with the templates provided by your DAW so that every new recording session goes as smoothly as possible.
Talkback
To conclude this article, a couple of remarks on talkback. If you have access to two different rooms at your place, one for your gear (the control room), and one for the actual recording, it might be very interesting to set up a talkback mic. Say what? A talkback is basically a mic that picks up the sounds from the control room to send them to the musicians’ headphones, allowing for a much more fluid communication between both of you during the recording session. Some devices (audio interfaces, headphone preamps, etc) have a built-in microphone with a button to activate/deactivate the talkback. But if that’s not your case, you only need to place a microphone close to you in the control room, connect it to any of your soundcard’s preamps and route the signal so that it’s only audible on the musicians’ headphones, not on the main outputs or you could get some really nasty feedback. Use the mute function of your audio interface’s management software to activate/deactivate the talkback, or that of a dedicated track in your sequencer. To finish, there’s a free plug-in by Sound Radix that allows you to automate the talkback depending on the status of the transport of your DAW: it activates the mic as soon as the DAW stops recording and mutes it when the sequencer is in playback or recording mode. Very practical, isn’t it?


