In this installment, we'll continue our focus on EQ, looking at how to clear out unneeded clutter in the low end of the frequency spectrum.
With or without filter…
Start by inserting your favorite EQ into every track. (If you don’t know the difference between an insert or aux effect, I invite you to read this article.). The goal is to make enough room in the low end for the instruments that need it, so it seems quite natural to start with the tracks for which these frequencies are not too important. For example, if I had a song with drums, one bass, one guitar, main vocals, backing vocals, and a synth pad, I’d usually start with the synth, then the backing vocals, the guitar, the overheads, the snare, the vocals, the bass drum, and, finally, the bass guitar.
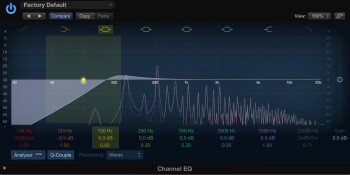
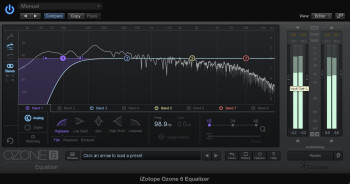
In order to attenuate the low frequencies, you have two main weapons: High-pass filters (HPF), also called Low-cut filters, and Shelving filters. The choice of filter will surely make for a good discussion in the comments below. Some prefer shelving filters for fear of phase problems, while others prefer the more “radical” aspect of an HPF.
Personally, I don’t have a fix “recipe.” However, generally speaking, I use soft HPFs (6 or 12 dB/octave) for instruments that don’t really have anything useful in the low end, and shelving filters for those which do bring something along in this frequency range, because they give me more control over the amount of attenuation. Sometimes I don’t use anything on the kick drum or bass guitar.
Methodology
There are basically two ways to set the cut-off frequency for these filters. The first one consists in using…your ears! Start by filtering at a very low frequency (around 60 Hz, for example), and move upwards gradually. When you start feeling that the sound turns thin, it means you’ve gone too far. Go back a bit to recover some of the instrument’s fullness and move on to the next track.
The second approach is more “scientific.” It consists in simply adjusting the frequency according to the instrument in turn. For instance, a guitar with a traditional tuning never goes below E2, which is around 82 Hz. This means that it may be wise to set your filter at that frequency. To know what’s the frequency range of an instrument, you only need to look for a “frequency chart.” But since I’m very nice, I’ll give you a link to an online frequency chart that I find particularly useful. A refinement of this technique consists in not considering the entire frequency range, but only the lowest note played by the instrument in question.
I obviously prefer the first of these two approaches, because I find it more “musical.” However, I must admit that the second approach has saved my ass more than once when the low end of a song is pretty busy.
One last trick before we finish. It may prove very effective to slightly boost the signal right above the cut-off frequency. This helps provide the instrument with a sensation of fullness, even though you just took away all the energy from it in the low end! To achieve that, you only need to play with the Q factor of the HPF or shelving filter. In fact, reasonably increasing the Q factor with this type of filters will also result in a slight boost above the cut-off frequency.
Once you’re done with this trimming in the low end, you should have a cleaner and more precise foundation, providing a sensation of clarity in the low frequencies. In the next episode, we’ll see how to reinforce this clarity addressing the low mids.


