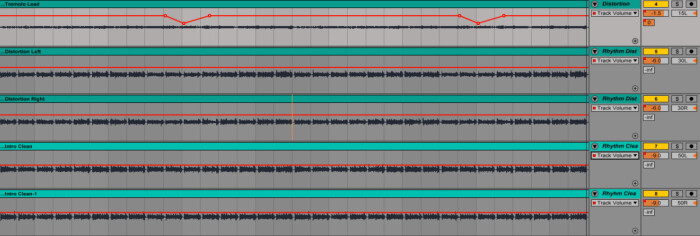
This week I will show you a technique that is pretty widespread when it comes to recording electric guitar (but not only), namely: double-tracking!

Dubbing Brothers
Do you want go get a louder, more powerful, thicker, deeper or more “spacious” guitar sound? Double-tracking was made for you! The basic principle behind this technique is pretty straightforward: you only need to record twice the same guitar part and put one take on top of the other. But do note that you need two distinct recordings! Duplicating a single recording from within your DAW won’t do the trick because the effect of this technique relies on the micro-differences between two different takes, following the unison principle. This obviously requires the musician to have a certain constancy in terms of performance or the guitar will lose definition.
Those are the basics. Nevertheless, to get an optimum result I recommend you to try one or several of the following tricks:
- Use different guitars for each take and/or, if that’s not possible, explore the different options that your instruments provides (pickups, tone controls)
- Along the same lines, use different amps and/or use different settings
- Record the guitar with different signal paths (mic/preamp) and/or mic placements
- Don’t hesitate recording the same part three or more times if necessary
- Spread the different take across the stereo field, but be careful with any potential phase issues
- Try out different chord inversions to enrich even more the sonic texture
As you can see, the possibilities are infinite! Whatever you do don’t stop experimenting with any ideas that come to your head which allow you to introduce new micro-variants between takes. But be careful not to lose sight of what you want to achieve: your goal is not to stack guitar takes until you’ve filled the entire frequency range and/or sound field with them. That would only be counterproductive because there will literally be no space left for the rest of the instruments, besides alienating the guitar sound from the one you originally had in mind. Not to mention the lack of precision and the appearance of some sort of flanger effect… In short, don’t overdo it!
To illustrate the topic of this article, here are some audio clips which use the same “clean” rhythm guitar we’ve using lately:

- 01 Rythm sm57 00:26
- 02 Rythm x2 Soft Pan 00:26
- 03 Rythm x3 Dirt Hard Pan 00:26
- 04 Rythm x4 Voicing 00:26
The first clip is the original take, bare-naked. On the second one, the guitar is doubled on the same Telecaster but with a different pickup/tone controls configuration, a different amp and an AKG C414 mic instead of the SM57 used previously. Do note that the two tracks are slightly off-center, to increase the stereo width.
On the third clip, there are three takes: the two previous ones, placed hard left and hard right, and a third one pinned to the center, played with a different guitar, an amp dialed-in to really get some crunch out of it and recorded with a Sontronics Sigma ribbon mic to smoothen the result a bit.
Finally, on the last clip there are four guitar takes. The first two takes, used similarly as on the third clip. I then added two more recordings, one on each side of the stereo field. Apart from using different guitars, amps and mics, I played the parts with different inversions to the ones on the original take.
And that’s it for today. Now you are probably thinking I went over it all a bit too quickly, aren’t you? Well, I must admit you aren’t that wrong. But it was all on purpose. In fact, I had to deal with the issue of double-tracking in this series for it to be as exhaustive as possible. However, I’m not for reinventing the wheel and it just so happens that today’s topic was already discussed at length by my dear friend Los Teignos some years ago. So I recommend you to read or re-read what he had to say back then if you want to learn more about doubling a guitar.
Until next time!
Download the audio clips (in FLAC format)

