It was late at night, at a live-in-concert recording session in Germany. As several thousand fans waited anxiously, the vocalist walked onstage, and picked up a set of headphones. I saw him plug them into the mixer, and figured he was going to make one final check of his vocal sound before the band kicked in. He then turned the preamp gain control up full...not too unusual, as mics don't have a lot of gain. But then he held the headphones up to his mouth and -- started singing. He had plugged the headphones into the mic in, not the headphone out...and he had done it on purpose. Is this what recording vocals in the 21st century is about?
Well, the answer is yes…and no. No, in the sense that a well-recorded vocal through a high-end mic feeding a state-of-the-art preamp remains a supremely important part of the recording art. Yes, in the sense that it underscores a fundamental truth about recording today: anything goes.
The tools of the vocal trade have undergone as dramatic a transformation as the recording process itself. Microphones are better and cheaper; today’s “budget” mics sometimes outperform the champions of yesteryear. Preamps, whether tube or solid state, have noise levels that are measurable only with the most sensitive test equipment. Processing gear ranges from “vocal strips” dedicated solely to vocal, to technologies such as Antares’Auto-Tune (which can correct out-of-tune-vocals) and mic modeling, which mimics the characteristics of particular “signature” mics. Compressors, reverbs, even vocal booths have all enjoyed the results of technological progress.
So what’s the best way to record vocals these days? The answer, of course, is that anything goes. Following are some of the possibilities.
Recording Vocals
Few topics inspire more debate than the optimum vocal mic and preamp. But note that a mic and preamp combination that sounds great with one vocalist might not work with another. Case in point: once while recording, my voice was recorded with a sub-$100 dynamic mic and a $995 condenser mic. The unanimous agreement was that the dynamic sounded better.
Was it because the mic was better? No. From any objective standpoint, it was inferior. But it had some response anomalies that flattered my voice. The condenser mic was accurate, but my voice didn’t need accuracy: It needed a high-frequency lift, and warmth from the proximity effect (i.e., the tendency of a dynamic to produce more bass as you sing closer to it).
I sometimes wish that all mics looked the same, and had no labels on them. That would force engineers to take a fresh approach with every session. It’s very easy to rely on using old favorites—the assumption is that the mic that worked great on the last session will be equally good on the current session, but that isn’t always true. Furthermore, there’s a matching issue between mics and preamps, so mic X might sound great with preamp A and not so great with preamp B.
Bottom line: Try every mic with a vocalist, record the results, then choose which one sounds most appropriate. I suggest comparing two mics at a time to prevent “option overload.” Choose the best of each pair, then have a runoff among the winners.
Creating the Best Performance
What’s far more important than the gear you use is the performance. While it may seem gear has little to do with this, gear can help create an environment that brings out the best in the vocalist. We’re not talking about dimming the lights, but working in a way that fits the vocalist’s style.
For example, loop recording (where a particular segment of music repeats over and over, and a new overdub gets laid down in a new track on each pass) is great for doing multiple takes. But some vocalists get nervous when the music never stops—they need some breathing space in between takes—while others just seem to build as the music keeps going around. Does the singer like having a long lead-in before the part to get psyched up, or prefer to jump right into it? Find the answers, and set up your gear accordingly.
Mic Modeling: Sonic Scam Or Holy Grail?
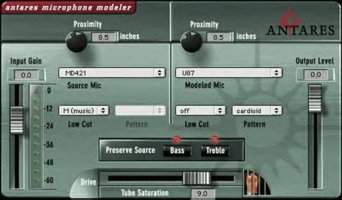
Different mics have different sonic “signatures.” A lot of this involves the mic’s distinctive frequency response, so mic modeling software or hardware analyzes a reference mic’s response (along with other selected characteristics), and applies this signature to your mic.

Antares’ Mic Modeler, now discontinued, was a pioneer in the concept of mic modeling.
This process works best when the modeling software either analyzes your mic also, so it knows exactly what type of compensation to apply, or you have a mic type that is recommended as a signal source for the modeling device.
So can you really turn a Radio Shack mic into a vintage tube Neumann? No way. Granted, it may sound more like a Neumann than it did before, but no one’s going to prefer it over the real thing. However, with a good source mic, and if you don’t stretch the model too far (for example, having one dynamic mic sound like a different dynamic mic will probably work out better than trying to make it sound like a small diaphragm condenser type), mic modeling can be a very useful tool.
The issues are the same as with modeled guitar amps. Clearly, plugging a guitar direct into a board through a modeling preamp is not going to feel the same as playing through a guitar amp and cabinet. That’s not surprising; what issurprising is just how close you can come, and how by the time the track plays back, few people can hear the difference between the real thing and the simulation.
Mic modeling isn’t a replacement for a good collection of mics, but it can take a good collection of mics further. Even if simulating other mics isn’t your main interest, the complex response curves created by applying mic modeling have uses in their own right.
Richer Vocals
One of the all-time proven techniques for creating thicker vocals is to have the vocalist double a line by singing along with the original take. The doubled take is usually mixed behind the main line at anywhere from 3 to 10 dB.
However, sometimes it isn’t always possible to cut a doubled line—like when you’re mixing, and the vocalist is on tour somewhere. For these circumstances, here’s a quick workaround.
- Copy the vocal track you want to thicken so you now have two tracks of the same vocal.
- Apply a pitch shift plug-in or hardware processor to one of the tracks.
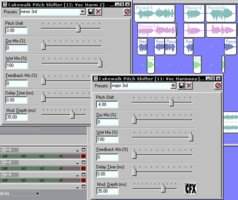
- Here’s a good point of departure for the Pitch Shift parameter settings:
- Pitch Shift = –20 to –30 cents
- Dry Mix = 0
- Wet Mix = 100 (you want only the pitch-shifted sound)
If there’s a feedback parameter, set it to 0. If delay time and modulation are available, try modulating pitch very slowly over a range of about 3 to 15 ms. This adds a bit of variety. Also, bring the doubled track down so it doesn’t compete with, but instead complements, the lead vocal. Of course, these are just suggested settings that work well with my voice; adjust to taste.
For the thickest sound, pan the two vocal tracks to center. If you pan one vocal full right and one full left, you’ll hear two individual vocals instead of a composite effect (which may be what you want). Also try panning lead vocals slightly left and right (e.g., left channel at 10 o’clock, right channel at 2 o’clock). This gives a somewhat fuller sound and wider stereo spread, which can also be useful.
Fixing A Doubled Vocal
With doubled vocals, sometimes the two vocals work together perfectly except for an occasional word or two. Rather than recut or overdub the doubled vocal, a workaround is to copy the same section from the original (non-doubled) vocal. Paste it into the doubled track, but delay it by about 20–30 ms. As long as the segment is short enough, it will sound fine (longer segments will sound echoed, which may work, but destroys the sense of two individual parts being played).
Synthesizing Vocal Harmonies
Normally, I sing my own harmonies. But sometimes, pitch shifters—because they’re not perfect—add timbral and timing imperfections that actually sound better for some applications.
Here’s an example of creating harmonies using Sonar’s real-time pitch shifting plug-in (the principles are the same for other programs). Note that Sonar Producer Edition also includes a high-quality, but non-real-time, pitch stretch processor. I usually use the real-time plug-in to get the harmonies right, then go back and process the files destructively using the higher-quality, non-real-time algorithm.

This shows harmonies being generated within Sonar using real-time plug-ins. Higher-quality, offline plug-ins can be used for the final processing.
Note that there are four tracks of vocals: The teal one at the top is the original vocal. The violet one below that is a “cloned” version, which has been processed with the doubling technique mentioned previously.
The next track (blue) is also a cloned track, but it’s being processed through the pitch shifter set to a major 3rd. However, note that some elements have been cut from this track and moved to the next track down, which is processed through the pitch shifter set to a minor 3rd. As Sonar doesn’t know which notes should receive minor 3rd or major 3rd harmonization, you have to cut up the track appropriately, and move the right phrases or notes to the right tracks. This may require zooming way in on the cloned track, so you can make cuts in the space between phrases.
The standard pitch shifting caution applies—the further you stretch pitch, the less realistic the sound. Sonar’s real-time pitch shifter does not preserve formants during shifts; however, when pitching up a major third the formant change adds a bit of voice-on-helium effect, which when mixed behind the main vocal, can actually sound pretty cool.
Starting with Sonar 5, the Producer Edition includes Roland’s VariPhrase technology in their V-Vocal plug-in. With this plug-in, you can “draw in” harmonics and constrain a melody to particular notes. This makes the process of harmonization much easier, as does a similar feature in Samplitude and Digital Performer. There are also programs like Antares Harmony Engine, and zplane’s Vielklang (among others) that are designed to generate harmonies.
Originally published on Harmony Central. Reprinted with permission.
