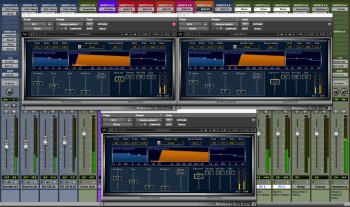
In this new episode, I'll show you how to recreate a realistic sound space with the last three buses of the reverb setup we've been using in the last couple of weeks.
Natural sized
In order to simulate a natural sound space, I recommend you to start with a Room algorithm on the first of the three buses in question. Choose a preset whose sound matches best your vision of the sonic puzzle. Once you’ve done that, adjust the decay time according to the groove of the song you are mixing. Finally, copy the reverb plug-in, with the exact same settings, to the two remaining buses.
Now, the trick is to create three distinct depth planes with these buses. Since your buses simulate the exact same room, you only need to tinker with a couple of parameters to create a near, a middle and a far field, so you can place any of the elements of your mix within a coherent sound space. And you don’t need to be a genius to achieve that.
As we have previously seen, pre-delay plays a very important role in conveying a sense of depth. A brief reminder: the longer the pre-delay time, the closer the signal seems to be. But be careful, don’t go beyond 50ms or you risk making your reverb unnatural. Plus, always bear in mind the groove of the song.
Along the same lines, gently play with the level of the early reflections to drive an element farther away. The farther a source is from the listener, the smaller the difference between the source signal and the first reflections, in terms of relative volume.
Finally, adjusting the frequency spectrum with Damping and/or post-reverb EQ can help you refine the distinction between the three planes.
One last remark before moving on. Don’t go too far out when creating the planes or you might end up degrading the overall sonic cohesion. Some minor retouches here and there ought to be more than enough to create a nice depth of field.
Once you’re done with all of the above, you only need to send the tracks of your song to the corresponding buses to place them in the sound field. Always respect the placements you had imagined before! Otherwise, it might be counterproductive ─ you should never forget that you are working from the perspective of a 3D puzzle. As such, all decisions you make regarding level, EQ, etc., already take in consideration the placement of the different elements in the soundscape. It would be a pity to destroy all that at this stage, wouldn’t it?
Okay, now you just have to figure out how much of each signal you should send towards these reverbs…Although there’s not much to rack your brains about in this regard. Don’t forget that you are working with the notion of distance between the “sound objects” and the listener. In nature, the more you move away from a signal, the weaker the difference in level between the source and its reverberation. So, to emphasize the sense of distance, you should send a good deal of signal to the corresponding bus. Conversely, to create a sense of closeness, you should send less signal.
And that’s it for today. I’ll see you next week for some new adventures with reverb!


