
In the three previous parts, we showed you how to set up the DJ hardware, how to configure your computer to record an optimal signal and some good practices to keep in mind for your sessions. Now that you have a "raw" recording, it's time to see how to finish the operation...
We will see here how to process and then export the recorded session to obtain the best possible result.
Mandatory processing
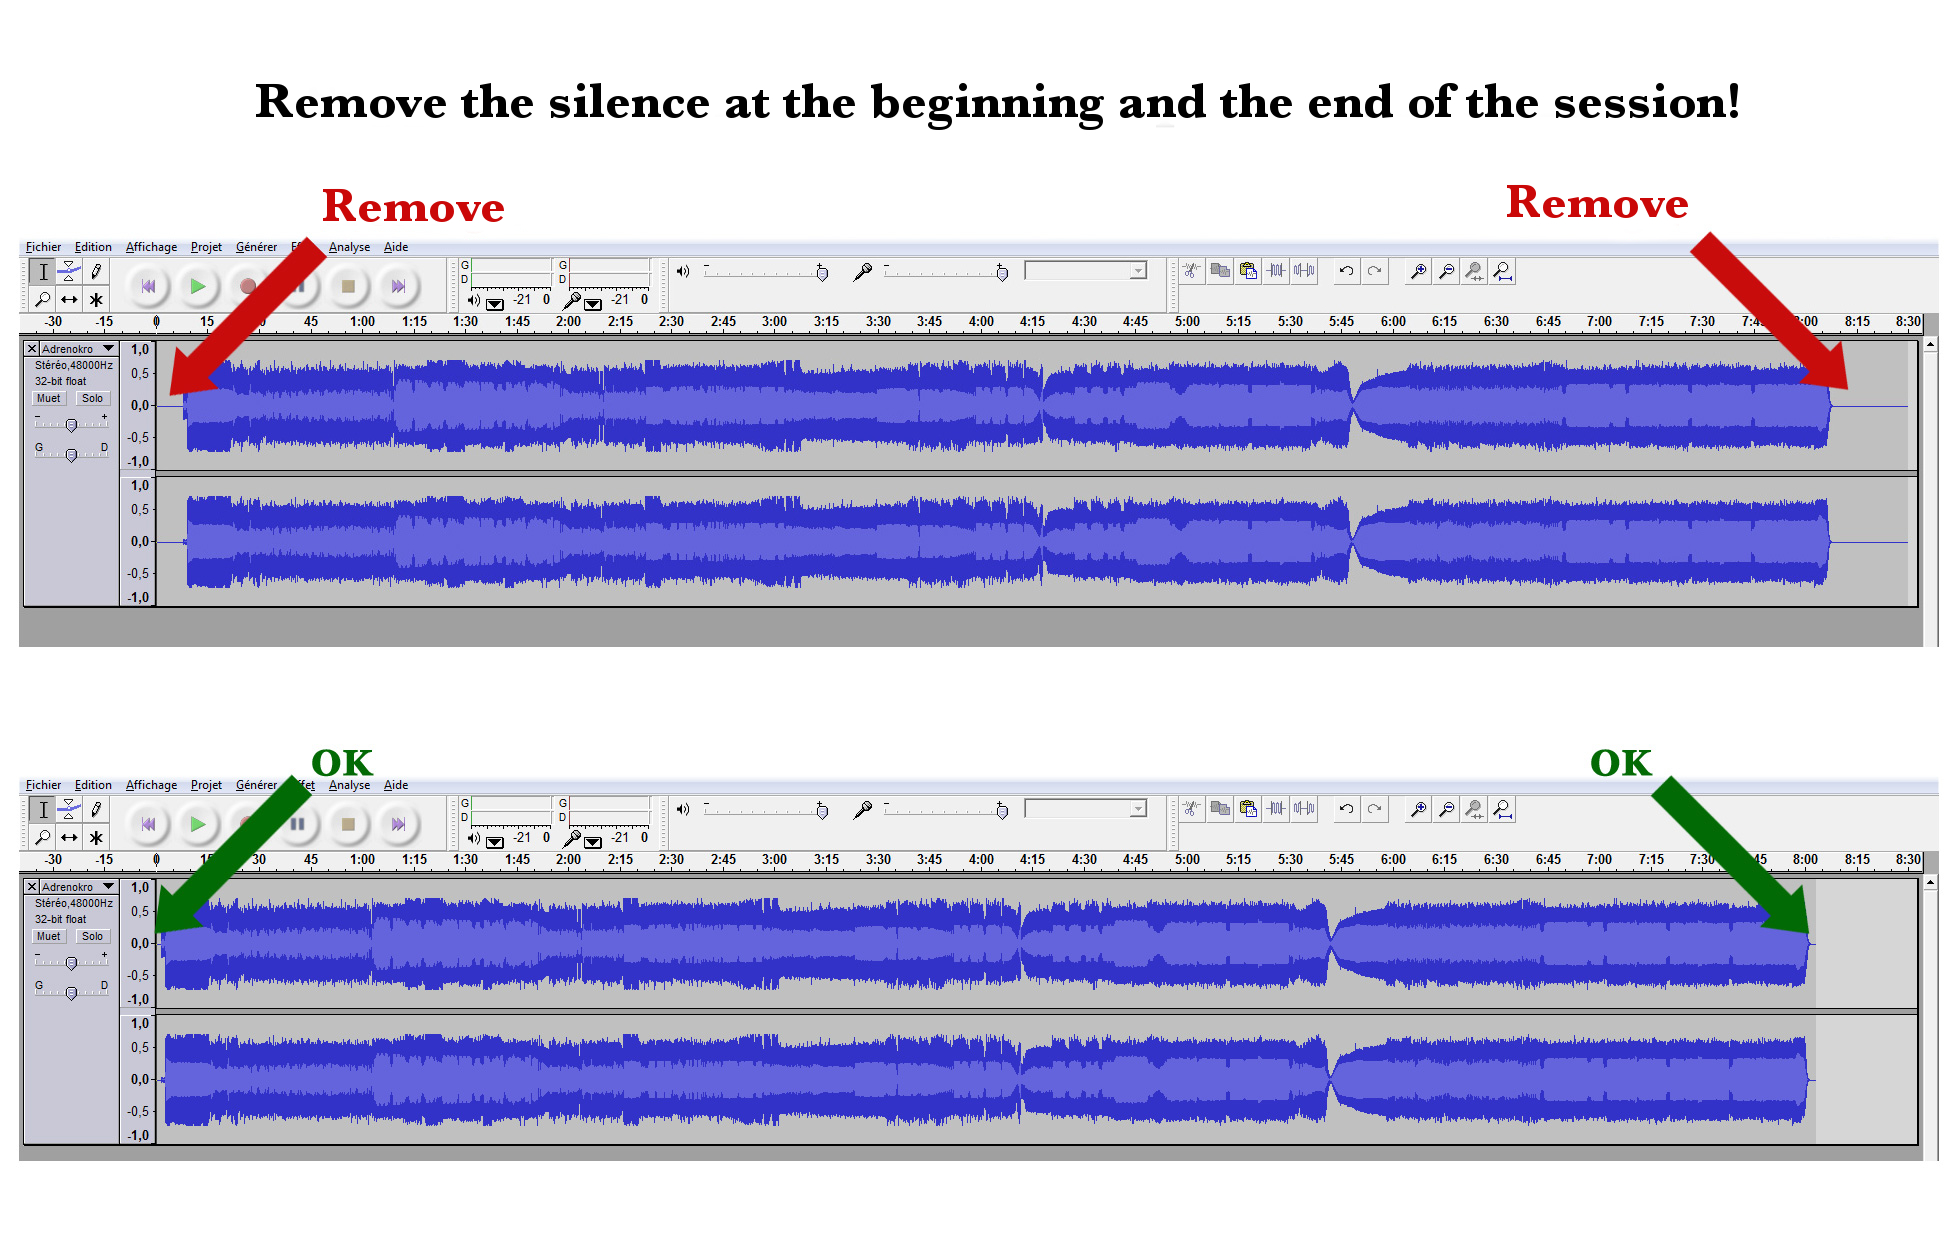
Logically, you started the recording before playing the first song and stopped it after the last one. So, you probably have useless silent passages varying in length before and after your session, which you can remove with an audio editing software application (like Audacity), so that you leave only 1 to 3 seconds of silence.
Optional processing
If you followed the suggestions made in the previous parts, you should have a clean recording, with almost no background noise, a constant volume without peaks, and an appropriate level (close to 0dB but never exceeding it).
Despite that, you might have set a knob slightly wrong or the gain too high before you noticed and corrected it… In which case, it might be interesting to apply some processing to “correct” these imperfections. Nevertheless, bear in mind that it’s always better to put a lot of detail into the recording, to have an excellent take, rather than to try to correct it afterwards. For instance, it’s almost impossible to reduce the background noise without altering the overall quality.
Before applying any processing and exporting it to a new file, make a copy of the original, unprocessed file. That way you will always be able to revisit it to process and export it in different ways.
If you had any volume peaks during your session, due to faulty settings, you can correct these mistakes by manually attenuating the volume of the recording during those passages. Zoom in on the waveform to accurately delimit the length of the processing. On certain software programs, you can automate the volume.
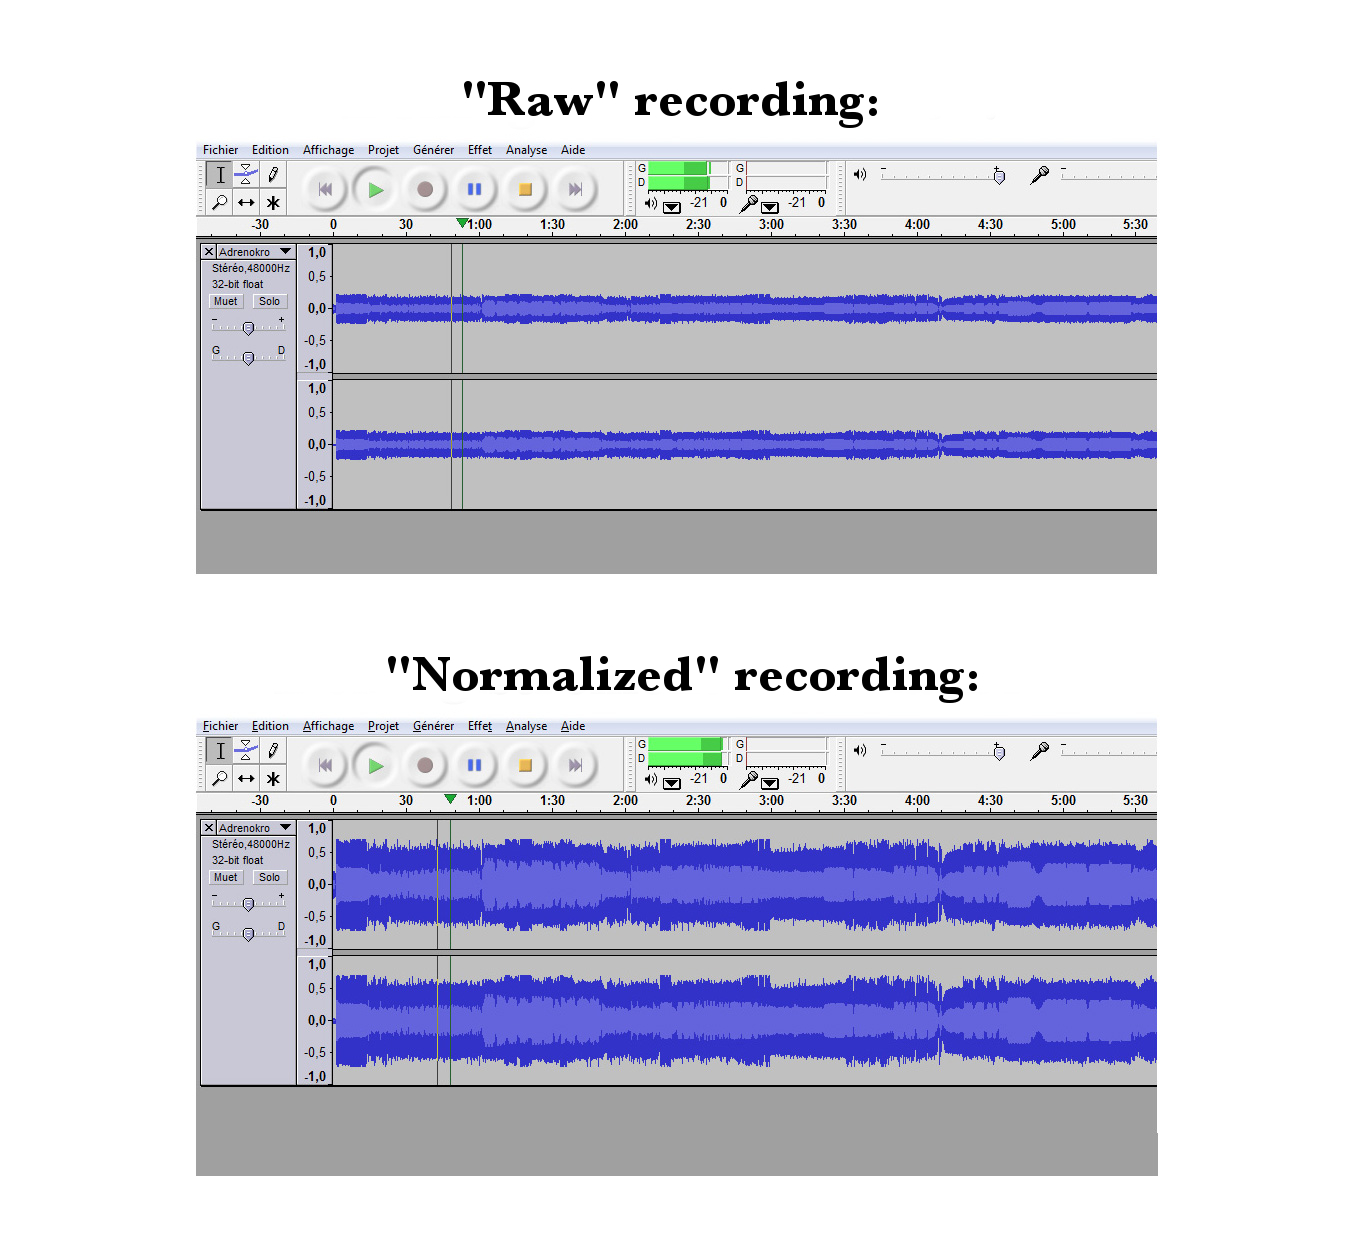
If the overall recording level is too weak, you can bring it up by “normalizing” it to –2dB or –3dB. Avoid using a compressor because it will modify the dynamics of the sound in a very pronounced fashion.
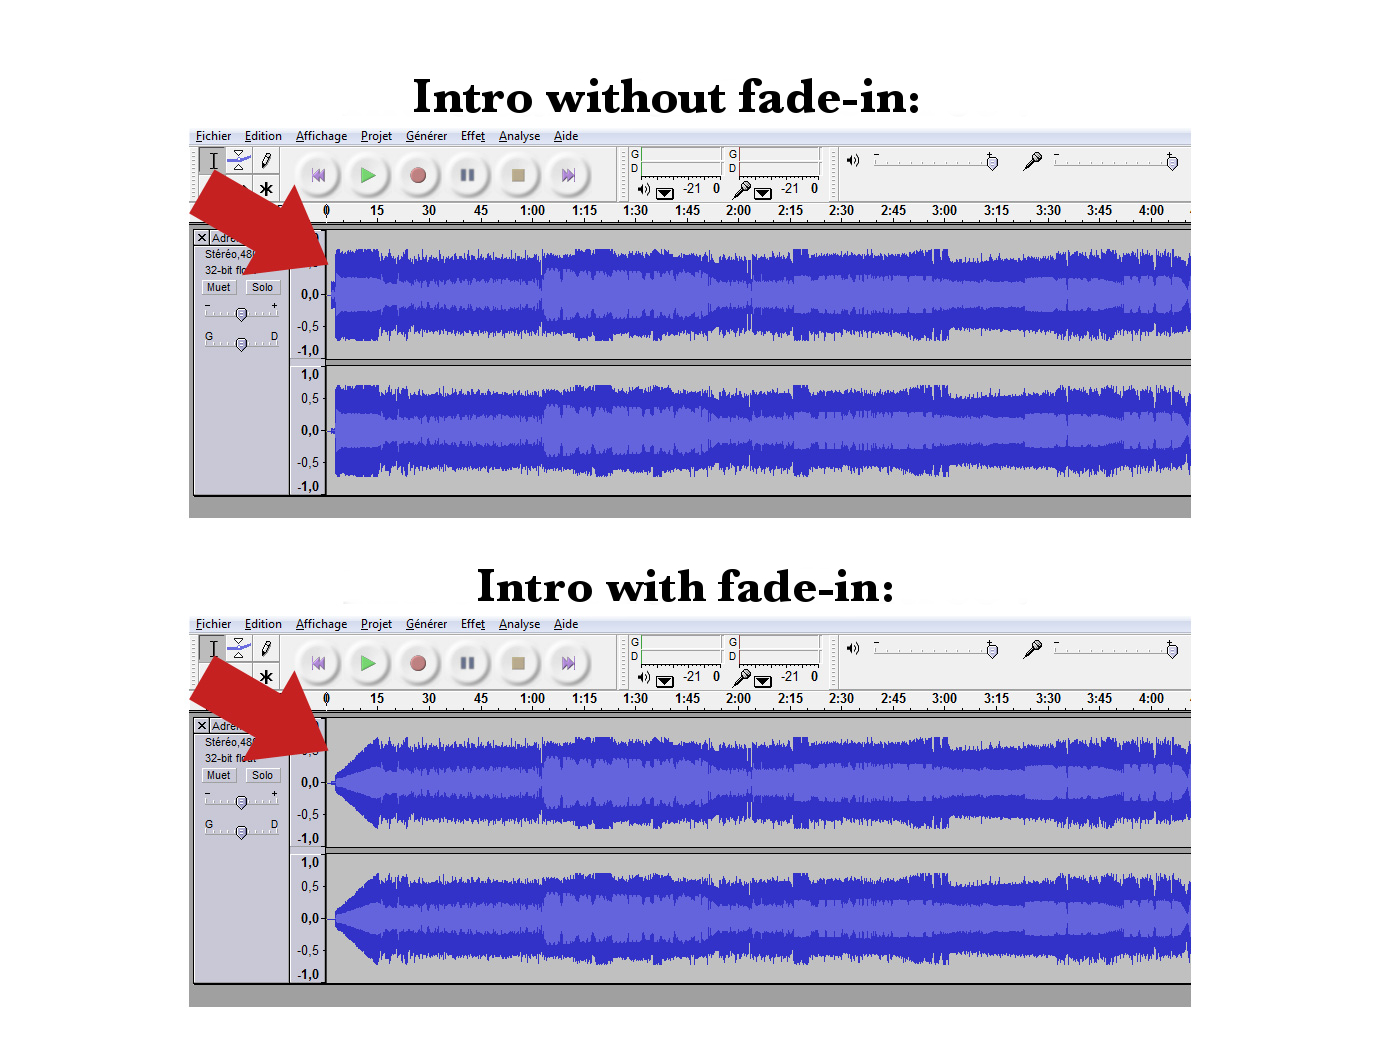
If you want to fine tune your intro and outro, and the songs allow it, you can eventually add a fade-in effect of 0.5–5 seconds at the start of the set, and a fade-out of between 2 and 10 seconds (for example) at the end.
In any case, always try it with and without processing to see what works best.
Exporting your session to the final format
Before exporting your baby, you can edit the metadata (or “ID3 Tags”), in order to add information about the name of the set, your alias, the year of creation, or even the musical style.

Export your recording to an uncompressed file format (wav, for instance), to always have a good quality backup. You can then do another export with your audio editing software, or convert it with a dedicated tool (like Free MP3 WMA Converter), to get a 320 kbit/s MP3 (for example). That way it will be easier to send it to your friends and share it on the Internet.
If the file size isn’t much of a problem, always export it in stereo. Otherwise, if you want to have a smaller-sized file, you can export it in mono.
Name your export file with the name of the set and your DJ alias. I recommend you not to include any spaces, accents or special characters in the file name, so as to avoid any problems when it’s downloaded from the Internet. You can use dashes and underscores (“-” or “_”) to space the words.
Article written by YannOO (Yann Costaz), DJ, composer and events organizer.