In the previous article, you saw how to direct record an electric bass. Although such recordings can be pretty good, they have a major drawback: lack of body. This can be a real problem when the production you are working on requires a fat foundation. So, if you wish to perk up your groove again, you need to use a more conventional way of recording: capturing the sound of a bass amp with one or several microphones.

Disclaimer
Similarly to what I told you at the beginning of this chapter regarding the importance of the choice of the bass and its settings, the same goes for the amp you plan to use. Each bass amp has its own sound signature and the EQ functions they feature are not there just to fill up some space. As for the speakers, even if we won’t get into any details, its important for you to know that the bigger a speaker, the deeper and fuller sound it will be able to produce. Conversely, small speakers provide a preciser and sharper sound.
So, as usual, take as much time as possible to pick the right combination of amp/cab, as well as the settings that give you the best results depending on the sound you want to get for the song in question.
On track
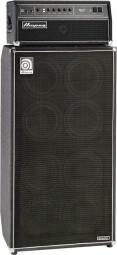
To make the audio clips for this article I used the reamping technique on one of the direct recordings from last time. I took a Fender Jazz Bass take played with a pick, the bridge pickup off and the tone knob set to minimum. The amp head used is an Ampeg SVT-CL with all EQ pots in the middle position and the “Ultra Lo” switch engaged. The cab is a a gigantic Ampeg SVT-810E Heritage which looked quite imposing in my small home studio, but anyway…
When it comes to recording a bass, I have a fondness for dynamic mics because they can handle with ease the high SPL inherent to such takes, while at the same time providing the instrument a much appreciated punch. My go-to choice is usually the Electro-Voice RE20, but since at the beginning of this series I promised to make do with the means available, I went for the classic Shure SM57 coupled with a preamp of my TC Electronic Konnekt Live audio interface. As you can hear, this tandem is far from being a bad choice:
On the first clip, the mic is perpendicular to one of the speakers, with the capsule pointing right at its center, almost glued to the grille. For the second clip, the SM57 was moved slightly off axis from the speaker. Finally, on the third one the shift was even more pronounced, so that the capsule of the mic was pointing towards the outer edge of the cab.
Being so close to the grille, the proximity effect is obvious, making the sound thicker. As you surely noticed, the more off-axis the mic is, the softer the sound. The fact that the attack of the notes loses some punch and the high end gets attenuated results in a rounder and warmer overall sound.

- 04 sm57 10 Center 00:23
- 05 sm57 20 Center 00:23
- 06 sm57 40 Center 00:23
For the next three examples, the SM57 was once again on axis but we placed it a bit farther every time: 4 inches, 8 inches, and 16 inches. When you listen to the takes you can sense a loss of definition, which is nevertheless compensated by the fact that the farther the mic, the better it can capture the high frequencies from the rest of the speakers of the cab. Also note that even though the proximity effect diminishes with distance, the sound never loses fullness. If for any reason your recording sounds a bit muddled in the lows or low mids, moving back the mic can prove a blessing, as long as the room where you are recording is not too reverberant in the same regions of the frequency spectrum.
Let’s see now what gives when we record the same setup with a condenser mic, an AKG C414 with cardioid polar pattern in this case:

- 07 414 20 Center 00:23
- 08 414 20 Edge 00:23
The C414 is placed perpendicular to the cab, first on axis with one of the speakers, then pointed towards the outer edge of the cone, always about 8 inches from the grille to not put it under too much pressure. As you can hear, the sound is preciser, better defined and more well-balanced than with the SM57. Pointing the mic towards the rim of the speaker smoothens out the high end, but way less than before. All in all, it sounds more natural than with the SM57. Yet, these two examples are less “punchy” and “thinner” than the previous ones. That’s why it’s a good idea to record a bass amp with several mics… But that’s something we’ll see next time!
Download the audio clips (in FLAC format)


