Eight years after the original, Eiosis presents a "Premium" edition of the AirEQ plug-in.
As soon as it came out in 2006, the AirEQ earned quite a reputation, especially thanks to its famous “Air” band, which provided an unheard-of audio clarity in the digital world back then. If we were to believe the slogan of this new, updated version ─ “Beyond Analog” ─ the developer claims to go even further. Such promises certainly don’t go unnoticed by the Audiofanzine editorial staff, who immediately commissioned me to put it to the test. After more than three weeks of testing, here are my conclusions.
Once upon a time in Grenoble…
For starters, how about a brief introduction to the plug-in developer? If you have a good memory, you might remember that the brand used to be called Eliosound. That is until 2007, when this Grenoble-based French company became Eiosis. Beside the first AirEQ, launched in 2006, Eiosis also introduced a vocoder, a de-esser and a transient designer between 2007 and 2008. And then nothing followed…which is even more surprising if you consider that each of its products received a warm welcome from home studio owners of all kinds. However, it’s less surprising when you know that the mind behind Eiosis is Fabrice Gabriel. Does the name ring a bell? That’s right, it’s the “Frenchy” who partnered with Steven Slate to create the famous VCC, VTM, etc. plug-ins by Slate Digital. The last couple of years, Slate’s company has become a staple when it comes to emulating legendary hardware gear, and it’s none other than Mr. Gabriel, himself, who coded them all.
By the way, it’s also worth mentioning that, besides the Eiosis AirEQ, Fabrice has also recently launched the Virtual Mix Rack with Slate Digital, which I will be reviewing as you read these lines. In short, we can’t say that Eiosis has been inactive during all this time. Quite the contrary, Fabrice Gabriel is a very busy person.
All right, now that we’ve set the table, let’s dig in.
Back to the future
We’ll start with a quick review of the technical aspects. The AirEQ is a plug-in available for Mac OS X (10.7 or higher) and Windows (Vista or newer) in VST (2 & 3), AAX, RTAS, and AU format, both in 32 and 64 bits. It uses iLok as a protection method and, unfortunately, there’s no option to link the plug-in directly to the computer. As such, an iLok is obligatory, even if you’re trying out the demo.
There’s not much to say regarding the installation process, except for the size of the installer, which is pretty big (about 300 MB compressed and almost 1 GB once installed). Its size is partially justified by the presence of high-definition files for the GUI and the systematic installation of all formats available for your OS. When I initially began this review, no manual was available, only an “Operational Guide” that described the basic mouse actions and keyboard shortcuts, but in the intervening time, Eiosis has released a full manual. In any case, the AirEQ is very easy to use because it’s well-designed and thoroughly thought-out.
Regarding the CPU load, the AirEQ is a champion of lightness. On my test system ─ a small MacBook Air with 2 GHz dual-core Intel Core i7 processor, one plug-in instance only consumes between 0.3% and 0.7%, which is quite impressive! If the audio quality is good, you could easily insert these EQs by the dozen into every track. Okay, I’m exaggerating a bit, but you can really insert it anywhere without overloading your CPU, which is very good. On the other hand, AirEQ doesn’t generate any latency, making it an interesting option for live applications.
Now let’s see what the insides of this plug-in look like.
The fifth element
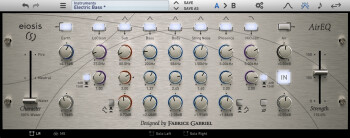
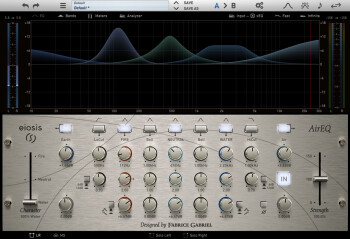
AirEQ is an EQ plug-in offering no less than 9 switchable bands, but they are not the average bands you can find everywhere. First of all, it has bands entitled “Earth” and “Air” at the low and high extremes of the frequency spectrum, respectively. These don’t feature any frequency or Q factor controls, just a gain knob with a range from –18dB to +18dB. Incidentally, these knobs are oddly placed on the GUI, right next to the knobs controlling the frequency of the other bands. Nothing too serious, but it could easily lead to confusion. Apart from their esoteric names, these bands are extremely effective. Used wisely, Earth allows you to round the weight of the lows without any nasty side effects, while Air adds and exhilarating clarity without an ounce of aggressiveness. I don’t know what’s the secret behind it but, to be honest, I couldn’t care less, because it sounds amazing!
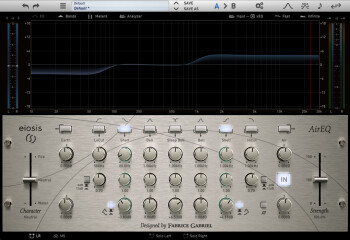
Let’s stay at the extremes of the spectrum, with the low- and high-pass filters. They allow you to control the Q factor (from 0.35 to 4) and the cutoff frequency (from 5Hz to 10kHz for the HPF and from 20Hz to 30kHz for the LPF). When it comes to slopes, you can choose between –6dB and –12dB per octave, which is not much compared to competing products. However, the developer says there will be more options with a future update. Other than that, there’s not much to add. They do their job and, at the end of the day, that’s what you expect from them.
The fives remaining bands can all be set as simple bell filters or a more pronounced Steep Bell version, which is ideal to remove any parasites in a ultra-targeted fashion. Furthermore, two of these bands offer an additional shelving filter option: Each can go from 10Hz to 30kHz with +/- 18dB of gain and a Q factor from 0.10 to 7. There’s plenty you can do with that, but nothing extraordinary in relation to similar products. But the AirEQ doesn’t just stop there…
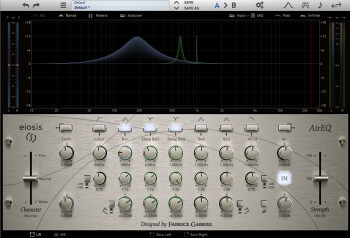
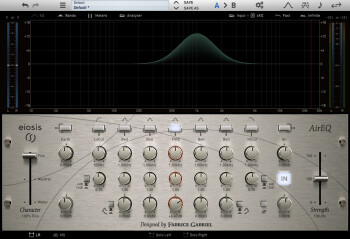
Indeed, the five bands can be modified by the Character fader which allows you to drift continuously between the “Water, ” “Neutral” and “Fire” settings. What’s all this mumbo jumbo, you ask? Neutral doesn’t need any explanations since the behavior of the bands is like with any other filter. Water and Fire are a bit harder to explain… You could say that Water, with its flat top, acts like some sort of frequency lever to find the ideal balance and transparency across the entire band selected. For its part, Fire, with its exaggerated roundness provides a more targeted effect on the central frequency without producing any unpleasant resonances. While the concept might be hard to grasp when described with words, it goes without saying that this Character control is incredibly effective. Its impact on sound is obvious and beautiful.
Another unusual parameter for an EQ is the Strength fader, which allows you to attenuate or emphasize the overall sonic impact of the AirEQ. This is pretty clever, because it’s very nice to be able to “dose” an EQ after having already found the right balance for the processed signal without having to start over from scratch. It can also be used to exaggerate the EQing when you are working on the different frequencies to be able to hear better what you are actually doing and, as such, find a more reasonable balance.
If all that weren’t enough, AirEQ allows you to customize the behavior of each band independently from each other. Right-clicking on the activation switch of any of the bands, you can choose whether it is influenced or not by the Strength setting, if it adopts the global Character or if it has a Character of its own and, finally, whether it has an effect on the stereo signal or only on the right or left channels (in LR mode) or on the mid or side components of the signal (in MS mode). Such flexibility opens up a crazy amount of possibilities, and all that without interfering with the overall usability. Imagine for a minute that you can boost, for instance, the Air band on the side component of the signal while EQing the mids of the entire stereo signal or boosting only the low end in the center. And if you went a bit too far on most bands, but you are happy with the low-cut, you can decrease the Strength and exclude the low-cut just like that! And that’s it! Easy and flawless. Hats off, Mr. Gabriel!
Talking about usability and design, the AirEQ ─ like many other EQs ─ allows you to solo a band by shift+clicking the corresponding frequency control. But Eiosis takes it even further by adding some sophistication to it. It provides two modes: The classic Band Solo which solos one band and mutes the rest, and Frequency Finder, which boosts the frequency of the band in question, leaving the rest of the signal intact. While the first mode can be very practical to track down parasite frequencies, the second one is amazingly effective to look for frequency zones such as the attack or the body of an instrument, considering that you can hear the equalized signal in context. And since attention to detail seems to be a constant of the French developer, you can choose how many dBs the band ought to be amplified in the Frequency Finder mode (3dBs, 6dBs or 12dBs), as well as the bandwidth affected (be it the current band setting or the maximum Q).
Let’s take a moment now to talk about the sonic behavior of the EQ. The AirEQ can be relatively unsettling, because it is “sensitive.” By that I mean that a simple amplification of just one dB on a frequency band can make a huge difference, unlike certain plug-ins you need to adjust at 6dB intervals in order to hear anything. In terms of sensations, it reminds me of the difference between EQing with a good Midas-like live console and an entry-level one. Regarding the AirEQ, this sensitivity can be explained by the strong link between the gain, Q and Character parameters. In fact, it all works hand in hand so that a change of Q or Character doesn’t affect the loudness sensation. Which is great because it makes it easier to make adjustments to achieve more targeted frequency corrections. In fact, the gain controls ought to be considered more as loudness controls rather than simple and classic gain controls.
We’re almost done with the overview of the EQing possibilities, themselves. But I still haven’t mentioned the input and output gain controls, nor the phase reverse switch and bypass button, but there’s no need to write a novel about those, they do their job as expected. On the other hand, I will say something about the AirEQ’s major omission: Automatic make-up gain. Even if this function is (still) not standard, it’s more and more common everyday and so practical that its absence is a bit surprising. Even more so considering that the AirEQ is the type of EQ prone to an additive EQing approach, rather than a subtractive one, which has an annoying tendency to deceive the ear if you are not careful. Fortunately, the plug-in provides a safeguard, which we will address in the next chapter. Besides, Fabrice Gabriel has assured me that he is working on the implementation of such a function.
I hope you are not too winded, because I still have lots of things to say about this EQ, which proves to be extremely dense in terms of its functionalities. Actually, I haven’t even mentioned the visual feedback options, a point where the AirEQ is far from being outdone.
Eyes wide shut
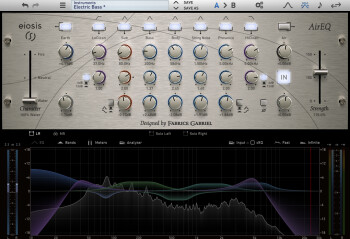
On top of its graphically depicted brushed-metal casing, the AirEQ has several visual aids that are both effective and aesthetically pleasing. Firstly, you have the input and output level indicators. For the outputs, you have peak and RMS indicators and you can choose the scale (dBFS, K-12, K-14, or K-20). For the inputs, it obviously has peak meters, but you can also view the RMS difference between the input and the output of the plug-in. This is the famous safeguard I told you about when muttering about the absence of an automatic make-up gain function. Thanks to it, it is very easy to manually compensate for level fluctuations generated by the EQ’s input and output gain controls.
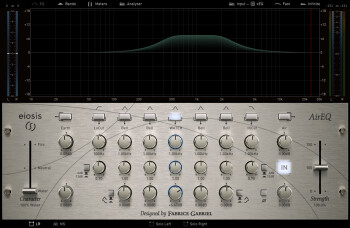
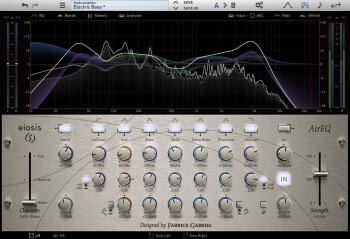
Between these level indicators, there’s a multi-purpose display area. Immediately, we see the graphical representation of each band and the overall EQ curve. Although the visual aid is very helpful, there are still a couple of defects to mention.
First, contrary to what you usually find everywhere, it’s impossible to adjust the bands by directly “grabbing” their graphical representations. Personally, that doesn’t bother me at all because I have never been a fan of that way of doing things. However, this type of graphical interaction is usually demanded by the users and I think it’s important to mention that, for the time being, that’s not possible with this plug-in. Yes, you read that right, I wrote “for the time being, ” because the developer is thinking of implementing this possibility in the near future.
The second snag has to do with the fact that it’s impossible to know which band on the display you are working on if you aren’t modifying a parameter. But, once again, Eiosis is working on a solution.
This display area also hosts a very nice, real-time spectrum analyzer that allows you to visualize either the input, the input x EQ or the output.
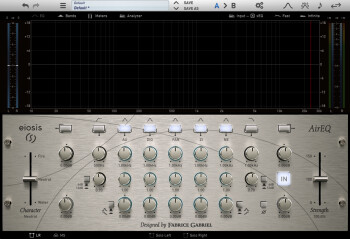
The good thing about all these visual feedback options is that they can all be hidden. And you can even conceal this entire upper zone to only have the useful part of the EQ itself displayed, favoring work in the “traditional” way, relying on your ears rather than your eyes, which, if you ask me, isn’t a bad thing. Especially since, if you want to take a quick peek at the EQ curve, a simple Command+Click on the “metallic” part of the GUI will make it reappear as long as you hold the click. It’s simple and effective. Sweet.
I still have a lot of things to say about the AirEQ, but if I do, this article will be four times longer than most tests. So to try and keep to a “modest” three times longer than normal, I’ll have to neglect the Undo/Redo functions, the A/B comparison, the display of frequencies in relation to the notes (which even includes the option to choose the reference frequency for the “A”!), the display of the Q factor in octave values, the option to make the gain knobs continuous or step controllers (with user-defined steps), etc. But, I must definitely tell you about the presets!
To understand these presets, you first need to know that the AirEQ allows you to name each band as you wish. As stupid as that might seem, it’s actually incredibly useful. To start with, it allows you to name a band according to what you used it for on a specific track or project, in case you ever need to go back to it. Additionally, it makes all the sense in the world when you load a preset.
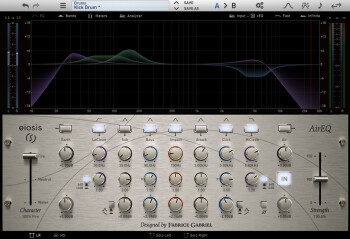
Take, for example, the “Kick Drum” preset from the “drum” category and load it into a kick track. What happens then? Well, absolutely nothing, and that’s the beauty of it! In fact, the presets don’t apply any cuts or boosts by default. However, the name, frequency, Q, and Character of the bands do change. For instance, our Kick has the LoClean, Sub, Bass, Impact, Attack, Click, and HiClean bands defined, which is pretty telling. But it’s up to the user to set the gain and make the appropriate tweaks based on the material he or she is working on. This system is so simple, instructive and effective that for the first time ever, I can recommend the use of EQ presets!
Okay, now I really think we’ve covered all the basics.
Pump up the volume
Let’s start with a basic chord progression played in a rush with a Kontakt organ patch.

- 01 Organ dry 00:19
- 02 Organ Attack Neutral 00:19
- 03 Organ Attack Fire 00:19
- 04 Organ Attack Water 00:19
- 05 Organ Body Neutral 00:19
- 06 Organ Body Fire 00:19
- 07 Organ Body Water 00:19
- 08 Organ Q 00:19
- 09 Organ wet 00:19
The first sample is the raw sound. On the next three I tried to reinforce the attack of the notes with the help of a peak filter. The gain and Q factor are the same for all three examples, only the Character parameter changes, going from Neutral to Fire to Water. In the Neutral position, the result is quite familiar, but it is worth noting the excellent respect of transients. Water doesn’t seem well suited for the proposed use. But, on the other hand, Fire does show its real value. The result is precise, musical and transparent, due to the absence of any unpleasant resonances.
Here’s the same procedure, but this time I went looking for the fullness of the instrument. Water seems to give the best results in this case. In fact, it adds a very nice balance and a roundness devoid of any aggressiveness.
The eighth example perfectly illustrates the symbiosis between the gain and Q controls. In this case I automated the Q factor to go from 0.10 to 7 with a peak filter set to Water. Note that the loudness does not increase! In practice, this behavior is incredibly handy to target precisely the frequency zone you want to work on.
Finally, the ninth example is, in my opinion, the “ideal” EQing for this organ within the song it is taken from. The goal was to give more fullness to the sound, as well as to revive the bass line (which was somewhat washed-out) while soothing the highs and the high-mids without affecting the attack. The result speaks for itself, don’t you think?
Afterwards I decided to go for something more difficult, an acoustic guitar recorded under very poor conditions. Originally, the recording was meant to be a reference track, let’s see what I was able to do with it…

- 10 Gtr Acc dry 00:43
- 11 Gtr Acc wet 00:43
The possibility to adjust the Character parameter independently for each band was decisive in this case. It was possible to appease the muddy low-mids with a band set to Water, while, at the same time, reducing the very nasty resonance on the attacks in this same frequency range with another band set to Fire. All without excessively altering the nature of the instrument. On the other hand, I was able to bring the strumming to the front, without it being aggressive, using a band on the high-mids set midway between Neutral and Water. The overall result is obviously not transcendental, but it allowed me to send this acoustic guitar to the background of the mix, giving it a rhythmic presence thanks to the strumming, which was something completely unexpected, given the quality of the original recording!
Now let’s move on to a bass drum.

- 12 Kick dry 00:22
- 13 Kick wet 00:22
The original sound is far from being ideal. However, thanks to the AirEQ, I realized it had everything I needed. Thus, I was able to clean up the lows with a low-cut while emphasizing the useful parts with a Water filter. A bit of Fire to give it more impact, a Water to reduce the click, another Fire to tame the attack, and that was it. Nevertheless, I used the Air band to avoid smothering the sound too much. The result seems more than convincing. Also note that, for this example, I started with one of the presets included, which made everything easier.
It’s time now to tackle the mix of an entire drum kit.

- 14 Drums dry 00:27
- 15 Drums wet 00:27
The goal was to give the rhythm more punch without ruining the sensation of space. And this time, the result clearly exceeded my expectations. The snare is more punchy and has no unpleasant resonances, the low end is solid without sounding choked, and the Air band emphasizes the width of it all. What else could you ask for?
Finally, I couldn’t resist the temptation of showing you the plug-in within the context of a mix.

- 16 Whatsoever EQless 02:20
- 17 Whatsoever AirEQ 02:20
The first example is a rough mix with nothing but reverb and a bit of compression on the vocals so that it isn’t drowned by the rest. The second is the exact same mix but with an AirEQ instance on every track. And that’s it! No compression per track, no volume automation, etc. There’s only a limiter on the output that levels out one or two peaks here and there, in order to end up with a reasonable overall listening level; but the exact same was applied to the example without any EQing. It sounds nice, doesn’t it?
The sounds gains width, depth, definition, punch, and clarity. In short, there’s not much left to do to get the final result, a brief session to adjust the dynamics, some fine-tuning of the reverbs, an automation pass and it’s in the bag. I’m obviously not implying that I wouldn’t get satisfying results with other EQs. But I can assert that working with the AirEQ on this song was incredibly easy and fast, which, in my opinion, is crucial.
The fresh prince
With all due respect to all-EQ-plug-ins-sound-the-same fundamentalists, the AirEQ is a actually a different piece of gear. And without any trickery, because there’s no trace of any harmonic distortion. So, rather than applying lots of makeup to the signal, Eiosis’ AirEQ reveals the natural beauty concealed in your recordings. Thanks to its flexibility, transparency, extraordinary effectiveness, very appropriate presets, and low CPU load, this EQ is a quality choice for mixing and mastering. It certainly has some defects. But most of them ought to be fixed with future updates that I’ll be eagerly awaiting. As for the rest, the AirEQ has seduced me so much, that I feel compelled to grant it the Best Product Award.


