Mixing gets the lion’s share of attention in how-to stories about the production process, but tracking —actually recording audio — is obviously quite important, too. It’s crucial to capture high-quality sound and to get the best performances from musicians and singers. To that end, here are ten tips to help your tracking sessions go better.
Be rehearsed
It stands to reason that the better you know the material you’re recording, the better you’ll play during the session. Playing with confidence is hugely important. Conversely, if the musicians are not well rehearsed and playing tentatively because they’re unsure of their parts, their performances will suffer.
There are, of course, recording situations in which a musician or vocalist is brought in to play on a song who has never heard it before and is playing from a chart. In those cases, it’s best to use a musician or singer with a lot of studio experience, who’s used to that kind of situation.
The bottom line is that the more prepared you are with your material, the better it will sound when recorded.
Read about rehearsal strategies here.
Be prepared
In a commercial studio, all the mics, cables, headphones, music stands and so forth are setup in advance, which minimizes waiting-around time when the talent arrives. You should take the same approach in your home studio prior to a session. Even if you’re only recording yourself, get everything setup that you’re going to need before you hit the record button.
Have a chair or chairs setup for the talent (unless they’re singers), and have the first song open in your DAW. If you’re going to be working on multiple songs during an overdub session, make sure to open and check each one beforehand to make sure they’re loading correctly. You don’t want to make everyone sit around while you search your recording drive for missing files.
If you have a choice of mics, figure out which ones (or which ones) will work best for the particular session and set them up beforehand. You can always swap them out when you’re getting sounds if a mic isn’t sounding great on a particular source. Make sure that all the headphones are working and that you’re hearing both recorded audio (in the case of an overdub session) and the output of the mics through them.
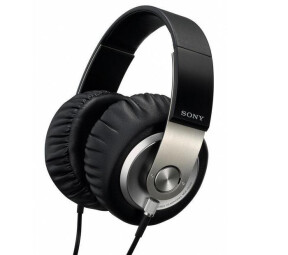
Check to see that there’s enough slack on headphone cables so that those recording can play their instruments freely and are not constrained by their headphone wire. If there are problems, use headphone extensions (which are inexpensive and incredibly useful). Make sure you’re getting audio through all headphones before everyone arrives.
Don’t phone it in
In addition to checking that the cue system is working, try to get a basic headphone mix dialed in before the session, if possible. If you have “low latency” or “latency free hardware monitoring” features, you’ll want to use them here. There’s nothing more distracting when you’re recording than hearing latency delay. Depending on your system, this may mean you can’t use reverb in the headphone mix, but it’s better to have a dry sounding mix than one with latency delay.
To understand more about latency in your DAW, read our part 1 and part 2 of our story “Demystifying Latency.”
Ain’t that sweet
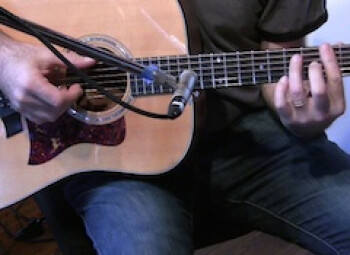
Engineers often talk about finding the “sweet spot” when miking an instrument or vocalist. Don’t let that confuse or intimidate you, it doesn’t mean that there’s a single mic position that can be scientifically proven to produce the best sounding recording, and that you have to find it. All it means is that you should move the mic around until you find the spot where the source sounds best. It’s really more of a concept than anything else: Be mindful of mic placement and experiment until you’re satisfied you’ve found the best placement. Get in the habit of doing that and it becomes second nature.
Read more about mic placement here.
Stop the bleeding
Bleed, leakage, and spill are all names for the same phenomenon — one instrument or voice accidentally picked up by the mic or mics aimed at another. It’s more difficult to mix tracks with bleed, because they’re less discrete. If the drums are bleeding onto the vocal track, let’s say, it makes adjusting the vocals more problematic, because every time you turn up the vocals, you’ll hear more drums. It’s also harder to pan your sources when they’re coming through the mix on other tracks.
Bleed is only a problem when recording multiple musicians or singers at once, such as in a band tracking session. Drums are especially problematic because they’re so loud. They need to be isolated as much as possible — preferably in another room. This is why most commercial studios have isolation rooms where they can put loud instruments or amps to avoid potential bleed.
Strategic mic placement and smart use of micrphone patterns can help — for instance, figure-8 mics pick up on either end but reject on the sides, so if placed correctly, can minimize bleed. In many cases you have to simply record fewer instruments at the same time as the drums, or take instruments like guitar and bass direct and re-amp them later or use amp modelers to get their sounds. You might also have the vocalist sing a reference vocal that’s turned up loud in the headphone mix but sung very quietly to avoid leakage. If you have a separate control room, you can often record the vocalist, or one of the miked instruments in there.
More strategies for for minimizing bleed when tracking can be found in this article this article.
The old “record the practice take” trick
In tracking situations, many musicians, especially those new to recording, tend to get nervous and it impacts their playing. They may do great when playing a song live, but put them in the studio and they tense up. If you’re the engineer, you might be able to sneakily capture a more relaxed take by telling the musician or musicians recording to run through the song so you can get levels, but without letting them know, actually record the take. Because they don’t think they’re being recorded, they might be more relaxed and play better. Of course, you’re not going to fool them every time with this, but it can be very effective when used selectively.
We offer more advice to producers in part 1 and part 2 of our feature “Producing a vocal session.”
Don’t get caught speeding
If you’re cutting basic tracks rather than doing overdubs, it’s crucial to have a tempo established in advance. In almost every session I’ve been involved with where we “winged” the tempo, rather than coming up with a BPM setting beforehand, we later discovered it was too fast or too slow. It’s better to work out tempos in rehearsals, not right before you start recording. Trust me on this one.
In addition, you should record your basic tracks to a click if at all possible. Some musicians are afraid they won’t be able to keep time with a click, but it’s just a matter of getting used to it. A click offers a number of advantages when editing and mixing, and allows the possibility of rearranging songs by section during the editing process, and even pasting in notes and phrases from one section to another. It also keeps your tempo from drifting as you’re recording, and, of course, allows you to play the song at the optimal BPM (beats per minute) setting for the song — which you’ve worked out during rehearsal. If it’s important to the song for it to speed up a little in certain spots, you can program a custom click with the tempo changes in it, which you’ll follow as you’re recording.
For the sanity of all involved, uses a click sound that’s not totally irritating and piercing, like so many of them are. Most DAWs give you options for choosing the sound. In some situations, a simple drum loop works well as a click, and is a lot less fatiguing.
Preserve your ears
Ear fatigue can be a problem in a long session, especially because you and anyone else involved will be listening through headphones most of the time. If you blast your headphones throughout the session, it creates several problems: First, you’re adding to your cumulative exposure to unsafe levels, which can cause hearing damage in the long term. Of more immediate concern, your ears will get fatigued faster and you’re going to feel less comfortable continuing the session, and less able to discern what you’re hearing. That could be particularly problematic if you’re also engineering the session.
Try to keep your headphone levels as low as they can be in order for you to hear what you need to hear. Obviously, you can’t force other musicians at the session to listen quietly, but when they ask for more volume in their monitor mix, make the increase small, and hope that will satisfy them. Only turn it up higher if they say the first upward adjustment was insufficient.
Read more about hearing issues for musicians, here.
Don’t go over the top
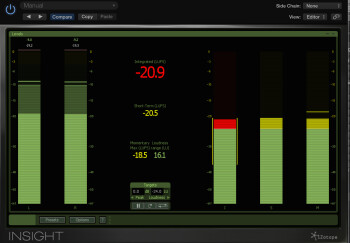
In this day and age of 24-bit recording, it’s a lot easier to set levels for recording, because you don’t have to worry so much about not getting enough level. With its much lower noise floor, 24-bit recording is much more forgiving of quiet signals than 16-bit. However, it sounds equally nasty when you clip in 16– or 24-bit, so err on the side of too little signal rather than too much. Your peaks should max out no higher than about –8 dB, with the average levels around -15 to –20 dB. You’ll still get all the fidelity, but will be protected from going over 0, which can sound horrible and ruin a take.
Find out more about level setting in this article.
Total recall
If you do find yourself with glitches or need to revisit recording any of the tracks on another day, it’s important to be able recreate the setup for the source you’re re-recording, so you get a matching sound. To that end, I’ve learned the hard way to be careful is in my record keeping of a session. I notate which mic was used to record a particular track, where was it placed and what instrument and settings was I using. I even take pictures of mic placement or hardware effects settings to be able to more closely recreate them.
This isn’t a big issue with software instruments, because their patches are typically saved along with your DAW file. But imagine that you wanted to go back and fix, say, an electric guitar part, and couldn’t remember which pickup was selected and how you had your pedalboard set. It would be almost impossible to duplicate the original sound without that information. It may seem tedious to notate all this information, but every once and a while, having it on hand will save your ass.
It’s also very useful to keep notes about which takes were good for each song (including the take numbers), so that you don’t get confused later on.
Read more about track and session organization here and here.

