Having seen the theory, the time has come to put the layering technique into practice and see what we can get with what we've recorded so far.

Role playing
Let’s jump into the heart of the matter with the Chorus clip:

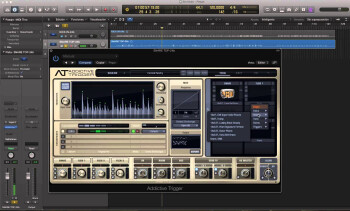
Right now, this rough mix is made up of the following tracks: stereo overheads, kick in, kick out, snare top, and snare bottom. I took it from there and used XLN Audio’s Addictive Trigger plug-in to add some snare and kick samples on top of it all. I obviously made sure there were no phase issues between the audio and the samples, so that the layering is not counterproductive.

- 02 Chorus Layer 1 00:28
- 03 Chorus Layer 2 00:28
The samples used in the first clip make the snare/kick couple more solid and compact. In the second example, I wanted to get a kick with more precision, but less salient, while at the same time pushing back the snare a bit with a sample flooded with reverb. Do note that on this example there was a trigger mistake on the snare at the end of the third bar courtesy of Addictive Trigger. It actually sounds like a double hit which never took place in reality, and to correct it I would need to do it by hand. Things like this can happen easily and might go unnoticed if you are not mindful enough. That’s why I prefer to apply the layering technique in a more artisan way – something I can do thanks to the features available on my favorite DAW (Reaper), which nevertheless require me to do plenty of work by hand. True, it’s much slower, but once you get the feel for it, it can go pretty fast and with much more precision, in my opinion. So that’s what I did with the following examples.
Here’s the first clip consisting exclusively of the stereo overheads, the snare/kick recorded with the RE-20 mic, and the hi-hat track:

I was able to extract the snare and kick grooves by editing the RE-20 track, while the hi-hat allowed to me to generate the perfect rhythm. Thus I was able to replace all my acoustic recordings with virtual drums, first with Native Instruments’ Abbey Road 60s Drums and then the Abbey Road 70s Drums.

- 05 Verse 60 00:14
- 06 Verse 70 00:14
It’s easy to realize the joyful possibilities this opens, while preserving the groove of the original drummer. And you can actually take it further:

- 07 Verse Electro 1 00:14
- 08 Verse Electro 2 00:14
On these last clips I simply used the basic electronic drums included in Native Instruments’ famous Kontakt.
And voilà, I think that about covers it. As I already told you in a previous article, I won’t encourage you to use layering at any price. It’s just one more method than can eventually help you achieve your goals. So to wrap it up, used wisely whenever the song calls for it, layering can prove a very powerful tool you shouldn’t neglect.
Until next time!
Download the audio files (in WAV format)

